


Chapter 6: Fine-Tuning
6.1 Configuration Refinement
At this point, the system will be able to recognize the Locator Model taught during the wizard
and perform automated pick and place. Most applications can be improved by adjusting para-
meters that aren’t covered in the sample application wizard. This could include advanced
properties of the vision tools, differentiating between multiple part types, sorting to multiple
place locations, avoiding picking overlapping parts, or detecting part defects.
6.2 Multiple Locator Models
In our dental floss application, we will add another Locator Model, since the dental floss parts
dispensed inside the AnyFeeder could be lying with either side up.
To add another Locator Model, in the workspace Explorer window on the left, simply right-
click on the Pick folder > New > Vision > Tool > Locator Model, then go through the same pro-
cess in creating another Model.
To add another Locator Model, in the Workspace Explorer window on the left, right-click on
Pick within the ACE Sight Pick and Place folder, then select:
New > Vision > Tool > Locator Model.
Repeat the process performed in the wizard for creating a Model.
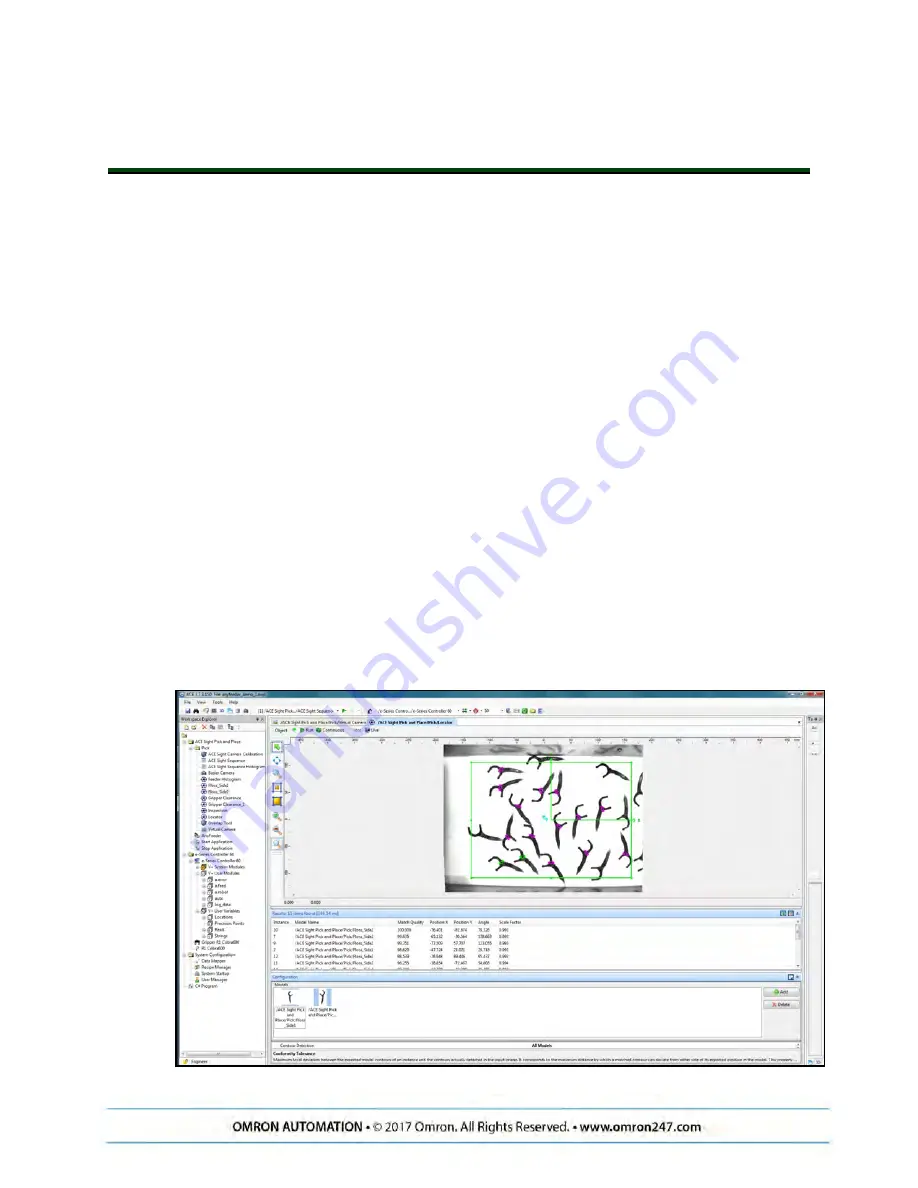
Double-click to open the Locator, and drag in the new Locator Model: Floss_Side2 created.
Click Run so the camera can find both Models.
In this case, we created another Locator Model: Floss_Side2, which corresponds to the flipped
profile of a dental floss. Now you will see two Locator Models beneath the window of Models:
AnyFeeder
Integration
Guide
- Page
3
7


