68
List of measurement functions
Button
Function
Outline of functions
Page
[Point Group]
By drawing the marks at multiple locations on the image, the number of
mark locations can be counted.
p.70
[Arbitrary Line]
The length between specified 2 points is measured.
p.70
[Polyline]
By specifying multiple points, the sum of the length between points is
measured.
p.71
[3 Point Circle]
By creating the circle (by inputting 3 points), the area, perimeter, and average
(diameter) are measured.
p.71
[Rectangle]
By creating the rectangle (by dragging the diagonal point), the area,
perimeter, width, and height are measured.
p.72
B
C
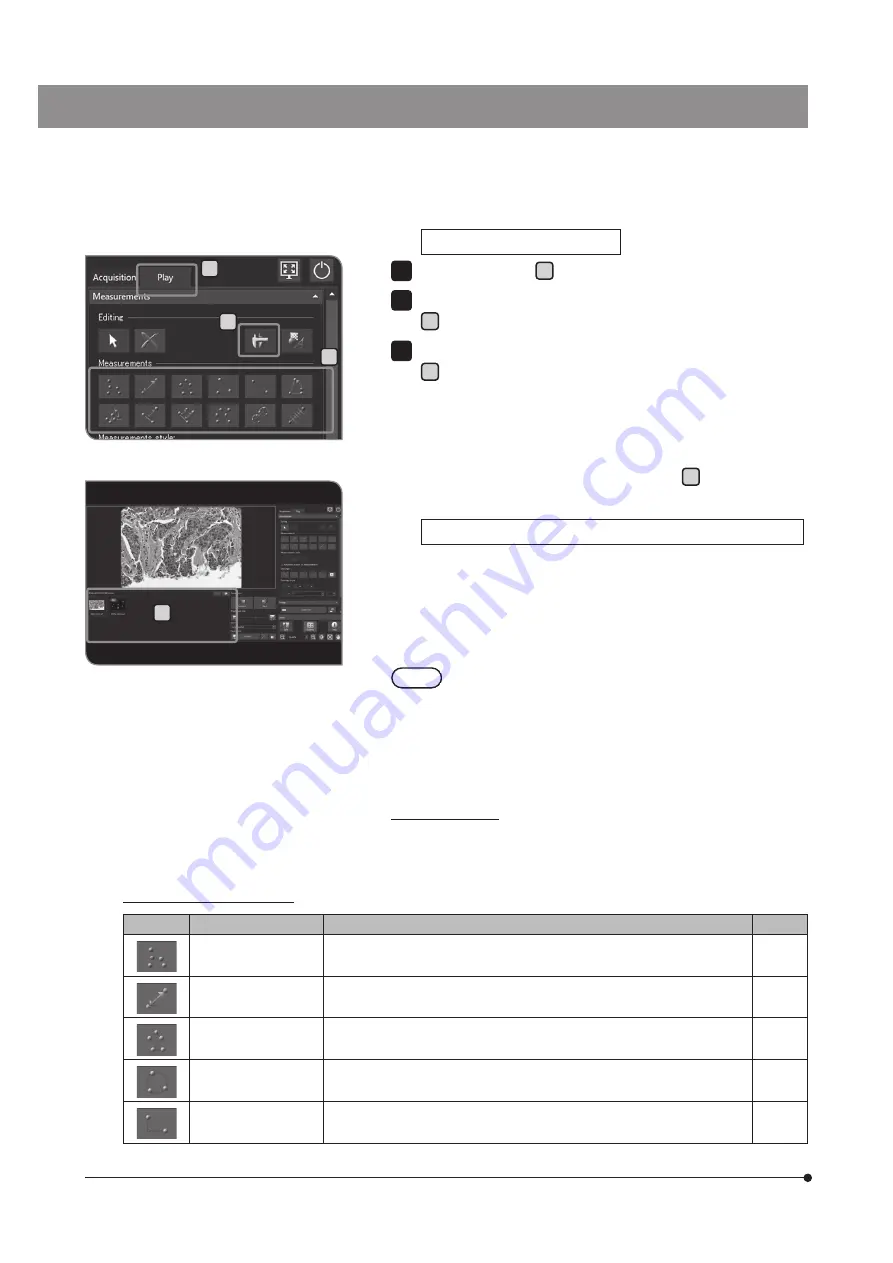
Measuring on the acquired image
Select the [Play] tab A .
Select the image you want to measure from the thumbnail in [Gallery]
B .
Press the arbitrary measurement method button in [Measurement]
C to perform the measurement on the image. For measurement
procedures, see the table below.
The measurement results are displayed on the measurement layer *
on the image.
You can switch between showing and hiding the measurement layer
by pressing the [Show Measurements] button D .
Adding measurement results to the acquired image (played image)
After performing the measurement on the acquired image, if you
change to the live image (change from the [Play] tab to the [Acquisition]
tab), the message regarding how to save the image appears. Save the
image according to the message.
·
The measurement results cannot be added to the protected
image. Cancel the protection in advance.
·
When measurement results are added to the image, the
image data is saved by overwriting. When the image is in
JPEG format, the measurement results are imprinted on
the image. Be careful, once the measurement results are
imprinted on the image, they will not be restored.
* The measurement layer is like an transparent sheet overlaid on the
image. The measurement results are displayed on the measurement
layer.
1
2
3
NOTE
D
A


