54
8
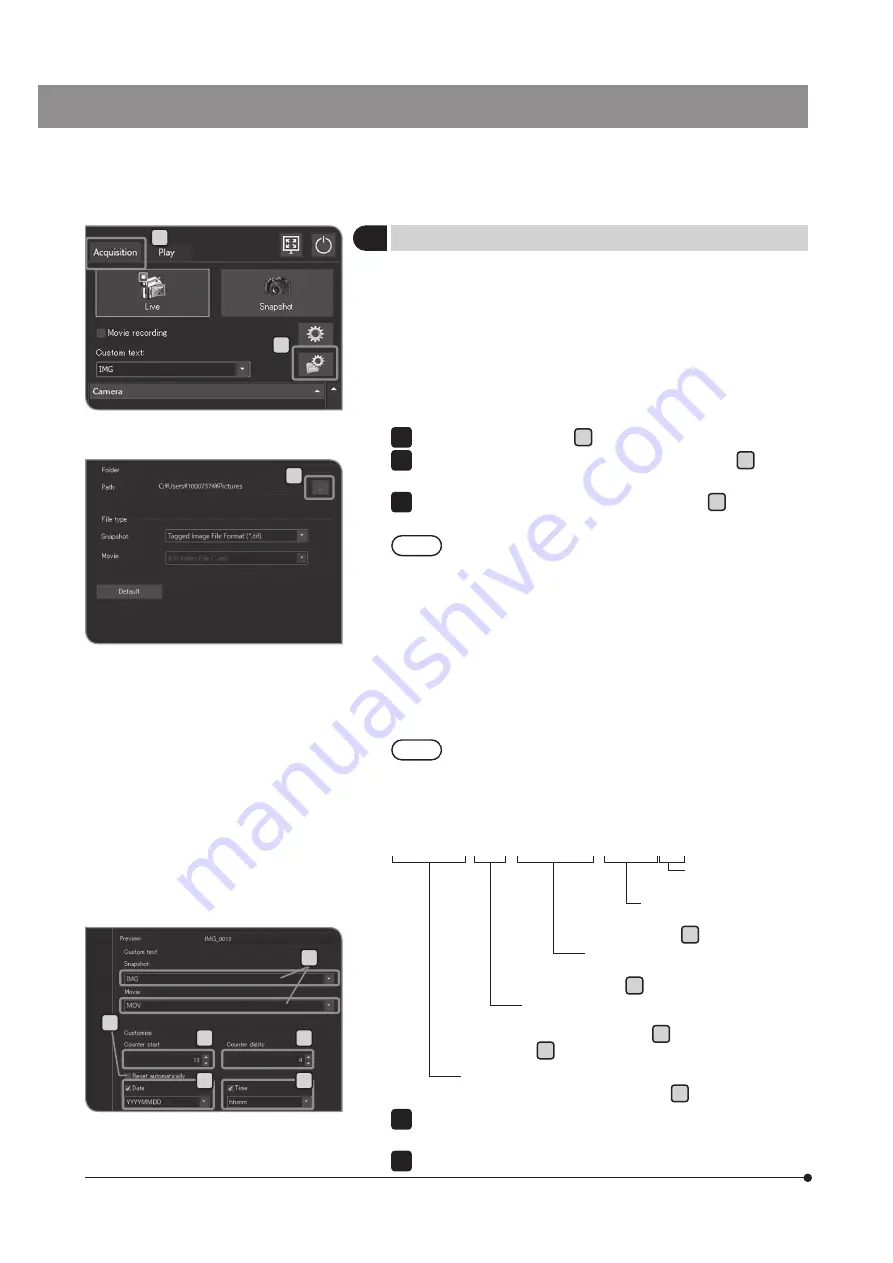
Setting the save folders and file names
You can set the save destination of the acquired image. The save
destinations you can set are recording media such as a USB flash
drive, etc. or PC connected to network.
If multiple microscope digital cameras specify the same folders as
those in PC on the network and acquire images at the same time,
an error that the acquired image cannot be saved may occur. If the
error occurs, wait for a while and acquire the image again or save it
to other folders.
Select the [Acquisition] tab A .
Press the [File Naming and Saving Options] button B to open
[Acquisition Settings] dialog box.
Select [Image file] > [Save], and press the [...] button C of [Path].
Specify the folder in the dialog box displayed.
When you specify PC on the network as the save folder,
you may not be able to specify it. In this case, wait for
a while and specify the folder again. The reason is that
when searching the PC for specifying the folder, the
results may differ each time you search.
·
If you specify the USB recording media equipped with the
password function as the save folder, press the [Unlock
External Drive] button to cancel the password using the
keyboard.
·
If the save folder name is garbled due to special characters,
a malfunction may be caused.
While the window to input password is displayed, if you place
the mouse pointer on the camera control software and click it,
the window to input password becomes invisible. In this case,
press [Alt]+[Tab] of the keyboard to make it visible.
1
2
3
NOTE
TIP
xxxxxxxxxx_0001_YYYYMMDD_hhmmss.xxx
Time
hh: Hour, mm: Minute, ss: Second
(Check
H
to add)
Extension
.TIF, .JPG, .AVI
Date
YYYY: Year, MM: Month, DD: Date
(Check
G
to add)
Counter
1 digit (1 to 9) to 4 digits (0001 to 9999)
(Specify the start value in
E
and the number of digits
in
F
.)
Fixed area of the file name
(Input the arbitrary texts (up to 10 texts) in
D
.)
C
B
D
E
I
G
F
H
Select [Image file] > [Name], and specify the naming rule on the screen
displayed.
Press the [OK] button to close the [Acquisition Settings] dialog box.
4
5
A


