E-16
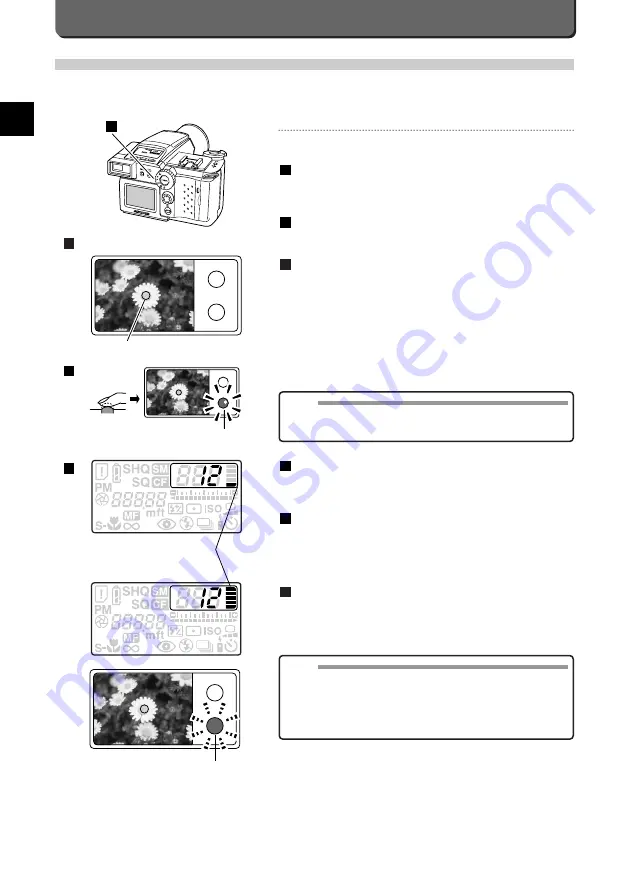
Press the shutter release button down all the way.
The green lamp inside the viewfinder will go out and one block in the
memory scale will light up on the control panel.
The image will appear on the LCD monitor and the camera will
start writing the data onto the card.
As long as there is available space on the card and the memory
scale is not full, you can continue taking pictures up to a maximum of
five while data is being written onto the card.
When all 5 blocks in the memory scale light up, the green lamp
will start blinking. While it is blinking, the camera cannot be
used.
You can resume picture-taking when one of the memory scale blocks
and the green lamp blinking are no longer lit.
6
5
4
Memory scale
4
Green lamp
MEMO
• The newly taken picture remains on the LCD monitor for the set peri-
od.(P. 75)
• Depending on the subject and card space availability, it can take
varying amounts of time to write the data onto the card.
• The photographed image is slightly wider than the image seen
through the viewfinder.
Taking Pictures in the P Mode
With the P mode, exposure is set automatically by the camera. The default setting is autofocus, which sets focus automatically,
for the camera. All you have to do to get sharp clear images is press the shutter release button. A good way to learn the basics
of using your camera is to take pictures.
Taking Pictures
Pictures are taken in the P mode as follows.
Set the mode dial to "P".
If the mode dial is not at “P”, turn it to "P".
The camera also has “M” and “A” modes. See page 14.
Look into the viewfinder at your subject.
Press the shutter release button down halfway.
This will lock the focus. The green lamp inside the viewfinder will light
up to indicate the camera is ready to take the picture.
3
2
1
NOTE
• If the green lamp in the viewfinder blinks when you press the shutter
release button down halfway, the focus is not locked. Release the
button for a moment and press it down halfway again.
1
"P"
Autofocus mark
Viewfinder
2
Green lamp
3
(Continues)
Summary of Contents for 2500L - CAMEDIA - Digital Camera SLR
Page 7: ...1 Preparations E ...
Page 15: ...2 Taking Pictures E ...
Page 35: ...3 Other Ways to Use Your Camera E ...
Page 66: ...E 60 ...
Page 67: ...4 For Better Images E ...
Page 71: ...5 Processing Images on Personal Computer E ...
Page 79: ...6 Setting Camera s System E ...
Page 87: ...7 Miscellaneous E ...
Page 95: ......


