- 121 -
8. Maintenance
7
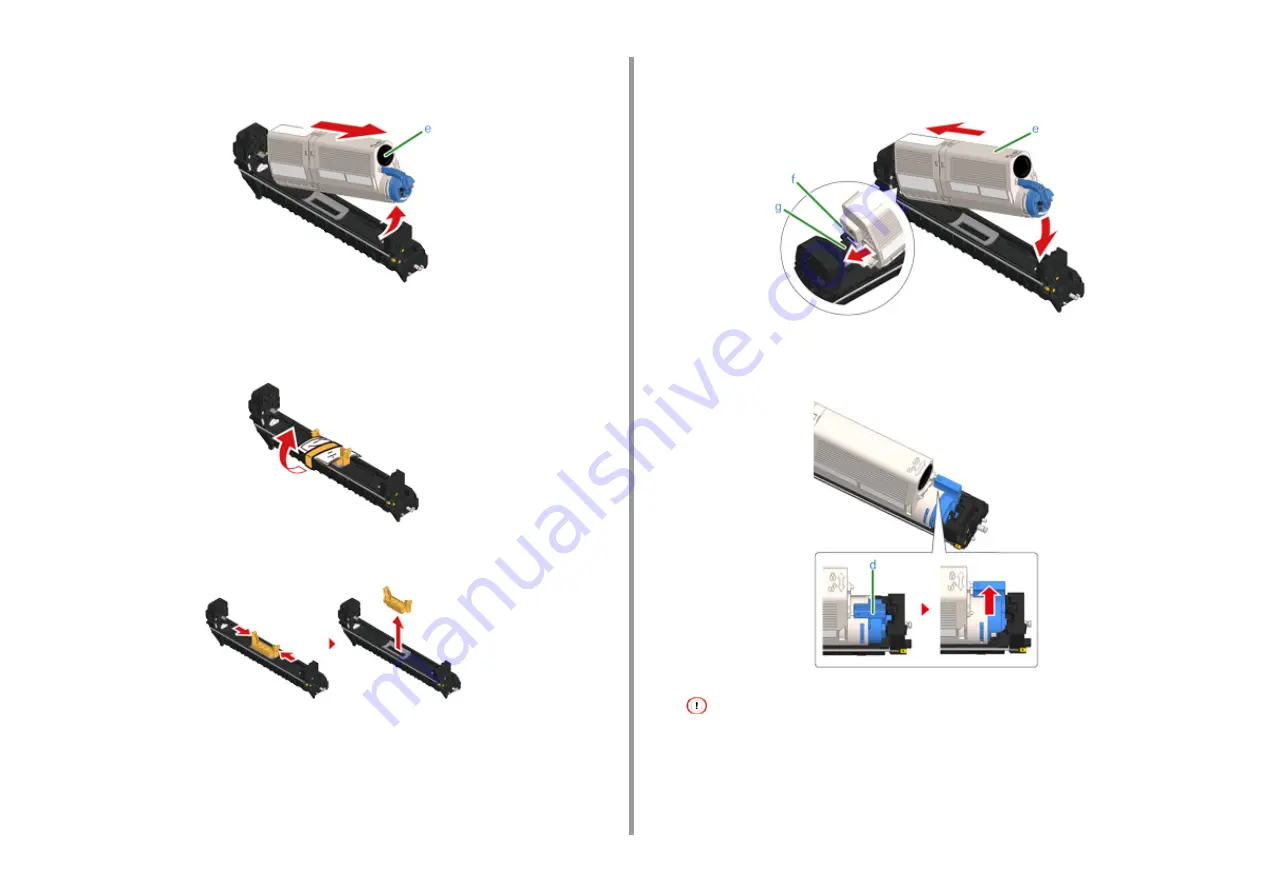
Lift the toner cartridge (e) from the right side, and remove it from the image
drum.
8
Unpack a new image drum and place it on a flat surface.
9
Remove the desiccant pack.
10
Remove the toner cover.
11
Insert the toner cartridge (e) removed in step 7 by aligning its left side
indentation (f) with the protrusion (g) on the image drum so that the toner
cartridge and image drum color label align. Then insert the right side gently
into place.
12
Hold the cartridge, pinch the tip of blue lever (d) of the toner cartridge, and turn
forward until the tip aligns on the lug of the cartridge.
If you close the output tray without turning the blue lever when installing the toner cartridge into the image drum,
it may cause a malfunction. Be sure to turn the blue lever until its top aligns on the lug in the back of the toner
cartridge.
Summary of Contents for ES5463 MFP
Page 1: ...MC563 ES5463 MFP User s Manual...
Page 11: ...11 1 Before starting ENVIRONMENTAL INFORMATION...
Page 16: ...16 2 Setting Up Side view when the additional tray unit is installed...
Page 21: ...21 2 Setting Up 13 Hold the handle B to close the scanner unit...
Page 81: ...4 Copy Copying Cancelling Copying Specifying the Number of Copies...
Page 107: ...7 Fax Basic Operations of Fax Functions Setting for Receptions...
Page 198: ...46590302EE Rev3...


