- 19 -
2. Setting Up
5
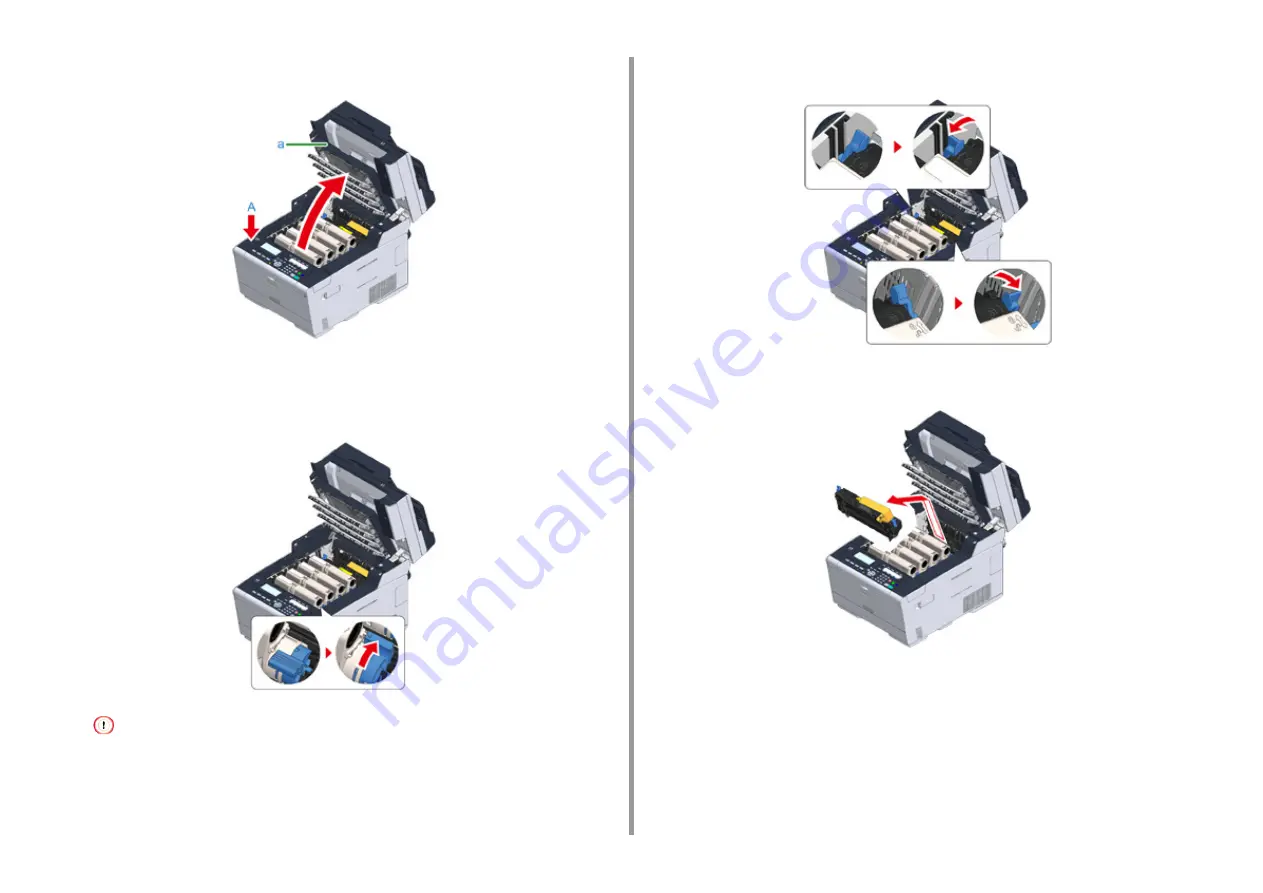
Press the button (A) and open the output tray (a) until it stops.
6
Pinch the tip of blue lever of the toner cartridge and turn forward until the tip
aligns on the lug of the cartridge.
Turn the levers of all 4 toner cartridges.
If you close the output tray without turning the blue lever, it may cause a malfunction. Be sure to turn the blue
lever until its top aligns on the lug in the back of the toner cartridge.
7
Pull the locking levers on the fuser unit toward you to unlock.
8
Hold the fuser unit handle and lift the fuser unit out of the machine.
Summary of Contents for ES5463 MFP
Page 1: ...MC563 ES5463 MFP User s Manual...
Page 11: ...11 1 Before starting ENVIRONMENTAL INFORMATION...
Page 16: ...16 2 Setting Up Side view when the additional tray unit is installed...
Page 21: ...21 2 Setting Up 13 Hold the handle B to close the scanner unit...
Page 81: ...4 Copy Copying Cancelling Copying Specifying the Number of Copies...
Page 107: ...7 Fax Basic Operations of Fax Functions Setting for Receptions...
Page 198: ...46590302EE Rev3...


