background image

5.MANAGING PRINT JOBS FROM THE CONTROL PANEL

Viewing the Print Job Log    213

5 MANAGING PRINT JOBS FROM THE CONTROL PANEL

3

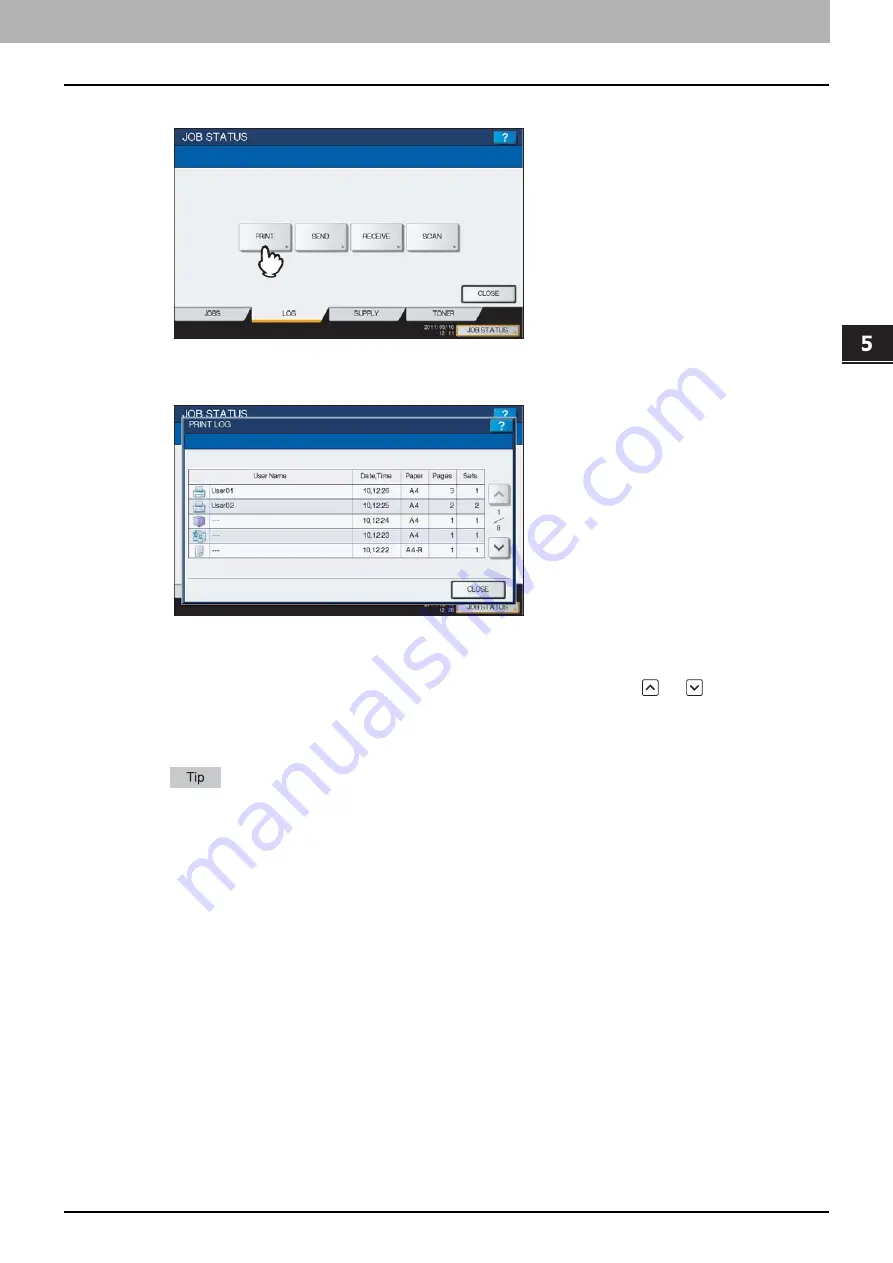
Press [PRINT].

The Print Log is displayed.

On the Print Log, each job’s user name, date and time of the job, paper size, the number of pages and the number 
of copies are displayed.

Up to 120 jobs can be listed on the log. To display the previous or next page, press 

 or 

. The number of jobs 

displayed on a page may vary depending on the equipment used.

To exit from the Print Log screen, press [CLOSE].

If the equipment encounters an error while printing, it records and displays an error code in the User Name 
column. For details on print job errors and error codes, refer to the 

Troubleshooting Guide

.

Summary of Contents for CX4545 MFP

Page 1: ...MULTIFUNCTIONAL DIGITAL COLOR SYSTEMS MULTIFUNCTIONAL DIGITAL SYSTEMS Printing Guide ES9160 MFP ES9170 MFP ES9460 MFP ES9470 MFP CX3535 MFP CX4545 MFP...

Page 2: ...2012 Oki Data Corporation All rights reserved Under the copyright laws this manual cannot be reproduced in any form without prior written permission of Oki Data...

Page 3: ...In this manual the screens and the operation procedures in Windows are described for Windows 7 The details on the screens may differ depending on how the equipment is used such as the status of the in...

Page 4: ...rademarks of Microsoft Corporation in the US and other countries Apple AppleTalk Macintosh Mac Mac OS Safari and TrueType are trademarks of Apple Inc in the US and other countries Adobe Acrobat Reader...

Page 5: ...ing tab menu 92 Finishing options in Paper Handling tab menu 100 Finishing options in Effect tab menu 103 Using various types of paper 108 Switching equipment to print jobs 113 Splitting a print job a...

Page 6: ...ld Print jobs 198 Invalid jobs 202 Printing files from USB media USB Direct Printing 205 Viewing the Print Job Log 212 Checking Supplies 214 Viewing the drawer status 214 Checking remaining toner leve...

Page 7: ...1 OVERVIEW This chapter provides an overview of the printing functions Features and Functions 6 About Printer Drivers 7 For Macintosh 7 For UNIX Linux 7...

Page 8: ...ed Print and Store to e Filing Professional Finishing Options Depending on the type of finishing units you have installed on this equipment you can choose to sort group fold and staple your documents...

Page 9: ...is included in the following folder Choose the appropriate file depending on the model to be used Client Utilities CD ROM Admin HP UXFilter Usa AIX filter The tar file for AIX 4 3 3 is included in the...

Page 10: ......

Page 11: ...to print 16 Setting Up Print Options 19 How to set up 19 Print options 26 Printing With Best Functions for Your Needs 78 Printing various print job types 78 Layout and finishing options in Basic tab m...

Page 12: ...If you enter the department code in the corresponding field in advance you can print without having to do this every time Ask your administrator about the codes When SNMP communication between the eq...

Page 13: ...he printer driver properties dialog box appears For Windows XP Windows Vista Windows Server 2003 Windows Server 2008 click Properties in the File menu and select the printer driver for this equipment...

Page 14: ...whether the optional drawers or the Large Capacity Feeder optional not available for some countries or regions are installed Finisher This sets whether or not the Finisher optional is installed Hole P...

Page 15: ...led LCF Select the size and type of paper that is loaded in the Large Capacity Feeder optional when it is installed External LCF Select the size and type of paper that is loaded in the External Large...

Page 16: ...a document with Black and White selected for the Color option in the Basic tab of printer driver How the equipment performs printing for an invalid department code print job for which an invalid depa...

Page 17: ...epartment code must consist of one byte characters such as numbers from 0 to 9 letters of the alphabet from A to Z both capital and small ones a hyphen an underscore _ and a period 4 Click Apply or OK...

Page 18: ...the collation is set from the application documents may not be properly printed If that happens use the printer driver to set the collation Depending on the application some print options such as the...

Page 19: ...nter driver may be different depending on the application that you are using See your application s manual about displaying the printer properties dialog box 3 Setting the print options on each tab ac...

Page 20: ...2 PRINTING FROM WINDOWS 18 Printing From Application 5 Click Print to print a document...

Page 21: ...want to change every time you print It is convenient to set these options as initial values How to display Windows 7 1 Click the Start menu and select Devices and Printers 2 Select the printer driver...

Page 22: ...aving profile Once you save a profile you can apply its settings to a print job P 21 Loading profile You can also delete unnecessary profiles P 22 Deleting profile Saving profile You can register up t...

Page 23: ...le If you want to register this temporary profile delete unnecessary profiles first and then select Temporary Profile to recall this profile and click Save Profile to save it You cannot specify None f...

Page 24: ...WINDOWS 22 Setting Up Print Options Deleting profile 1 Select the profile that you want to delete in the Profile box and click Delete The Confirm Delete dialog box appears 2 Click Yes to delete the s...

Page 25: ...box for selecting Template Buttons to appear automatically upon printing P 23 Saving a profile to the Template Button You can apply the saved profile to a print job by selecting the Template Button u...

Page 26: ...ck Save and then OK The chosen profile is saved in the selected Template Button 8 Click OK on the Template tab The saved profile is registered Printing with profiles in a Template Button 1 The Templat...

Page 27: ...rofile saved in a Template Button 1 Select the Templates tab 2 Click Edit The Edit Templates dialog box appears 3 Select a Template Button whose profile needs to be deleted 4 Click Delete and then OK...

Page 28: ...r Management tab Security tab How to display 1 Click Start menu and select Devices and Printers The Printers folder appears For Windows Vista or Windows Server 2008 Click Start menu Control Panel Hard...

Page 29: ...b Image Quality tab Effect tab and Templates tab appear only when each setting is enabled with the Plug in feature P 73 Customization Plug in tab 3 Print Job This sets the type of print job Normal Pri...

Page 30: ...You can also print a job and save it to a box by checking on the Print option Documents stored in e Filing are retained with the best image quality for printing If you want to download them into your...

Page 31: ...s such as the original paper size print paper size paper source paper type destination number of copies orientation and so on 1 Original Paper Size This selects the size of a document to be printed Av...

Page 32: ...s tab P 63 Others tab 3 Image Scale Select this check box to enter the scale manually to enlarge or reduce an image The ratio can be set at between 25 and 400 For detailed instructions on how to print...

Page 33: ...this when printing on plain paper Recycled Select this when printing on recycled paper Thick1 Select this when printing on thick 1 paper Thick2 Select this when printing on thick 2 paper Thick3 Selec...

Page 34: ...ant to reduce the initialization period if the Finisher optional is installed 7 Number of Copies This sets the number of printed copies This can be set at between 1 and 9999 The selectable range of th...

Page 35: ...model See the following for setting this option For the ES9460 MFP ES9470 MFP CX3535 MFP CX4545 MFP The margin between the shifted text and right edge of the tab extension must have at least 0 17 inc...

Page 36: ...in the correct position within the tab extension Please make sure to create the document and set the Image Shift Width correctly If misprinting occurs while multiple tab pages are printed continuously...

Page 37: ...rotate sort printing Group Copies and Rotated Sort Copies can be selected only when more than 1 copy is entered at the Number of Copies option Rotated Sort Copies can be selected only when Letter A4...

Page 38: ...let or magazine style publication When this is selected click Details to specify the details of the Booklet printing P 41 Booklet Details 2 Sided printing cannot be set when the following paper size i...

Page 39: ...sheet Right to Left Select this to arrange pages horizontally from the right and printed top to bottom on one sheet Left to Right by column Select this to arrange pages vertically from the top and pr...

Page 40: ...ialog box The selectable options vary depending on the paper size The Staple option is available only when the Finisher optional is installed Center Double can be selected only when the Saddle Stitch...

Page 41: ...want to have the printed paper folded when it exits If this option is selected the job is printed according to the other print options set and then exits with its center folded The Folding option is...

Page 42: ...in function use the application s function rather than this option This cannot specify the binding margin for Booklet printing 8 Poster Print You can divide a print job onto more than one sheet of pap...

Page 43: ...a 1 2 Statement size booklet Every 2 pages are printed on Statement paper to fit on half a sheet 1 2 Comp on Comp Select this to print a 1 2 Computer size booklet Every 2 pages are printed on Computer...

Page 44: ...FP or the Saddle Stitch Finisher MJ 1106 optional is installed in the ES9160 MFP ES9170 MFP 8 Staple Down the Center Select this check box to double staple in the center Staple Down the Center is avai...

Page 45: ...d Interleave Pages are unselectable 1 Use Front Cover This sets front cover printing which allows you to insert or print a cover on a sheet fed from a different Drawer or Bypass tray other than the Pa...

Page 46: ...on this equipment and their configuration on the Device Settings tab Print Style This selects how you want to print a back cover Do not print on page Select this to insert a blank cover Print one side...

Page 47: ...ont Cover and Use Back Cover options enabled no page is inserted after the front cover and back cover This option cannot be set when Insert Pages option is enabled For detailed instructions on how to...

Page 48: ...sertion sheets 2 Sides Select this to print the specified page and the next page on both sides of the insertion sheets 3 Paper Source Select the location from where the insertion sheets are to be fed...

Page 49: ...ion The selectable range of the edge margin differs depending on the model See the following for setting this option For the ES9460 MFP ES9470 MFP CX3535 MFP CX4545 MFP The margin between the shifted...

Page 50: ...the tab paper before printing the next job If Blank is selected while 2 sided printing is performed and you enter an even numbered page printed on the back side of the paper Page 4 in the following e...

Page 51: ...t how images are printed You can easily select the appropriate image quality depending on the type of document The available setup items for this option differ depending on which MFP is used color or...

Page 52: ...settings P 51 Setting Basic tab P 54 Setting Color Balance tab P 55 Setting Image Attribute tab P 56 Setting Advanced tab This option is available only when your equipment is a multifunctional digita...

Page 53: ...ital system Setting Basic tab In the Basic tab of the Setting dialog box you can specify the following functions The print options in the Basic tab are available only when your equipment is a multifun...

Page 54: ...l not be overwritten The Image Quality Type is saved as a new custom Image Quality Type under the name you have specified Original Image Quality Type Select the image quality type to be applied as the...

Page 55: ...ground content that has black text overlaid on it If this is enabled the gap between the text and the background is minimized and color deviation is prevented If this is not enabled the background of...

Page 56: ...ect this check box to adjust the density of each color separately in details When this box is selected click Edit to display the Color Balance Detail dialog box and specify the density of each color C...

Page 57: ...corresponding Printing Guide 1 Contrast Adjust the contrast for printing You can set from 4 lowest to 4 highest 2 Brightness Adjust the brightness for printing You can set from 4 darkest to 4 lightest...

Page 58: ...e profile When you obtained color profile data from this equipment the CMYK source profile data of this equipment appear 3 Apply to Device Color Only Select this check box when you give priority to co...

Page 59: ...or space conversion is performed according to the default profile that set as a default profile in the ICC Profile submenu of the Setup menu in the TopAccess administrator mode Effect tab The Effect t...

Page 60: ...wing page P 103 Printing with watermarks Add Click this to create a new watermark The Watermark dialog box appears when you click on this P 60 Add Edit Watermark Edit Select a watermark from the Water...

Page 61: ...s changing the type of overlay image for odd pages and that for even pages or applying an overlay image only to the specified pages If you click this when Multiple Overlays is selected in the Overlay...

Page 62: ...Font Size Enter the font size for the watermark text The font size can be set from 6 to 300 pt in units of 1 pt 6 Color Select the color of the watermark text If the color that you require is not lis...

Page 63: ...field Selection is switched in the order of Setting 1 Setting 2 Setting 3 Setting 4 Setting 5 and Setting 6 every time you click this 4 Master Setting 1 2 This sets if the selected overlay image is ap...

Page 64: ...ar This selects the overlay image setting to be cleared 7 Clear This clears the overlay image setting selected in the Select setting to clear 8 Restore Defaults Click this to restore the settings disp...

Page 65: ...printer driver from the Devices and Printers folder P 19 Setting initial values of print options 2 TopAccess Link Click this to start a web browser and display the TopAccess menu 3 Toner Save Select...

Page 66: ...specify the custom paper size The Custom Paper Size dialog box appears when you click this P 68 Custom Paper Size In order to set Custom Paper Size you must access the printer driver properties from...

Page 67: ...code within 63 characters How the equipment performs printing for an invalid department code print job for which an invalid department code is specified varies depending on the Invalid Department Cod...

Page 68: ...Settings tab menus you need to access with the administrator privilege from the Printers folder For the details see the following page P 69 Device Settings tab 18 Version Information Click this to dis...

Page 69: ...each of the User Name Authentication Password and Privacy Password _ 4 Restore Defaults Click this button when you want to reset all the settings back to the defaults Add Printer 1 Discovered Printers...

Page 70: ...custom paper size name You can enter up to 63 characters This name will be displayed in the Original Paper Size and Print Paper Size box on the Basic tab 3 Paper Size Enter A Length and B Width to sp...

Page 71: ...s tab you must access the printer driver properties from the Devices and Printers folder Windows Vista Windows Server 2008 Printer Windows XP Windows Server 2003 Printers and Faxes For detailed instru...

Page 72: ...nal is not installed External LCF Select this when an External Large Capacity Feeder optional is installed 6 Inserter Unit Select this check box when the Inserter optional is installed This setting is...

Page 73: ...be disabled 12 Restore Defaults Click this to restore the configuration of this equipment displayed in the Device Settings tab menu to the original factory defaults Drawer Settings 1 Paper Size Selec...

Page 74: ...eck box to enable the Private Print Restriction function 5 Hold Print Restriction Select this check box to enable the Hold Print Restriction function For details and setting of the Private Print Restr...

Page 75: ...this check box to enable the Effect tab P 57 Effect tab 4 Templates Select this check box to enable the Templates tab P 76 Templates tab 5 Add Printer Select this check box to enable Add Printer on t...

Page 76: ...Traditional Danish Dutch English UK English US Finnish French German Italian Japanese Norwegian Bokm l Polish Russian Spanish Swedish Auto is selected by default When Auto is selected the most appropr...

Page 77: ...ing is available only for PCL6 2 Output Format This setting is not available for this model 3 Print Error Information This setting is not available for this model 4 Compress Bitmap This sends the comp...

Page 78: ...Template Button Click this to apply the profile saved in a Template Button to each setting of the printer driver On the Template Button the name of the profile saved and the print image of the job ap...

Page 79: ...This selects the profile to be saved in a Template Button 2 Template Button This selects the Template Button to be edited 3 Save This saves the chosen profile in the selected Template Button 4 Delete...

Page 80: ...menu P 100 Finishing options in Paper Handling tab menu P 103 Finishing options in Effect tab menu P 108 Using various types of paper P 113 Switching equipment to print jobs P 115 Splitting a print jo...

Page 81: ...duled Print in the Print Job box 3 Click on the right of the Print Job box The Scheduled Print dialog box appears 4 Click the arrow button at the Date box to display the Calendar window and select the...

Page 82: ...cters and symbol characters ASCII code characters between 0x21 to 0x7E in the Password box The password must be between 1 and 63 characters When you enter this password on the touch panel display conf...

Page 83: ...Hold Print in the Print Job box 3 Set any other print options as required and click OK 4 Click OK or Print to send the print job The print job is stored in the Hold Print job list in the touch panel d...

Page 84: ...uch a case print just one trial copy first and then specify the required number of copies on the touch panel display Printing a proof copy 1 Display the Basic tab menu 2 Select Proof Print in the Prin...

Page 85: ...th the overlay file and the documents on which you superimpose the overlay image must be created in the same size color mode and orientation Printing a document as an overlay file 1 Display the Basic...

Page 86: ...is not available Additionally when paper of those sizes is also included in a part of the documents the printing job cannot be stored in e Filing either Custom paper Non standard size paper bypass tra...

Page 87: ...If the number of folders has reached 100 you cannot create any more 6 If you print the job as well as save it to the Public Box select the Print check box 7 Click OK 8 Click OK or Print to send the p...

Page 88: ...ox Folder box If the entered folder name is not found a new folder is created under this box Enter the folder name within 64 characters If the number of folders has reached 100 you cannot create any m...

Page 89: ...of Print In this a case perform Proof Print of only one copy first and then change the number of copies on the touch panel to print the rest Documents stored in e Filing are retained with the optimal...

Page 90: ...vate Print or Proof Private Print Enter a password using the alphanumeric characters and symbol characters ASCII code characters between 0x21 to 0x7E in the Password box The password must be between 1...

Page 91: ...OK 9 Click OK or Print to send the print job If you select Scheduled Print the job is printed at the specified date and time If you select Private Print or Proof Private Print the job is stored in thi...

Page 92: ...larged or reduced image to fit the specified paper size 1 Display the Basic tab menu 2 Select the document size on the Original Paper Size box Then select the paper size that you want to print at the...

Page 93: ...in units of 1 4 Set any other print options you require and click OK 5 Click OK or Print to send the print job The image is printed on paper of the specified size at the specified reproduction ratio P...

Page 94: ...nt to send the print job The print job is printed in the twin color mode Layout and finishing options in Finishing tab menu Using the printer driver you can set various layout options to suit your pre...

Page 95: ...p Copies icon at Copy Handling 5 Set any other print options you require and click OK 6 Click OK or Print to send the print job The printed documents are sorted according to the pages Sorting printed...

Page 96: ...can create a document in a book or magazine style publication by selecting the Booklet option Also you can create a folded booklet by automatically stapling saddle stitching and folding the center of...

Page 97: ...er size booklet Every 2 pages are printed on Computer paper to fit on half a sheet 1 2 13LG on 13LG Select this to print a 1 2 13 inch LG size booklet Every 2 pages are printed on 13 inch LG paper to...

Page 98: ...ant to double staple the center select the Staple Down the Center check box Staple Down the Center is available only when the Saddle Stitch Finisher optional is installed and configured on the Device...

Page 99: ...pages arranged on one sheet 6 pages Select this to print images from 6 pages arranged on one sheet 8 pages Select this to print images from 8 pages arranged on one sheet 9 pages Select this to print i...

Page 100: ...the printed document in the center The selectable options vary depending on the paper size Center Double can be selected only when the Saddle Stitch Finisher optional is installed and configured on t...

Page 101: ...er Print 1 Display the Finishing tab menu 2 Select the Poster Print check box and then click Details The Poster Print dialog box appears 3 Select the number of sheets on which the image is printed and...

Page 102: ...lank cover or printed front cover at the Print Style box Do not print on page Select this to insert a blank front cover Print one side of the page Select this to print the first page of the document o...

Page 103: ...age numbers to which you want to insert the sheet in each Page box and select the Print Style Paper Source and Paper Type options as you require 6 Set any other print options you require and click OK...

Page 104: ...e drawer where the desired paper is loaded at the Source box When Auto is selected in the Source box the paper is automatically selected according to the printed document size To insert thick paper se...

Page 105: ...RAFT ORIGINAL or COPY You can choose from several predefined watermarks or you can create and save your own custom watermarks Watermarks are text only To add graphics or other document elements use im...

Page 106: ...mark at the Color box If your preferred color is not listed in the box click Browse to display the color palette and add your color This option is available only when your equipment is a multifunction...

Page 107: ...WINDOWS Deleting a watermark You can delete the default watermarks However they cannot be restored by clicking Restore Defaults 1 Select the watermark that you want to delete at the Watermark box 2 C...

Page 108: ...you want to print them on each page select the Print on Each Page check box in Overlay Image on the Effect tab P 57 Effect tab Both the overlay file and the documents on which you superimpose the over...

Page 109: ...nctions for Your Needs 107 2 PRINTING FROM WINDOWS Deleting an overlay image 1 Select an overlay image that you want to delete at the Overlay Image box 2 Click Delete The Confirm Delete dialog box app...

Page 110: ...ument and place the text or object that should appear on the tab extension as described below When you create a document for tab printing place the text or object that should appear on the tab extensi...

Page 111: ...Original Paper Size box and either Letter Tab or A4 Tab according to the document size in the Print Paper Size box The Primary Tab Dialog dialog box appears 4 In the Tab Manufacturer box select the pr...

Page 112: ...nd the Image Shift Width box For the ES9160 MFP ES9170 MFP The margin between the shifted text and right edge of the tab extension must have at least 0 08 inches 2 0 mm of space because any data in th...

Page 113: ...in Print Paper Size of the Basic tab menu before starting printing 2 Set any other print options you require and click OK 3 Click OK or Print to send the print job 4 Place paper larger than the stand...

Page 114: ...t is being fed into the equipment Be careful not to cut your fingers on the edge of paper when you hold it Make sure that the trailing edge of the paper will not be fed into the equipment while you ar...

Page 115: ...his case the same number of copies is printed from all of the pieces of equipment you selected When you select the equipment in the Selected Devices boxes make sure to select that which supports featu...

Page 116: ...t does not support features enabling the print options of the job printing may not be performed properly Department code confirmation for the selected equipment is not performed when the job is printe...

Page 117: ...elect the Auto check box the number of copies set in the Total Copies box is automatically and equally allocated to two pieces of equipment When you select the equipment in the Selected Devices boxes...

Page 118: ...t does not support features enabling the print options of the job printing may not be performed properly Department code confirmation for the selected equipment is not performed when the job is printe...

Page 119: ...nting From Application on Mac OS X 10 2 4 to Mac OS X 10 7 x 118 Considerations and limitations 118 How to print from Mac OS X 10 2 4 to Mac OS X 10 7 x 119 Page Setup dialog on Mac OS X 10 2 4 to Mac...

Page 120: ...ending a print job with a banner page cannot be used at the same time The e Filing function cannot be used together with Custom Paper Size Magazine Sort Twin Color Hold Print Proof Print or Private Pr...

Page 121: ...elect the name of the equipment in the Format For box and specify the Page Setup settings for your print job Setting the Page Setup varies depending on how you want to print a document P 120 Page Attr...

Page 122: ...m is enabled only when the ES9460 MFP ES9470 MFP CX3535 MFP CX4545 MFP is used Env Com10 4 1 8 x 9 1 2 Env Mornarch 3 7 8 x 7 1 2 Envelope DL 110 x 220 mm Envelope Cho 3 120 x 235 mm and Envelope You...

Page 123: ...X 10 4 x to Mac OS X 10 7 x and Mac OS X 10 2 4 to Mac OS X 10 3 x When you print on paper larger than standard sizes print one sheet at a time P 111 Printing on paper larger than standard sizes The p...

Page 124: ...quipment in the Printer Margins box If Mac OS X 10 6 x to 10 7 x is used enter the width and height in the Paper Sizes box and then select your printer name in the Non Printable Area box Please use th...

Page 125: ...10 2 4 to Mac OS X 10 3 x 1 Select Custom Paper Size in the Settings box The Custom Paper Size menu is displayed 2 Click New A new custom page size name is added to the list If you want to create a ne...

Page 126: ...in the Page Size boxes and enter the printer margins in the Printer Margins boxes In the Printer Margins box please enter 0 17 inch You can delete the created custom page size by clicking Delete 5 Cli...

Page 127: ...Page Setup may not be included in the File menu but in the Print dialog boxes The layout of the setting items may vary depending on the type of your Mac OS Copies Pages In the Copies Pages menu you c...

Page 128: ...nged on one sheet This is available only when N up printing printing multiple pages on one sheet is set Across Left to Right Before Down Pages arranged horizontally from left to right and then top to...

Page 129: ...tion This sets the paper exit orientation When the orientation of the paper is reversed with this setting the top of the paper comes to the control panel side This is selectable only for Mac OS X 10 5...

Page 130: ...ue on Mac OS X When you select this the print job will be held in the queue on Mac OS X until you resume the print job to be sent from the queue on Mac OS X 2 Priority Select the priority of a print j...

Page 131: ...he box If you do not want to enlarge the document images when a larger paper size is selected select the Scale down only check box Mac OS X 10 5 x 1 Pages to Print Select whether all pages will be pri...

Page 132: ...inting When this is selected select the output paper size in the box If you do not want to enlarge the document images when a larger paper size is selected select the Scale down only check box ColorSy...

Page 133: ...n the printouts This menu is displayed only for Mac OS X 10 5 x to Mac OS X 10 7 x 1 ColorSync Select this if you want the application you are using to control the color management of the printouts 2...

Page 134: ...Print Cover Page You can set how to insert a banner page None Select this to print without a banner page Before document Select this to print a banner page before the document After document Select t...

Page 135: ...ormation 2 Tray Switching This is not supported by this equipment Paper Feed In the Paper Feed menu you can set the paper source 1 All pages from Select this when you want to use the same paper source...

Page 136: ...X 10 2 4 to Mac OS X 10 7 x Color Settings In the Color Settings 1 and Color Settings 2 menus you can adjust the color settings for printing This option is available only when your equipment is a mult...

Page 137: ...3 PRINTING FROM Macintosh Printing From Application on Mac OS X 10 2 4 to Mac OS X 10 7 x 135 3 PRINTING FROM Macintosh Color Settings 1 Mac OS X 10 3 x Color Settings 2 1 8 3 5 7 2 9 4 10 11...

Page 138: ...ected the black parts of the document are printed in black and the color parts of the document are printed in yellow Black and White Select this to print a document in the twin color mode with white W...

Page 139: ...Gray Text and Graphic Select this to print the black and gray scale text and graphics using black toner Black and Gray Text Graphic and Image Select this to print the black and gray scale text graphic...

Page 140: ...nu For detailed instructions on how to set Advanced Color Settings from the TopAccess menu refer to the TopAccess Guide 1 RGB Source profiles This selects RGB source profile When you obtained color pr...

Page 141: ...profile data set for this equipment and return to the Color Settings 1 menu Print Mode In the Print Mode menu you can set the way this equipment handles the print job This menu allows you to enable va...

Page 142: ...on this equipment and not printed until you activate printing from the touch panel display of this equipment This option is useful when you want to print a confidential document secured with a passwo...

Page 143: ...Upper Select this to route the upper exit tray of the Job Separator optional Job Separator Lower Select this to route the lower exit tray of the Job Separator optional Tray 1 Select this to set the ou...

Page 144: ...lect this to create holes on the right side for a portrait document or on the bottom for a landscape document Short Edge Punch with 180 degree rotation Select this to create holes on the bottom for a...

Page 145: ...on the right for a portrait document or on the bottom for a landscape document Lower Right Portrait Lower Left Landscape Select this to staple on the lower right for a portrait document or on the lowe...

Page 146: ...her optional is installed in either the ES9460 MFP ES9470 MFP CX3535 MFP CX4545 MFP or the Saddle Stitch Finisher MJ 1106 optional is installed in the ES9160 MFP ES9170 MFP Booklet In the Booklet menu...

Page 147: ...ces installed on this equipment and their configuration on the Paper Feed menu Print Style This selects how to print the cover Do not print on page Select this to insert a blank cover Print on page Se...

Page 148: ...nt on 1 side of the page Select this to print the last page image on the front side of a back cover This is available only when the Two Sided Printing option is enabled in the Layout menu Quality In t...

Page 149: ...e restricted with a password The e Filing menu is displayed when the Plug in file is installed in Mac OS X 10 4 x to Mac OS X 10 7 x For instructions on how to install the Plug in file refer to the So...

Page 150: ...on the box You can enter up to 63 alphanumeric characters If too many characters are entered the watermark may not be printed correctly 2 Font Select the font to be used for the watermark text 3 Size...

Page 151: ...this to print the watermark text placed below everything 8 Position Adjust the position of the watermark by moving the scroll bars Supply Levels In the Supply Levels menu the remaining toner and paper...

Page 152: ...ions of the Print dialog box for Mac OS X 10 3 x to Mac OS X 10 7 x P 125 Print dialog on Mac OS X 10 3 x to Mac OS X 10 7 x The Print dialog boxes vary across applications Copies Pages In the Copies...

Page 153: ...yout Direction This sets how pages are arranged on one sheet This is available only when the N up printing printing multiple sheets on a page is set Across Left to Right Before Down Pages are arranged...

Page 154: ...e direction to be printed on the back side of the paper differs depending on the orientation Short Edge Binding Select this to bind along the short edge side of paper The direction to be printed on th...

Page 155: ...nt Paper Feed In the Paper Feed menu you can select the paper source or media type 1 All pages from Select the option button when you want to use the same paper source for all pages When this is selec...

Page 156: ...rivate Document Password P 166 Quality Do not use the Cover Pages menu Booklet In the Booklet menu you can set booklet printing 1 Booklet Paper Size Select a paper size for the booklet Both sides of a...

Page 157: ...t a document in the twin color mode with blue When this is selected the black parts of the document are printed in black and the color parts of the document are printed in blue Black and Cyan Select t...

Page 158: ...s or line art Other than General cannot be selected when Mono is selected at the Color Type box in the Color Settings 1 menu 2 Black Overprint This set when printing background content that has black...

Page 159: ...ted using black toner when you want to print the black and gray scale contents using its toner When this option is selected appropriate areas are printed using black toner according to the Image Type...

Page 160: ...Select this check box when you use a sharpness filter 2 Contrast Adjusts the contrast for printing You can set from 4 lowest to 4 highest 3 Sharpness Adjusts the sharpness for printing You can set fro...

Page 161: ...Select this to route the output to the default tray that is set as the default tray for raw jobs in the Printer setting page of the TopAccess Administrator s page Exit Tray Select this to set the outp...

Page 162: ...hole punched Off Select this to print without hole punches Long Edge Punch without rotation Select this to create holes on the left side for a portrait document or on the top for a landscape document...

Page 163: ...upper right for a portrait document or on the lower right for a landscape document Middle Right Portrait Middle Bottom Landscape Select this to double staple on the right for a portrait document or on...

Page 164: ...is not installed Saddle Stitch Portrait Saddle Stitch Landscape can be selected only when the Saddle Stitch Finisher optional is installed 4 Folding Select this check box to have paper folded at its...

Page 165: ...the remaining copies and thereby reduce paper waste For detailed instructions on how to use the touch panel display see the following page P 191 Proof Print jobs Private Password Select this to print...

Page 166: ...list the invalid department code print job will be stored in invalid list without printing When SNMP communication is disabled and Invalid Department Code Print Job is set to Store to invalid job lis...

Page 167: ...ocument Password when you select to print a private job If you do not specify the Private Document Password the private job uses default Private Document Password 00000 1 Password Digit 1 Select the f...

Page 168: ...halftones Auto Select this to print with proper halftone depending on the contents in the document automatically Detail Select this to print halftone in detail Smooth Select this to print halftone smo...

Page 169: ...vides the instructions on how to print from a UNIX Linux workstation Printing From Application 168 Considerations and limitations 168 Printing using lp command 168 Generic lp and lptap options 168 Gen...

Page 170: ...the qdaemon This can be invoked by the user with the commands lp lpr or qprt In order to use the filter either lp or qprt should be used Printing using lp command Use the lp command lptap in Linux to...

Page 171: ...obs automatically send the esc k2G command to convert the line feed character into a carriage return line feed sequence If the PCL5e job contains some of its own escape sequences it may override this...

Page 172: ...page or the top side of a landscape page printed on long edge feed paper This command has no effect when the paper is fed from the short edge side staple 3 Staple in the bottom left corner of a portra...

Page 173: ...ing option In PostScript Deferred Media Selection is always turned on so the paper size has priority over the media type and the paper source In PCL5e the paper size always has priority over the media...

Page 174: ...sed It is not necessary to specify duplexing for Booklet Mode sduplex Setting duplexing separately can override the booklet mode setting for duplexing Example The command to specify long edge duplexin...

Page 175: ...Letter size paper A4 a4 Select A4 size paper legal lg LG Select Legal size paper statement st ST Select Statement size paper ledger ld LD Select Ledger size paper ledgerwide ldwide LDWIDE Select Ledge...

Page 176: ...tment code is entered When SNMP communication is disabled and Invalid Department Code Print Job is set to Store to invalid job list the invalid department code print job will be stored in the invalid...

Page 177: ...the blank page mode is lp o blankpage 0 filename Toner Save The toner save mode can be set using the following option Example The command to set the toner save mode is lp o tonersave on filename Optio...

Page 178: ...ue Alternate Value Description booklet letter lt LT Select Letter size paper for the booklet printing mode booklet A4 a4 Select A4 size paper for the booklet printing mode booklet legal lg LG Select L...

Page 179: ...cription left2right off OFF Select right to left page layout for the booklet printing mode This value decides the layout of the pages in the booklet If this value is OFF then the layout of pages is Ri...

Page 180: ...d with the following option As this equipment is a page printer we cannot change the physical length of a piece of paper so the actual effect of this command is to after the value for lines per inch s...

Page 181: ...lormode COLOR color Set color mode printing for the print mode colormode GRAYSCALE grayscale Set grayscale mode printing for the print mode colormode AUTO auto Set auto color mode printing for the pri...

Page 182: ...mode can be selected using the following options Example The command to set the black overprint mode for the print job is lp o blackoverprint 1 filename This option is available only when you have ei...

Page 183: ...f cyan toner You can specify the following values 4 3 2 1 0 1 2 3 4 CBM value Specify the color density of magenta toner You can specify the following values 4 3 2 1 0 1 2 3 4 CBY value Specify the co...

Page 184: ...high or too low part of the text may not appear due to the printer s unprintable region The top margin will be ignored if it is set to a value greater than the printer s logical page length Setting t...

Page 185: ...ce and the media type for the banner page can be set to different values than the job s paper source and media type Auto paper source selection or the requested banner page source or media type Output...

Page 186: ...n a media type is lp o bmtype Plain1 filename Option Value Alternate Value Description banner last Print the banner page after the job so that it will be physically on top of the job in the output tra...

Page 187: ...equipment Monitoring the Print Job Status 186 Normal Print Scheduled Print jobs 186 Proof Print jobs 191 Private Print jobs 194 Hold Print jobs 198 Invalid jobs 202 Printing files from USB media USB...

Page 188: ...h panel the JOBS tab of the JOB STATUS screen appears On the JOBS tab Normal Print and Scheduled Print jobs are listed together with copy jobs You can check the user name date and time of registration...

Page 189: ...NEL Deleting jobs Follow the procedure below when you want to delete unnecessary Normal Print Scheduled Print jobs 1 On the JOBS tab listing the print jobs P 186 select the job that you want to delete...

Page 190: ...be held in the queue Pausing Pausing jobs On the JOBS tab listing the print jobs P 186 select the job that you want to pause and then press PAUSE The selected job is paused When a job is paused the su...

Page 191: ...jobs by moving them within the list You can only move jobs from and to those whose status is Wait 1 On the JOBS tab listing the print jobs P 186 select the job that you want to move in the list and th...

Page 192: ...kipped by the Job Skip function 1 On the JOBS tab listing the print jobs P 186 confirm the information of the skipped job 1 Select the skipped job 2 Press RECOVERY INFORMATION 2 Resolve the cause of t...

Page 193: ...opy you can decide on the Proof Print job list whether to print out the remaining copies or cancel the job to change the settings If you select to print the remaining copies you can change the number...

Page 194: ...opies 1 On the Proof Print job list P 191 select the job for printing If the target job is not displayed on the screen use and to change between pages 2 Press PRINT The remaining copies are printed ou...

Page 195: ...Deleting Proof Print jobs Follow the procedure below to delete Proof Print jobs 1 On the Proof Print job list P 191 select the job that you want to delete and then press DELETE If the target job is n...

Page 196: ...ay the list of Private Print jobs 2 On the Private Print job list select the desired user name and then press OK When you enter the nickname for User name Alias box on the Others tab on a Windows comp...

Page 197: ...computer When the user name that is entered to log in to your computer is used for User name Alias the displayed list contains the Private Print jobs for which the same password has been set When the...

Page 198: ...Print job list P 194 select a job for printing You can select more than one job If the target job is not displayed on the screen use and to change between pages If you want to select all the jobs dis...

Page 199: ...int job 1 On the Private Print job list P 194 select the job that you want to delete and then press DELETE You can select more than one job If the target job is not displayed on the screen use and to...

Page 200: ...his function is useful to prevent you forgetting to remove printed sheets Hold Print jobs can be released or deleted from the Hold Print job list For the detailed instructions on Hold Print see the fo...

Page 201: ...ress ADMIN PASSWORD instead of selecting a user name The on screen keyboard appears with which you can enter the 6 to 64 digit administrator password In this case the jobs can be deleted but are not a...

Page 202: ...for printing You can select more than one job If the target job is not displayed on the screen use and to change between pages If you want to select all the jobs displayed on the screen press SELECT A...

Page 203: ...nt job 1 On the Hold Print job list P 198 select the job that you want to delete and then press DELETE You can select more than one job If the target job is not displayed on the screen use and to chan...

Page 204: ...to be held as an invalid job and stored in the Invalid job queue To release the job from the queue enter the correct department code on the JOBS tab listing the Invalid jobs A print job whose number o...

Page 205: ...VALID The Invalid jobs are listed on the screen Printing Invalid jobs If you have entered an incorrect department code for printing you need to re enter the correct one Follow the procedure below 1 On...

Page 206: ...OBS tab listing the Normal Print jobs P 186 Deleting Invalid jobs Follow the procedure below to delete an Invalid job 1 On the Invalid job list P 202 select the job that you want to delete and then pr...

Page 207: ...PDF files whose encryption level is 128bit AES and some files of other encryption levels may not be printable as well In these cases print these files from a client computer For printing the PRN file...

Page 208: ...he above screen will not be displayed when the equipment is not managed by department codes Proceed to the next step 4 Select USB Do not disconnect the USB storage device when USB DEVICE in use Do not...

Page 209: ...o print If you select an encrypted PDF file for which a password has been set the password entry screen is displayed Proceed to Step 6 If you change the paper size stapling position 2 Sided Printing s...

Page 210: ...on Adobe Acrobat 6 0 or later enter the document open password or permissions password To print an encrypted PDF file for which Low Resolution 150 dpi is set on Adobe Acrobat you must enter the permi...

Page 211: ...set SIZE To print a PDF file you can set FINISHING 2 SIDED and PDF Overprint 1 Press any of SIZE FINISHING 2 SIDED and PDF Overprint 2 Select the desired item 3 Press OK when you finish the setting S...

Page 212: ...n this option is enabled OFF Select this not to overprint the job ON Select this to enable overprint the job ON PDF X ONLY Select this to enable overprint the job only when the original PDF file is co...

Page 213: ...ving tray The job in progress can be monitored from the JOBS tab listing the Normal Print jobs Before Disconnecting the USB Storage Device Make sure that USB DEVICE in use Do not remove USB DEVICE is...

Page 214: ...THE CONTROL PANEL 212 Viewing the Print Job Log Viewing the Print Job Log You can view the log of print jobs on the touch panel Viewing the print job log 1 On the touch panel press JOB STATUS 2 Press...

Page 215: ...ges and the number of copies are displayed Up to 120 jobs can be listed on the log To display the previous or next page press or The number of jobs displayed on a page may vary depending on the equipm...

Page 216: ...y on the equipment has the specified size of paper a printing error occurs and JOB STATUS blinks In this case pressing JOB STATUS displays the SUPPLY tab from which you can learn which drawer needs ad...

Page 217: ...6 OTHER PRINTING METHODS This equipment also supports the following printing methods FTP Printing 216 Email Printing 217...

Page 218: ...ing to a file refer to the Macintosh documentation Printing a file using the FTP command The procedure below describes the example of printing using the FTP command with the MS DOS Prompt 1 Launch the...

Page 219: ...er When Discard Printing is OFF the print image is printed on the largest sheet of paper if its length exceeds the paper printing area When RX Reduction Printing is ON it will be vertically reduced to...

Page 220: ......

Page 221: ...7 APPENDIX This chapter provides the following contents Internal Fonts List 220 Internal PCL fonts list 220 Internal PS fonts list 221...

Page 222: ...man 16 Univers Condensed Bold 58 NewCenturySchlbk Bold 17 Univers Medium Condensed Italic 59 NewCenturySchlbk Italic 18 Univers Condensed Bold Italic 60 NewCenturySchlbk BoldItalic 19 Antique Olive 61...

Page 223: ...lvetica Condensed Oblique Bookman LightItalic Helvetica Condensed Bold Bookman Demi Helvetica Condensed BoldObl Bookman DemiItalic Helvetica Narrow Candid Helvetica Narrow Oblique Chicago Helvetica Na...

Page 224: ...no Italic Palatino Bold Palatino BoldItalic StempelGaramond Roman StempelGaramond Italic StempelGaramond Bold StempelGaramond BoldItalic Symbol Taffy Times Roman Times Italic Times Bold Times BoldItal...

Page 225: ...121 Custom Paper Size 64 68 111 Customization 70 D Default Menu Setting 63 Department Code 10 15 65 139 163 164 Destination 32 141 147 159 Destination folder 147 Destination Paper Size 129 130 Destin...

Page 226: ...Options 127 152 Output PDL 75 Overlay Image 59 106 Overlay Images 61 Override Application Paper Source Settings 13 71 P Page Attributes 120 Page Order 41 95 129 130 Pages 125 150 Pages per Sheet 126...

Page 227: ...P V1 V2 66 SNMP V3 67 Solid 60 104 Staple 37 Staple Down the Center 42 96 Status Drawer 214 Print job 186 Print job log 212 Toner 214 Store this document to e Filing 147 Store to e Filing 28 84 85 Sty...

Page 228: ...226 INDEX...

Page 229: ...ES9160 MFP ES9170 MFP ES9460 MFP ES9470 MFP CX3535 MFP CX4545 MFP...

Page 230: ...www okiprintingsolutions com Oki Data Corporation 4 11 22 Shibaura Minato ku Tokyo 108 8551 Japan 45106002EE...

Reviews: