95
Pompe à chaleur pour piscine à onduleur
FR
12
WARNING: Installation must be carried out by a qualified engineer.
This section is provided for information purposes only and must be checked and adapted if
necessary according to the actual installation conditions.
3.6 Hydraulic connection
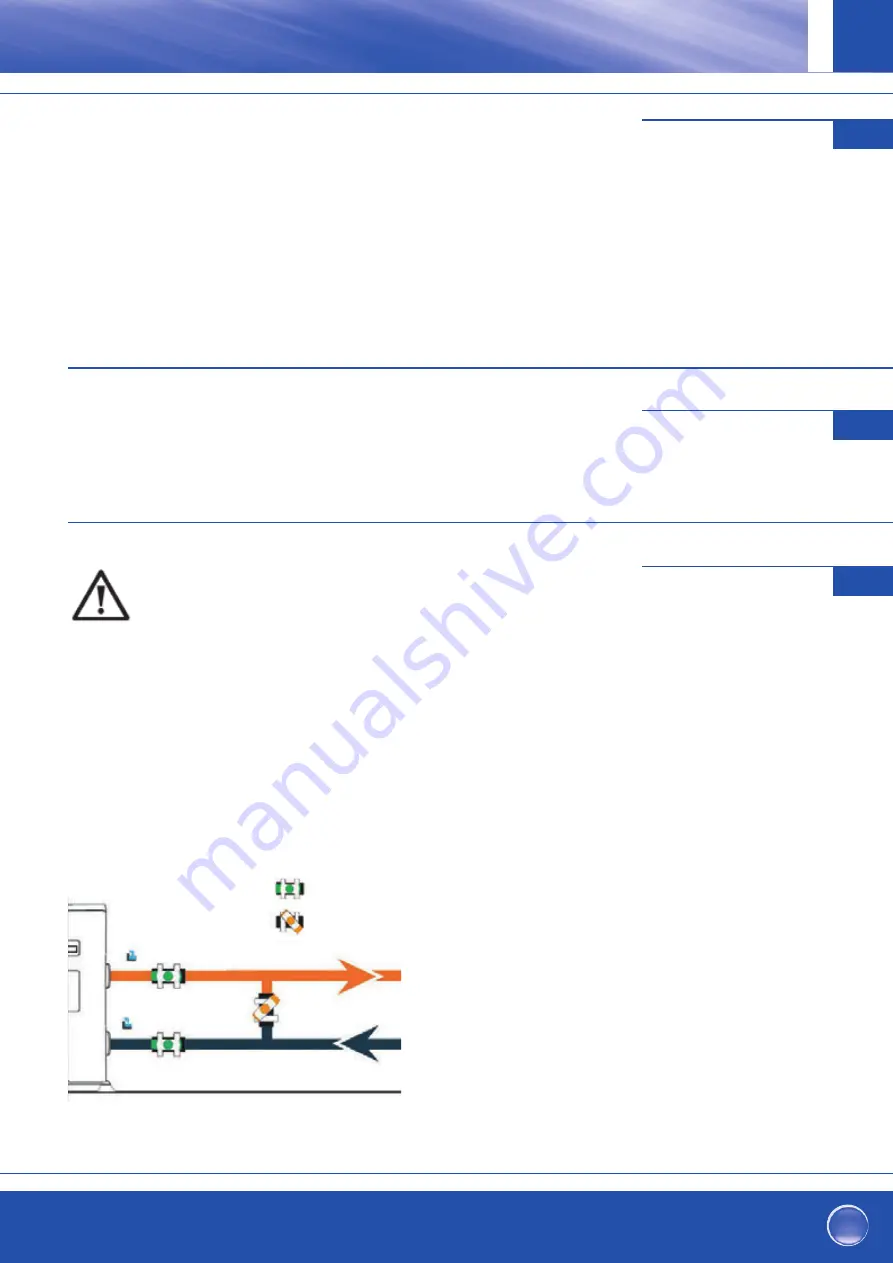
By-Pass assembly
The heat pump must be connected to the pool by means of a
By-Pass assembly.
A By-Pass is an assembly consisting of 3 valves that
regulate the flow circulating in the heat pump.
During maintenance operations, the By-Pass permits the heat
pump to be isolated from the system without interrupting your
installation.
Making a hydraulic connection with the By-Pass kit
WARNING: Do not run water through the hydraulic circuit for 2 hours after applying the adhesive.
Step 1: Take the necessary steps to cut your pipes.
Step 2: Make a straight perpendicular cut through the PVC pipes with a saw.
Step 3: Assemble your hydraulic circuit without connecting it in order to check that it perfectly fits your
installation, then dismantle the pipes to be connected. Step 4: Chamfer the ends of the cut pipes with sandpaper.
Step 5: Apply stripper to the ends of the pipes to be connected. Step 6: Apply the adhesive in the same place.
Step 7: Assemble the pipes.
Step 7: Clean off any adhesive remaining on the PVC.
Step 8: Leave to dry for at least 2 hours before putting the hydraulic circuit into water.
VERS LA PISCINE
DEPUIS LA PISCINE
sortie
entrée
11
3.3 Installation layout
3.4 Connecting the condensation draining kit
While operating, the heat pump is subject to condensation. This will result in a more or less large run-off of
water, depending on the degree of humidity. To channel this flow, we recommend that you install the
condensation drainage kit.
How do you install the condensation drainage kit|?
Install the heat pump, raising it at least 10 cm with solid water-resistant pads, then connect the drainage pipe to
the opening located under the pump.
3.5 Installing the unit on noise-damping supports
In order to minimize the noise pollution associated with heat pump vibrations, it can be positioned on vibration
absorbing pads.
To do this, you simply have to position a pad between each of the unit’s feet and its support, and then fix
the heat pump to the support with suitable screws.
vanne à moitié ouverte
vanne entièrement ouverte
11
3.3 Installation layout
3.4 Connecting the condensation draining kit
While operating, the heat pump is subject to condensation. This will result in a more or less large run-off of
water, depending on the degree of humidity. To channel this flow, we recommend that you install the
condensation drainage kit.
How do you install the condensation drainage kit|?
Install the heat pump, raising it at least 10 cm with solid water-resistant pads, then connect the drainage pipe to
the opening located under the pump.
3.5 Installing the unit on noise-damping supports
In order to minimize the noise pollution associated with heat pump vibrations, it can be positioned on vibration
absorbing pads.
To do this, you simply have to position a pad between each of the unit’s feet and its support, and then fix
the heat pump to the support with suitable screws.
Pendant le fonctionnement, la pompe à chaleur a tendance à former de la condensation.
En fonction de l'humidité, des quantités plus ou moins importantes de condensat
s'échappent. Nous recommandons l'installation d'un kit d'évacuation des condensats pour
évacuer les condensats.
Comment installer le kit d'évacuation des condensats ?
Installez la pompe à chaleur à l'aide de taquets stables et résistants à l'humidité avec
une distance au sol de minimum 10 cm. Raccordez ensuite la conduite de condensation
fournie, y compris l'embout de tuyau, à l'ouverture ronde dans le socle / bac collecteur
au dessous de la pompe à chaleur.
Voir page 88, 3.3: évacuation de condensat
La pompe à chaleur peut être placée sur des silencieux afi n de réduire les nuisances
sonores causées par les bruits de vibration de la pompe à chaleur.
Il suffi t de placer un bloc entre le pied et la base de la pompe à chaleur et de fi xer
la pompe à chaleur à la base à l'aide de vis appropriées.
Raccordement du kit
d'évacuation des condensats
3.4
Installation sur des
amortisseurs de vibrations
3.5
Raccordement hydraulique
3.6
NOTE IMPORTANTE :
L'installation doit être eff ectuée par un spécialiste qualifi é. Cette section
n'est donnée qu'à titre d'information et doit être vérifi ée et, si nécessaire,
adaptée sur place, en tenant compte des conditions d'installation.
Kit de dérivation
La pompe à chaleur doit être raccordée à la piscine par un kit de dérivation.
Le kit se compose de 3 vannes qui régulent la circulation de l'eau dans la pompe à
chaleur. Pendant les travaux d'entretien, la dérivation permet de déconnecter la
pompe à chaleur du système sans interrompre le fonctionnement de la piscine.


