background image

Advanced menu ............................................................................................................................................... 33


Advanced Chipset Control submenu .............................................................................................................. 34


I/O Device Configuration submenu ................................................................................................................ 35


PCI Configuration submenu ........................................................................................................................... 36


PCI/PNP ISA UMB Region Exclusion submenu............................................................................................ 36


PCI/PNP ISA IRQ Resource Exclusion submenu .......................................................................................... 37


PCI/PNP ISA DMA Resource Exclusion submenu ........................................................................................ 37


Boot menu........................................................................................................................................................ 38


Expanded Boot screen ..................................................................................................................................... 38


Exit menu ........................................................................................................................................................ 39


Chapter 4:  Save and run programs ................................................................................................................ 40


Save and run your programs on the XE–800 SBC ............................................................................................ 40


Saving programs and support files .................................................................................................................... 40


Adding your application .................................................................................................................................. 40


Overriding the autoexecution of your application ......................................................................................... 41


Overview:  Section 2 – Hardware .................................................................................................................... 42


Chapter 5:  Serial ports...................................................................................................................................... 43


Description .......................................................................................................................................................... 43


Mating receptacle ............................................................................................................................................ 43


Serial port configurations ................................................................................................................................... 43


Setup menu for COM ports ............................................................................................................................. 46


Function and use of serial ports ......................................................................................................................... 46


COM1 as serial console device ........................................................................................................................ 46


COM ports as RS–232 I/O ............................................................................................................................... 46


COM2 as RS–422 and RS–485 networks ....................................................................................................... 47


RS–422 ............................................................................................................................................................. 47


RS–485 ............................................................................................................................................................. 47


Chapter 6:  Console devices .............................................................................................................................. 49


Description .......................................................................................................................................................... 49


Selecting console devices .................................................................................................................................... 49


Monitor and keyboard console ........................................................................................................................ 49


Serial console ................................................................................................................................................... 50


Chapter 7: CompactFlash, SDRAM, and battery backup ........................................................................... 53


Description .......................................................................................................................................................... 53


CompactFlash ..................................................................................................................................................... 53


Creating a bootable CompactFlash ................................................................................................................ 53


SDRAM................................................................................................................................................................ 54


Battery backup for real time calendar clock...................................................................................................... 54


Installing an AT battery ................................................................................................................................. 54


Chapter 8:  External drives............................................................................................................................... 55


Description .......................................................................................................................................................... 55


Hard disk controller............................................................................................................................................ 55


Master/slave designation for IDE devices ...................................................................................................... 55


Installing a hard drive........................................................................................................................................ 57


Setup parameters and booting ........................................................................................................................... 57


Chapter 9:  Bit-programmable digital I/O...................................................................................................... 58


Description .......................................................................................................................................................... 58


Interfacing to switches and other devices.......................................................................................................... 61


Opto-module rack interface ............................................................................................................................ 61


Organization of banks......................................................................................................................................... 63


Port addressing................................................................................................................................................ 63


I/O lines pulled low.......................................................................................................................................... 63


Configuring and programming the I/O ports..................................................................................................... 64


Programming the I/O ...................................................................................................................................... 64


Configuring the I/O ......................................................................................................................................... 64


Writing and reading from I/O ......................................................................................................................... 65


I/O output program examples ......................................................................................................................... 65


I/O input program examples ........................................................................................................................... 66


Enhanced INT 17h function definitions............................................................................................................. 66


Summary of Contents for XE-800

Page 1: ...XE 800 Single Board Computer Reference Manual Document 6515 rev G07 CONTACT INFORMATION Front Desk 303 430 1500 Technical Support 303 426 4521 FastHelp octagonsystems com www octagonsystems com 1 ...

Page 2: ...hout further testing or modification Octagon Systems Corporation general policy does not recommend the use of its products in life support applications where the failure or malfunction of a component may directly threaten life or injury It is a Condition of Sale that the user of Octagon products in life support applications assumes all the risk of such use and indemnifies Octagon against all damag...

Page 3: ... an expensive display Multiple component failures The chance of a random component failure is very rare since the average MTBF of an Octagon card is greater than 11 years In a 7 year study Octagon has never found a single case where multiple IC failures were not caused by misuse or accident It is very probable that multiple component failures indicate that they were user induced Testing dead cards...

Page 4: ...1 section 3 3 5 This assures that all the circuitry on the CPU control card sequences properly and avoids system lockup Excessive signal lead lengths Another source of failure that was identified years ago at Octagon was excessive lead lengths on digital inputs Long leads act as an antenna to pick up noise They can also act as unterminated transmission lines When 5V is switched onto a line it crea...

Page 5: ...n stored in EEPROM for high reliability 14 Watchdog timer added for safety 14 Hardware reset 14 5 Volt only operation lowers system cost 15 Rugged environmental operation 15 Size 15 XE 800 SBC major software features 16 Diagnostic software verifies system integrity automatically 16 Phoenix software BIOS 16 Octagon BIOS extensions 16 Boot sequence 16 Chapter 2 Quick start 17 Component diagrams conn...

Page 6: ... and RS 485 networks 47 RS 422 47 RS 485 47 Chapter 6 Console devices 49 Description 49 Selecting console devices 49 Monitor and keyboard console 49 Serial console 50 Chapter 7 CompactFlash SDRAM and battery backup 53 Description 53 CompactFlash 53 Creating a bootable CompactFlash 53 SDRAM 54 Battery backup for real time calendar clock 54 Installing an AT battery 54 Chapter 8 External drives 55 De...

Page 7: ...NT 17h function definitions 82 Serial EEPROM 82 Read a single word from the serial EEPROM 82 Write a single word to the serial EEPROM 83 Read multiple words from the serial EEPROM 83 Write multiple words to the serial EEPROM 84 Return serial EEPROM size 85 Chapter 16 System jumpers user jumper and BIOS recovery 86 System jumpers 86 System jumper 86 Extended BIOS jumper 87 Video jumper 87 User jump...

Page 8: ...ansion 100 Operating systems 100 PCI bus mastering 100 Power requirements 100 Environmental specifications 100 Size 100 Weight 100 Excessive Thermal Stress 100 Mating connectors 101 Maps 101 Jumper settings 104 Connector pin outs 105 Appendix B Software utilities 113 Introduction 113 Support commands 113 GETVIDEO EXE 114 I17HNDLR EXE 114 PGMVIDEO EXE 115 PHLASH EXE 115 RESET COM 116 Appendix C Acc...

Page 9: ...44 Figure 5 3 Typical RS 422 four wire interface circuit 47 Figure 5 4 Typical RS 485 4 wire interface circuit 48 Figure 5 5 Typical RS 485 2 wire half duplex interface circuit 48 Figure 6 1 Monitor and keyboard as console 50 Figure 6 2 The XE 800 SBC and a serial console 52 Figure 8 1 XE 800 SBC with IDE device 56 Figure 9 1 Typical digital I O configuration 60 Figure 9 2 Organization of banks 63...

Page 10: ...Table A 1 XE 800 SBC Mating connectors 101 Table A 2 XE 800 SBC DMA map 101 Table A 3 XE 800 SBC I O map 102 Table A 4 XE 800 SBC interrupt map 103 Table A 5 XE 800 SBC memory map 103 Table A 6 System configuration jumper W1 104 Table A 7 COM2 jumper W2 104 Table A 8 J1 flat panel connector 105 Table A 9 J2 PC 104 Plus connector 106 Table A 10 J3 CRT connector 107 Table A 11 J4 EIDE 107 Table A 12...

Page 11: ...rovides installation and programming instructions startup options and system configuration program examples The following chapters are included Chapter 1 Overview Chapter 2 Quick start Chapter 3 Setup programs Chapter 4 Save and run programs 11 ...

Page 12: ...es the CS5530A companion chip for some of the peripherals The XE 800 SBC has an ISA bus speed of 8 33 MHz SDRAM The memory socket can accept up to 256 MB capacity SO DIMM modules On board flash On board is a 512 KB SMT boot flash that contains the BIOS CompactFlash socket The CompactFlash socket accepts a Type I or Type II 3V CompactFlash card The CompactFlash appears as an IDE device to the syste...

Page 13: ...t hot swap at the 10 pin header itself LPT and floppy The XE 800 does not provide connectors for LPT parallel port or floppy disk drive These functions if required can be obtained through USB devices For DOS operating system they can be obtained through PC 104 or PC 104 Plus devices Digital I O The 48 digital I O lines will interface with logic devices switch inputs LEDs and industry standard opto...

Page 14: ... 5 volt supply is removed Setup information stored in EEPROM for high reliability Loss of Setup data is serious in industrial applications Most PCs store Setup information in battery backed CMOS RAM If the battery fails or is replaced during routine maintenance this information is lost Without a keyboard and monitor in embedded applications time consuming re initialization is required The XE 800 S...

Page 15: ...nnector from the power connector not required for XE 800 SBC operation Rugged environmental operation Operating temperature 40 to 70 C 300 MHz with no air flow 40 to 80 C 300 MHz with forced air flow Nonoperating temperature 55 to 95 C nonoperating Relative humidity 5 to 95 noncondensing Shock 40g 3 axis Vibration 5g 3 axis Size 115 mm x 165mm x 29 5 mm EPIC form factor 15 ...

Page 16: ...d up Memory verification does not require software test equipment monitor keyboard disks or test fixtures See the Troubleshooting chapter for a listing of tests and failures and their descriptions Phoenix software BIOS The XE 800 SBC has a Phoenix Software BIOS with Octagon BIOS extensions The BIOS extensions support the INT17 functions Octagon BIOS extensions On board BIOS extensions allow easy a...

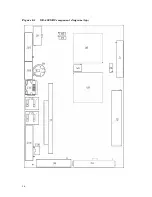
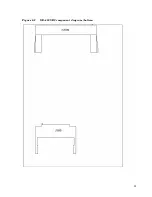
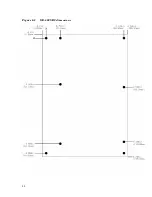
Page 17: ...1 and 2 2 show the connectors and jumpers and their locations on the XE 800 SBC Figure 2 3 shows the dimensions of the XE 800 SBC in inches and millimeters The sections immediately following those figures describe the connectors and jumpers and some cables that you might require WARNING The XE 800 SBC contains static sensitive CMOS components To avoid damaging your card and its components Ground y...

Page 18: ...Figure 2 1 XE 800 SBC component diagram top 18 ...

Page 19: ...Figure 2 2 XE 800 SBC component diagram bottom 19 ...

Page 20: ...Figure 2 3 XE 800 SBC dimensions 20 ...

Page 21: ...s see page 100 For information on cables you might require see the following section Table 2 1 XE 800 SBC connector functions Connector Function J1 Flat Panel Display J2 PC 104 Plus J3 CRT Video J4 Hard drive IDE J5 COM2 RS 422 RS 485 J6 Digital I O 2 J7 PC 104 J8 Power J9 Keyboard Mouse J10 AT battery J11 Ethernet J12 USB3 4 USB 2 0 J13 USB5 6 USB 2 0 J14 Digital I O 1 J15 COM1 2 J16 USB1 2 USB 1...

Page 22: ...s the 44 pin IDE header to a 40 pin IDE header Keyboard Mouse Y Cable Connects to the PS 2 keyboard mouse port to provide keyboard and mouse interfaces A keyboard will plug directly into the XE 800 port Two port USB Cable Converts the 10 pin header for USB1 2 into two standard USB connectors XE 800 ATX Power Cable Connects to the 10 pin ATX power connector and provides a standard 20 pin ATX connec...

Page 23: ...erating system can be Windows NT Windows CE net Linux QNX or DOS Note Windows 2000 and Windows XP XP Embedded will run with known issues however new driver development is not supported by the CPU manufacturer PS 2 style keyboard SVGA monitor 2 mm VGA 12 Cable part 6392 VTC 20F Cable part 4866 for serial console Null modem adapter 2740 for serial console Windows HyperTerminal or equivalent terminal...

Page 24: ... mounting holes Damage will occur at power up 2 Connect a 5V power source to the XE 800 SBC Refer to the Power Supply Requirements section page 25 The power supply connector is located at J8 Refer to Figure 2 4 and Table 2 3 Note The 12V 12V and 3V signals are routed to the PC 104 and PC 104 Plus bus only WARNING Make sure the power supply is OFF when connecting the power cable to the XE 800 SBC b...

Page 25: ... of external devices such as hard drives floppy drives displays mouse and keyboard It is important that a quality power supply be used that has sufficient current capacity line and load regulation hold up time current limiting and minimum ripple The power supply for the XE 800 must meet the startup risetime requirements specified in the ATX Power Design Guide version 1 1 section 3 3 5 This assures...

Page 26: ... XE 800 SBC Dot indicates pin 1 Monitor The XE 800 SBC interfaces to a standard SVGA monitor through the J3 connector using a 2 mm VGA 12 cable Connect one end of the 2 mm VGA 12 cable into J3 and connect the other end to a SVGA monitor cable Note The video jumper W1 5 6 must be installed to use a monitor This jumper is installed by default Keyboard and mouse The XE 800 SBC accepts an AT style key...

Page 27: ...ng system media Hard drive or CompactFlash to install the operating system onto If installing onto a hard drive an IDE cable with master and slave connectors OS on CD ROM onto a hard drive or CompactFlash Refer to Figure 2 6 on page 29 for the following 1 Attach the 2 mm VGA 12 video cable to J3 2 Connect the PS 2 keyboard to J9 a VGA monitor to the VGA 12 video cable and a CD ROM drive to J4 Conf...

Page 28: ...Legacy Diskette B Primary Master Primary Slave Secondary Master Secondary Slave Memory Cache Boot option System Memory Extended Memory 00 00 36 01 01 1988 Disabled Disabled None None 3253MB None 640 KB 130048 KB Tab Shift Tab or Enter selects field F1 Help v Select Item Change Values F9 Setup Defaults Esc Exit Select Menu Enter Select Sub Menu F10 Save and Exit Note Your display message may be sli...

Page 29: ...CompactFlash installed into CompactFlash socket on back of board Power Supply PS 2 Keyboard VGA Monitor 2 mm VGA 12 cable XE 800 SBC CD ROM and or Hard Drive IDE ribbon cable for two devices or one device directly into J4 Dot indicates pin 1 29 ...

Page 30: ...this memory for use by other operating systems Setup Setup can be entered by pressing the F2 key during the BIOS POST sequence this occurs between the memory test and boot Also by removing the S jumper W1 1 2 you will force the setup to revert to the factory programmed defaults shown in the following menus This allows the user to reconfigure the setup Note The Setup defaults might vary slightly fr...

Page 31: ...te B Enables or disables a second legacy floppy disk drive Note that Diskette A must be enabled before Diskette B is accessible The menu items for Diskette B are then the same as for Diskette A See note under Diskette A Primary Master Accesses submenu for a Primary Master disk drive Options are None CD ROM ATAPI Removable Other ATAPI User and Auto This channel is hardwired to the CompactFlash and ...

Page 32: ...drive installed at this connection Auto autotypes hard disk drive installed here CD ROM a CD ROM drive is installed here ATAPI Removable removable disk drive is installed here F1 Help v Select Item Change Values F9 Setup Defaults Esc Exit Select Menu Enter Select Sub Menu F10 Save and Exit Type Specifies types of hard drives Choices are None Auto CD ROM ATAPI removable Other ATAPI and User Selecti...

Page 33: ...enu Enter Select Sub Menu F10 Save and Exit Serial Video Enabled Disabled Enables redirection of video and keyboard to COM1 Baud Rate 9600 19 2K 38 4K 57 6K 115K Selects baud rate for serial console Post Video Mode Text Graphical Selects which video mode to display during POST Secured Setup Configurations Yes or No Yes prevents the operating system from overriding selections you have made in Setup...

Page 34: ...v Select Item Change Values F9 Setup Defaults Esc Exit Select Menu Enter Select Sub Menu F10 Save and Exit Memory speed Low Medium High Configures DRAM performance options High is a 100 MHz memory clock Medium is an 80 MHz memory clock and Low is a 66 MHz memory clock Low is recommended for Industrial Temperature Range Applications Video Resolution Low Medium High Super PS 2 Mouse Disabled Enabled...

Page 35: ... as Serial Port A Base I O address 3F8 2F8 3E8 2E8 Interrupt IRQ3 IRQ4 Interface RS232 RS422 RS485 Parallel port Disabled Enabled Auto OS controlled Enabled allows user to set configuration while Auto uses the BIOS or OS configuration Note that the XE 800 does not support a parallel port directly This feature should be left disabled unless you are using a PC 104 parallel port This also frees up IR...

Page 36: ...ion submenu reserves the specified block of upper memory for use by legacy ISA devices Options are Available or Reserved PhoenixBIOS Setup Utility Advanced PCI PNP ISA UMB Region Exclusion Item Specific Help C800 CBFF CC00 CFFF D000 D3FF D400 D7FF D800 DBFF DC00 DFFF Available Available Available Available Available Available Reserves the specified block of upper memory for use by legacy ISA devic...

Page 37: ... Values F9 Setup Defaults Esc Exit Select Menu Enter Select Sub Menu F10 Save and Exit PCI PNP ISA DMA Resource Exclusion submenu The PCI PNP ISA DMA Resource Exclusion submenu reserves the specified DMA channels for use by legacy ISA devices Options are Available or Reserved PhoenixBIOS Setup Utility Advanced PCI PNP ISA DMA Resource Exclusion Item Specific Help DMA 0 DMA 1 DMA 2 DMA 3 DMA 5 DMA ...

Page 38: ...ice between Hard Disk or Removable Disk d Remove a device that is not installed F1 Help v Select Item Change Values F9 Setup Defaults Esc Exit Select Menu Enter Select Sub Menu F10 Save and Exit Expanded Boot screen The expanded screen allows you set the order of drives for booting PhoenixBIOS Setup Utility Advanced Boot Order Item Specific Help Removable Devices Legacy Floppy Drives Hard Drive Bo...

Page 39: ... console F9 and F10 are not available you must press down up arrow to get to the proper option then press enter PhoenixBIOS Setup Utility Main Advanced Boot Exit Item Specific Help Exit Saving Changes Exit Discarding Changes Load Setup Defaults Discard Changes Save Changes Exit System Setup and save your changes to CMOS F1 Help v Select Item Change Values F9 Setup Defaults Esc Exit Select Menu Ent...

Page 40: ...n undocumented DOS call is made causing your program to operate erratically We recommend using Microsoft s MSDOS when using programs with undocumented DOS calls Saving programs and support files A disk drive or CompactFlash must contain proper formatting To format the CompactFlash or to add your own operating system please refer to the Compact Flash SDRAM and battery backup chapter WARNING Reforma...

Page 41: ...Note that this option does not work if you are using a terminal emulator serial console Option 2 1 Press Ctrl C when the system is first starting This halts all batch files 2 Change AUTOEXEC BAT and or CONFIG SYS to not call out your program Option 3 1 Remove CompactFlash from target system 2 Install CompactFlash in host system CompactFlash adapter 3 Edit Config sys and or Autoexec bat 4 Reinstall...

Page 42: ...e features The following chapters are included Chapter 5 Serial ports Chapter 6 Console devices Chapter 7 CompactFlash SDRAM and battery backup Chapter 8 External drives Chapter 9 Bit programmable digital I O Chapter 10 CRTs and flat panels Chapter 11 Ethernet Chapter 12 PC 104 and PC 104 Plus expansion Chapter 13 USB 42 ...

Page 43: ...C 20M connectors which plug directly into a 9 pin serial cable For RS 422 or RS 485 on COM2 use a 1 25 mm RS422 485 Cable part 6393 and connector J5 Figure 5 1 following page shows two serial devices connected to the XE 800 SBC It also shows the schematic for connecting RS 422 and RS 485 devices Note that you cannot use COM2 for RS 232 and RS 422 485 at the same time Figure 5 2 shows a null modem ...

Page 44: ...l Device on COM2 Serial Device on COM1 RS 422 or RS 485 Device on COM2 1 25 mm RS 422 485 cable XE 800 SBC VTC 20F cable Figure 5 2 VTC 20F cable and null modem adapter VTC 20F Cable P3 P2 Null Modem Adapter required for serial console 44 ...

Page 45: ...wire RS 485 2 wire RS422 485 J7 default Table 5 2 COM1 and COM2 connector pin outs J15 connector COM1 COM2 Pin RS 232 signal Pin RS 232 signal 1 2 3 4 5 6 7 8 9 10 DCD DSR RxD RTS TxD CTS DTR RI GND nc 11 12 13 14 15 16 17 18 19 20 DCD DSR RxD RTS TxD CTS DTR RI GND nc Table 5 3 J7 COM2 connector pin outs and pin outs for 1 25 mm RS 422 485 cable J7 connector DB 9 connector Pin Signal Pin Pin 1 TX...

Page 46: ... Disabled Bi directional 378 IRQ 7 DMA 1 F1 Help v Select Item Change Values F9 Setup Defaults Esc Exit Select Menu Enter Select Sub Menu F10 Save and Exit Function and use of serial ports COM1 as serial console device You can use COM1 as a console device to communicate with another PC For COM1 to be a serial console the V video jumper W1 5 6 must be removed See the Console devices chapter for mor...

Page 47: ... can be configured in BIOS Setup as either RS 232 RS 422 or RS 485 Refer to table 5 4 on page 46 for jumper settings for terminating an RS 422 485 network RS 422 RS 422 is typically point to point configuration RS 422 is also specified for multi drop party line applications where only one driver is connected to and transmits on a bus of up to 10 receivers The device at the end of an RS 422 network...

Page 48: ...00 TXD tied to RXD TXD tied to RXD The RTS signal is used to control the transmitter and receiver in RS 485 mode The RTS signal is controlled by the Modem Control Register bit 1 MCR 1 which is offset 0x04 from the UART base address Writing MCR 1 to 0 default state sets RTS to an inactive state RTS logic high and DISABLES the RS 485 Transmitter and ENABLES the Receiver Writing MCR 1 to 1 sets RTS t...

Page 49: ...ot required Monitor and keyboard console To use a monitor and keyboard as the console you will need the following equipment or equivalent XE 800 SBC 2 mm VGA 12 video cable 6392 PS 2 style keyboard VGA monitor WARNING The video connector is not keyed and can be plugged in incorrectly Ensure that pin 1 of the cable is connected to pin 1 of the connector indicated by the dot Incorrect connection cou...

Page 50: ...tup To use COM1 as the console you will need the following equipment or equivalent XE 800 SBC VTC 20F cable 4866 Null modem adapter 2470 9 pin to 9 pin Host computer running HyperTerminal or equivalent Serial cable to connect XE 800 SBC COM1 to host computer serial port PS 2 style keyboard optional Refer to Figure 2 1 on page 18 for the location of various connectors and jumpers before installing ...

Page 51: ...Flow control none Terminal support ANSI ANSI terminal option Wrap lines that exceed terminal width Yes uncheck box 6 Start HyperTerminal You are now ready to establish communications between the host PC and the XE 800 SBC 7 Power on the XE 800 SBC Console data will be redirected to COM1 and will be displayed on the host computer 8 If you do not get the proper logon message check the HyperTerminal ...

Page 52: ...Figure 6 2 The XE 800 SBC and a serial console HyperTerm or other terminal emulator COM2 COM1 VTC 20F cable XE 800 SBC Desktop PC COM1 and Null Modem Adapter Keyboard 52 ...

Page 53: ...ow up as Secondary IDE devices Note Octagon Systems only recommends Industrial Grade CompactFlash NAND technology that implements ECC error code correction and wear level technology Creating a bootable CompactFlash A CompactFlash as shipped from the factory may or may not be formatted even if formatted it may or may not be bootable The following sequence shows how to create a bootable CompactFlash...

Page 54: ...st Remove the external device and power off the XE 800 SBC 8 Reboot SDRAM The memory socket can accept up to 256 MB capacity SO DIMM modules using PC100 or PC133 memory sticks Note that if the memory Speed in BIOS Setup is set to High you must use PC133 memory sticks Battery backup for real time calendar clock An AT battery can be installed to back up the CMOS real time clock The battery can be in...

Page 55: ...ve Standard IDE devices such as hard drives and CD ROM drives are interfaced via a 44 pin connectors at J10 For those IDE devices that use a 40 pin interface use the Octagon Systems IDE cable 4080 or 6246 UltraDMA modes are not supported directly by the XE 800 These modes require an 80 pin connector and there is no adapter available for the 44 pin 2mm IDE connector used on the XE 800 IDE combinati...

Page 56: ...mpactFlash installed into CompactFlash socket on back of board Power Supply PS 2 Keyboard VGA Monitor 2 mm VGA 12 cable XE 800 SBC CD ROM and or Hard Drive IDE ribbon cable for two devices or one device directly into J4 Dot indicates pin 1 56 ...

Page 57: ...in Setup Setup parameters and booting The parameters in the BIOS Setup must match the actual system configuration for the XE 800 SBC to properly boot In particular if you add an IDE device you must specify it in the Secondary Slave or Secondary Master fields in the Main menu Also if the added device is to be used to boot the system it must be at the top of the list in the Setup Boot menu Other fac...

Page 58: ...the following specifications Each I O chip has 24 I O lines grouped into 3 ports of 8 bits Each bit is programmable as either 5V input or 5V output Read back state of each pin Easy to program Each line can sink and source 15 mA Table 9 1 J6 and J14 arranged by function digital I O connectors J14 Digital I O 1 and J6 Digital I O 2 Pin Port A Pin Port B Pin Port C 19 Bit 0 10 Bit 0 13 Bit 0 21 Bit 1...

Page 59: ...bit 6 Port B bit 3 6 7 Port B bit 7 Port B bit 1 8 9 Port C bit 7 Port B bit 0 10 11 Port C bit 5 Port C bit 6 12 13 Port C bit 0 Port C bit 4 14 15 Port C bit 2 Port C bit 1 16 17 Port C bit 3 Port A bit 7 18 19 Port A bit 0 Port A bit 6 20 21 Port A bit 1 Port A bit 5 22 23 Port A bit 2 Port A bit 4 24 25 Port A bit 3 Gnd 26 5V safe is fused through a 750 mA automatic resetting fuse 59 ...

Page 60: ...cal digital I O configuration MPB 8 16 or 24 Opto Rack MPB 8 16 or 24 Opto Rack CMA 26 Ribbon Cable XE 800 SBC STB 26 CMA 26 Ribbon Cable XE 800 SBC STB 26 CMA 26 Ribbon Cable XE 800 SBC Digital I O 1 Digital I O 2 60 ...

Page 61: ...to an 8 16 or 24 position opto module rack One end of the CMA 26 cable plugs into the I O connector and the other plugs into an MPB 8 MPB 16 or an MPB 24 opto rack Refer to the MPB opto racks data sheet for more information You can also use a CMA 26 cable to connect the I O port to an STB 26 terminal board and then to the opto rack The STB 26 has two 26 pin connectors one of which connects to the ...

Page 62: ... position Port C 0 Bit 0 13 1 Bit 1 16 2 Bit 2 15 3 MPB 08 Bit 3 17 4 Bit 4 14 5 Bit 5 11 6 Bit 6 12 7 Bit 7 9 Port A 8 Bit 0 19 9 Bit 1 21 10 Bit 2 23 11 MPB 16 Bit 3 25 12 Bit 4 24 13 Bit 5 22 14 Bit 6 20 15 Bit 7 18 Port B 16 Bit 0 10 17 Bit 1 8 18 Bit 2 4 19 MPB 24 Bit 3 6 20 Bit 4 1 21 Bit 5 3 22 Bit 6 5 23 Bit 7 7 62 ...

Page 63: ... through 127h 8 8 8 Port C Port B Port A Control Register Base 120h or 124h Base 1 121h or 125h Base 2 122h or 126h Base 3 123h or 127h Port addressing Ports A B C and the control register are addressable The base I O address for I O 1 is fixed at 120h The base address for I O 2 is fixed at 124h Ports A B C and the control register are addressable with reference to the base address I O lines pulle...

Page 64: ... desired port Configuring the I O Follow these steps to configure the I O chip Note In the following examples base for I O always refers to the base address for I O 1 120h For I O 2 base is 124h 1 Write a 2 to the control register base address 3 This places the I O chip in direction mode base address 120h OUT 123h 2 control register direction mode 2 Set the direction of each bit A 0 written to the...

Page 65: ...rite a bit pattern to the desired I O port OUT 122h FFh All output bits of port C go high all input bits are unaffected 2 To read a bit pattern from the desired I O port PORTC INP 122h The byte read from port C is assigned to variable PORTC I O output program examples To configure ports A B and C as all outputs issue the commands OUT 123h 2 Direction Mode OUT 120h FFh PortA OUT 121h FFh PortB OUT ...

Page 66: ...s the operating system the I17HNDLR EXE TSR can be used Once executed the TSR is active but it must be executed each time the system is rebooted Copy the I17HNDLR EXE utility to your boot device and add it to your AUTOEXEC BAT Note The INT17 functions can only be used with DOS operating systems If you use a different operating system the INT17 functionality can still be used by your application bu...

Page 67: ...on efh Subfunction 01h Purpose To write a value to an I O port Calling registers AH efh AL 01h DI Port A mask and data Mask Data xxxxxxxx xxxxxxxxB Mask 1 bit to be changed BX Port B mask and data Mask Data xxxxxxxx xxxxxxxxB Mask 1 bit to be changed CX Port C mask and data Mask Data xxxxxxxx xxxxxxxxB Mask 1 bit to be changed DX ffffh Return registers Carry flag cleared if successful Carry flag s...

Page 68: ...fffh Return registers AL Port A data Ah Port B data BL Port C data Carry flag cleared if successful Carry flag set if error AL Error code Comments This function is used to read from the I O Programming example Inline assembly code for Borland C 3 1 asm mov ax 0efoch mov dx 0ffffh int 17h mov aData al mov bData ah mov cData bl 68 ...

Page 69: ...24 bpp 1024 x 768 x 16 bpp Support for plasma and TFT flat panel displays 3V flat panel support 5V requires alternate power source Flat panel power sequencing Connecting a monitor To use a monitor or a flat panel the Video jumper W1 5 6 must be installed This is the default configuration The 10 pin connector at J3 supports an analog CGA VGA SVGA XVGA CRT color or monochrome monitor The 2 mm VGA 12...

Page 70: ... VGA 12 adapter cable into J3 on the XE 800 SBC 3 Plug the DB 15 end of the VGA 12 cable into the VGA cable of the monitor Refer to Figure 10 1 Table 10 1 J3 CRT connector J3 CRT Connector Pin Pin Name Pin Name Pin 1 RD GR 2 3 BL GND 4 5 5V GND 6 7 HSYNCOUT DDC SDA 8 9 DDC SCL VSYNCOUT 10 Figure 10 1 The XE 800 SBC and a VGA monitor PS 2 Keyboard VGA Monitor 2 mm VGA 12 cable XE 800 SBC Dot indica...

Page 71: ...cific to your flat panel or refer to your flat panel information If your flat panel requires a bias voltage refer to the manufacturer s documentation for procedures on supplying the proper bias voltage WARNING Since improper voltage levels can severely damage the flat panel make sure the bias voltage is correct before the flat panel is connected to the XE 800 SBC Connecting the flat panel to the X...

Page 72: ...PDATA 3 SDA 12 13 Gnd FPDATA 15 14 15 FPDATA 4 FPDATA 16 16 17 FPDATA 5 FPDATA 17 18 19 FPDATA 6 Gnd 20 21 FPDATA 7 FPDISPEN 22 23 Gnd VCC3 24 25 FPDATA 8 VCC3 26 27 FPDATA 9 FPVSYNC 28 29 FPDATA 10 Gnd 30 31 FPDATA 11 FPHSYNC 32 33 Gnd VCC3 34 35 PCIRST VCC3 36 37 Gnd Gnd 38 39 Gnd Gnd 40 active low Figure 10 2 The XE 800 SBC and a flat panel display Flat Panel Display XE 800 SBC 72 ...

Page 73: ...ble keyboard and a CompactFlash to the XE 800 SBC Note If a monitor and keyboard are not available connect the XE 800 SBC to your PC by using a remote serial console Refer to the Serial Console section in the Console devices chapter 2 Power on the XE 800 SBC 3 Select the correct DAT file Example LQ12S31 DAT 4 Run PGMVIDEO Example XE 800 SBC C PGMVIDEO XE800 BIOS LQ12S31 DAT 5 Power off the XE 800 ...

Page 74: ...he XE 800 SBC Ethernet uses twisted pair wiring cable which is built in a star configuration The interface terminates at the standard 8 position RJ 45 latching jack CAUTION Use a strain relief loop when connecting to the XE 800 SBC Ethernet connector to avoid damaging the connector The Ethernet port uses IRQ11 For more information on programming the Ethernet port see the README file in the Etherne...

Page 75: ... if the IOW line is routed to four ICs on the module without a buffer then the loading is equivalent to four PC 104 modules Stacks with three or more expansion modules should be carefully tested under all environmental conditions If possible query the manufacture of the expansion module regarding loading All Octagon products present one load The situation is even more critical for the PC 104 Plus ...

Page 76: ...andard USB connectors Octagon p n 6288 This cable consists of two five pin connectors that mate with the J16 connector on one end and two USB connectors at the other end Ensure that the arrow on the five pin connectors is matched to the pin 1 end of J16 Any USB device can then plug into either USB interface on the USB adapter cable or into a multi port hub that then plugs into the USB adapter cabl...

Page 77: ...n managing the XE 800 SBC in the areas of internal control and troubleshooting The following chapters are included Chapter 14 Watchdog timer and hardware reset Chapter 15 Serial EEPROM Chapter 16 System jumpers user jumper and BIOS recovery Chapter 17 Troubleshooting 77 ...

Page 78: ... long as three minutes To ensure that the watchdog does not reset the system accidentally always strobe the watchdog at a rate of at least twice the selected timeout period Booting power down and strobing the watchdog timer When the watchdog is enabled in Setup it sets the timeout period for two minutes The BIOS will strobe the watchdog during the boot process and once more just before booting is ...

Page 79: ...required for your application source code is available on the Octagon Product CD ROM to access the watchdog OS Development Kits are available from Octagon for Linux QNX and Windows CE net that have watchdog drivers for these operating systems Contact Octagon Systems for more information Enable watchdog Function fdh Subfunction 01h Purpose To enable the watchdog Calling registers AH fdh AL 01h BX t...

Page 80: ...rogramming example Inline assembly code for Borland C 3 1 asm mov ax 0fd02h mov dx 0ffffh int 17h Disable watchdog Function fdh Subfunction 03h Purpose To disable the watchdog Calling registers AH fdh AL 03h DX ffffh Return registers None Comments This function disables the watchdog Once the watchdog is enabled it has to be strobed at least twice per timeout period or until the watchdog is disable...

Page 81: ...he system The RESET command accomplishes the same thing as the reset button Refer to the component diagram in the Quick start chapter for the location of the reset switch and to Appendix B Software utilities for information on the Reset utility WARNING When using COM1 as the console the CTRL ALT DEL commands on the host system keyboard only reset the host system Use the RESET command to issue a ha...

Page 82: ...d Return serial EEPROM size Serial EEPROM Read a single word from the serial EEPROM Function fch Subfunction 00h Purpose To read a single word from the on board serial EEPROM Calling registers AH fch AL 00h BX Word address zero based DX ffffh User area relative address Return registers Carry flag cleared if successful AX Word read Carry flag set if error AL Error code Error code Meaning ffh Unknow...

Page 83: ... a word to the user area of the serial EEPROM Programming example Write 0x1234 to word 3 unsigned int seeData 0x1234 Inline assembly code for Borland C 3 1 asm mov ax 0fc01h mov bx 03h Write word 3 mov cx seeData Get write data from c environment mov dx 0ffffh int 17h Read multiple words from the serial EEPROM Function fch Subfunction 02h Purpose To read multiple words from the on board serial EEP...

Page 84: ...g registers AH fch AL 03h BX Word address zero based CX Word count DX ffffh DS SI Source pointer Return registers Carry flag cleared if successful Carry flag set if error AL Error code Error Code Meaning ffh Unknown error 01h Function not implemented 02h Defective serial EEPROM 03h Illegal access Comments This function writes multiple words to the user area of the serial EEPROM Programming example...

Page 85: ...ror code Error code Meaning ffh Unknown error 01h Function not implemented 02h Defective serial EEPROM 03h Illegal access Comments This function returns the size in words of the serial EEPROM Since the user cannot access all of the serial EEPROM this function determines how much space is available to the user This avoids the user from accessing unavailable addresses Programming example unsigned in...

Page 86: ...uration jumper W1 W1 System Configuration Label Description W1 S System parameters option jumper Installed enable User Setup options Removed enable BIOS Setup default 1 2 X BIOS extension enable Installed enable extended BIOS allows use of INT17 calls without loading I17HNDLER EXE Removed disables extended BIOS frees location D8000 DFFFF 3 4 V Video jumper Installed enable on card video Removed di...

Page 87: ... 7 8 and is associated with GPIO 23 of the Winbond SuperIO controller The INT17 functions provide an easy method to implement software routines according to whether or not a jumper has been installed Refer to the INT17 calls to read user jumper on page 88 BIOS recovery jumper The BIOS recovery jumper on the XE 800 SBC is W1 9 10 This jumper allows you to reinstall the BIOS from a floppy disk using...

Page 88: ...S subdirectory to the root of a bootable CompactFlash disk 2 Boot the XE 800 SBC from the CompactFlash disk with a CRT monitor or flat panel connected to the system Note that HIMEM SYS or other memory managers cannot be used in CONFIG SYS 3 At the DOS prompt for the C drive type phlash enter The utility will display a progress screen and tell you when the process is done You may need to push the r...

Page 89: ...MOV AX 0fb0bh MOV DX 0ffffh INT 17h MOV aData AL if aData 1 printf U1 jumper is ON n 89 ...

Page 90: ...other operating systems if they attempt to use this memory range Removing the X jumper frees this memory for use by other operating systems No system LED activity If there is no LED activity at CR9 check the following Make sure all PC 104 or PC 104 Plus expansion cards are removed from the XE 800 SBC This ensures that other cards are not interacting with the XE 800 SBC Remove the jumper from the S...

Page 91: ...ideo exe utility to either program the desired flat panel VIDEO BIOS into the XE 800 SBC or program in the CRT DAT file for analog monitor support to recover the system 4 Replace the S and V jumpers and re boot the system Video is present but is distorted If video is present but is distorted check the following Make sure all PC 104 or PC 104 Plus expansion cards are removed from the XE 800 SBC Thi...

Page 92: ... oscilloscope screen The voltage level should switch between 8V Garbled serial console screen activity If you do get activity on your console screen but the message is garbled check the following Remove the jumper from the S position at W1 1 2 to ensure the default settings for COM1 Make sure that your terminal emulator such as HyperTerminal on your PC is set up properly Refer to the Console devic...

Page 93: ...rd bias This is typically caused by using power supplies that have large output capacitors Either use a different power supply that discharges faster leave the power off until the supply has adequate time to discharge or place a 100 ohm large wattage resistor across the output capacitor LED signaling of beep codes Description The XE 800 SBC has a bicolor LED that is used by the BIOS to indicate th...

Page 94: ...t Initialize PCI Bus Mastering devices Initialize keyboard controller BIOS ROM checksum Initialize cache before memory Auto size 8254 timer initialization 8237 DMA controller initialization Reset Programmable Interrupt Controller Test DRAM refresh Test 8742 Keyboard Controller Set ES segment register to 4 GB Auto size DRAM Initialize POST memory manager Clear 512 KB base RAM ROM failure on address...

Page 95: ...ernal L2 cache size Load custom defaults optional Display shadow area message Display possible high address for UMB recovery Display error messages Check for configuration errors Check for keyboard errors Set up hardware interrupt vectors Initialize Intelligent System Monitoring Initialize coprocessor if present Disable onboard Super I O ports and IRQs Late POST device initialization Detect and in...

Page 96: ...e end of POST POST done prepare to boot operating system One short beep before boot Terminate QuietBoot optional Check password optional Initialize ACPI BIOS Prepare Boot Initialize SMBIOS Initialize PnP Option ROMs Clear parity checkers Display MultiBoot menu Clear screen optional Check virus and backup reminders Try to boot with Int 19h Initialize POST Error Manager PEM Initialize error logging ...

Page 97: ...he more information you can provide the easier it will be for Technical Support staff to help you solve the problem For additional technical assistance try the following Technical Support telephone 303 426 4521 E mail Technical Support fasthelp octagonsystems com Applications Notes via web www octagonsystems com 97 ...

Page 98: ...iew Section 4 Appendices Section 4 contains a series of appendices which provides additional information about the XE 800 SBC Appendix A Technical data Appendix B Software utilities Appendix C Accessories 98 ...

Page 99: ... EIDE hard drive support with on card hard drive controller and BIOS Accessed via 44 pin connector Supports up to three EIDE devices CompactFlash appears as the primary EIDE device CompactFlash socket Supports Type I and Type II CompactFlash devices USB 4 ports USB 2 0 compliant 2 additional ports USB 1 1 compatible Serial I O IEC1000 level 3 ESD protection specification Contact discharge 6 kV Air...

Page 100: ... SDRAM typically 1500 mA 256 MB SDRAM typically 1700 mA Note The power supply for the XE 800 must meet the startup risetime requirements specified in the ATX Power Design Guide version 1 1 section 3 3 5 This assures that all the circuitry on the XE 800 sequences properly and avoids system lockup Environmental specifications Operating temperature 40 to 70 C 300 MHz with no air flow 40 to 80 C 300 M...

Page 101: ...er Molex 39 01 2100 J9 Keyboard Mouse PS 2 J10 AT battery BERG 65039 033 J11 Ethernet RJ45 J12 USB3 4 standard USB A cable J13 USB5 6 standard USB A cable J14 Digital I O 1 Amp 746288 6 J15 COM1 2 Amp 746288 4 J16 USB1 2 Octagon 6288 cable J500 CompactFlash N A XU1 SDRAM SODIMM N A Maps Table A 2 XE 800 SBC DMA map XE 800 SBC DMA map Channel Description Channel 0 Reserved for bus memory refresh Ch...

Page 102: ...le X170h to X17Fh IDE Controller secondary X180h to X1EFh Off card I O space available X1F0h to X1F7h IDE Controller primary X208h to X20Fh System I O space not available X278h to X27Bh available X2E8h to X2EFh System I O space not available X2F8h to X2FFh COM 1 or 2 Setup selectable X320h to X377h System I O space not available X378h to X37Bh available X3F8h to X3FFh COM 1 or 2 Setup selectable d...

Page 103: ...ary CompactFlash PC 104 IRQ15 IDE Secondary PC 104 available when functions disabled in Setup Table A 5 XE 800 SBC memory map XE 800 SBC memory map Address Size Description Shadowing 00000H to 9FFFFH 640KB DOS and extended BIOS RAM A0000H to BFFFFH 128KB Off Card Memory shadowable C0000H to CBFFFH 48KB Video BIOS ENABLED CC000H to D7FFFH 48KB Off Card Memory D8000H to DFFFFH 32KB Extended BIOS Are...

Page 104: ...tended BIOS frees location D8000 DFFFF 3 4 V Video jumper Installed enable on card video Removed disable on card video 5 6 U User jumper 7 8 R Bios recovery jumper Installed normal BIOS operation Removed allows new BIOS to be installed 9 10 default Table A 7 COM2 jumper W2 W2 COM2 jumper COM Port Interface Jumper Settings RS 422 RS 485 no termination No jumpers on W2 COM2 RS 422 RS 485 with termin...

Page 105: ...2 3 Gnd FPDATA 12 4 5 FPDATA 0 FPDATA 13 6 7 FPDATA 1 FPDATA 14 8 9 FPDATA 2 SCL 10 11 FPDATA 3 SDA 12 13 Gnd FPDATA 15 14 15 FPDATA 4 FPDATA 16 16 17 FPDATA 5 FPDATA 17 18 19 FPDATA 6 Gnd 20 21 FPDATA 7 FPDISPEN 22 23 Gnd VCC3 24 25 FPDATA 8 VCC3 26 27 FPDATA 9 FPVSYNC 28 29 FPDATA 10 Gnd 30 31 FPDATA 11 FPHSYNC 32 33 Gnd VCC3 34 35 PCIRST VCC3 36 37 Gnd Gnd 38 39 Gnd Gnd 40 active low 105 ...

Page 106: ... 3 3V SDONE 11 STOP 3 3V LOCK GND 12 3 3V TRDY GND DEVSEL 13 FRAME GND IRDY 3 3V 14 GND AD16 3 3V C BE2 15 AD18 3 3V AD17 GND 16 AD21 AD20 GND AD19 17 3 3V AD23 AD22 3 3V 18 IDSEL0 GND IDSEL1 IDSEL2 19 AD24 C BE3 VI O IDSEL3 20 GND AD26 AD25 GND 21 AD29 5V AD28 AD27 22 5V AD30 GND AD31 23 REQ0 GND REQ1 VI O 24 GND REQ2 5V GNT0 25 GNT1 VI O GNT2 GND 26 5V CLK0 GND CLK1 27 CLK2 5V CLK3 GND 28 GND IN...

Page 107: ...C5 VCC5 41 40 Gnd IDES LED 39 38 IDESCSI IDESCS0 37 36 IDESA 2 IDESA 0 35 34 NC IDESA 1 33 32 NC IDESINTR 31 30 Gnd IDESDACK 29 28 NC IDESIORDY 27 26 Gnd IDESTOR 25 24 Gnd IDESTOW 23 22 Gnd IDESDRO 21 20 KEY Gnd 19 18 IDEDS 15 IDEDS 0 17 16 IDEDS 14 IDEDS 1 15 14 IDEDS 13 IDEDS 2 13 12 IDEDS 12 IDEDS 3 11 10 IDEDS 11 IDEDS 4 9 8 IDEDS 10 IDEDS 5 7 6 IDEDS 9 IDEDS 6 5 4 IDEDS 8 IDEDS 7 3 2 Gnd IDES...

Page 108: ... J6 Digital I O 2 Pin Pin Name Pin Name Pin 1 Port B bit 4 Vcc 5V 2 3 Port B bit 5 Port B bit 2 4 5 Port B bit 6 Port B bit 3 6 7 Port B bit 7 Port B bit 1 8 9 Port C bit 7 Port B bit 0 10 11 Port C bit 5 Port C bit 6 12 13 Port C bit 0 Port C bit 4 14 15 Port C bit 2 Port C bit 1 16 17 Port C bit 3 Port A bit 7 18 19 Port A bit 0 Port A bit 6 20 21 Port A bit 1 Port A bit 5 22 23 Port A bit 2 Por...

Page 109: ...17 IOR 6 IRQ15 LS19 15 A16 DACK3 7 IRQ14 LA18 16 A15 DRQ3 8 DACK0 LA17 17 A14 DACK1 9 DRQ0 MEMR 18 A13 DRQ1 10 DACK5 MEMW 19 A12 REFRESH 11 DRQ5 SD8 20 A11 SYSCLK 12 DACK6 SD9 21 A10 IRQ7 13 DRQ6 SD10 22 A9 IRQ6 14 DACK7 SD11 23 A8 IRQ5 15 DRQ7 SD12 24 A7 IRQ4 16 5V SD13 25 A6 IRQ3 17 MASTER SD14 26 A5 DACK2 18 GND SD15 27 A4 TC 19 GND GND KEY 28 A3 BALE 29 A2 5V 30 A1 OSC 31 A0 GND 32 GND GND Tab...

Page 110: ...ND 4 5V 5 KCLK 6 MCLK Table A 17 J10 Battery Connector J10 battery connector Pin Pin Name 1 Battery 2 Key 3 nc 4 Battery Table A 18 J11 Ethernet connectors J11 Ethernet connector RJ pin Pin Name 1 TxD 2 TxD 3 RxD 4 comm mode term 5 comm mode term 6 RxD 7 comm mode term 8 comm mode term 110 ...

Page 111: ...Same as J6 Table A 21 J15 COM1 and COM2 connector pin outs COM1 COM2 Pin RS 232 signal Pin RS 232 signal 1 2 3 4 5 6 7 8 9 10 DCD DSR RxD RTS TxD CTS DTR RI GND nc 11 12 13 14 15 16 17 18 19 20 DCD DSR RxD RTS TxD CTS DTR RI GND nc Table A 22 J16 USB connector J16 USB connector Pin Pin Name Pin Name Pin 1 USB1 power USB2 power 2 3 USB1 USB2 4 5 USB1 USB2 6 7 Gnd Gnd 8 9 Gnd Gnd 10 111 ...

Page 112: ...9 GND GND 10 11 GND GND 12 13 5V GND 14 15 GND GND 16 17 GND A2 18 19 A1 A0 20 21 DD0 DD1 22 21 DD2 NC 24 25 NC NC 26 27 DD11 DD12 28 29 DD13 DD14 30 31 DD15 HDCS1 32 33 NC IOR 34 35 IOW 5V 36 37 IRQ14 5V 38 39 M S select NC 40 41 RST IORDY 42 43 NC 5V 44 45 ACTLED PDIAG 46 47 DD8 DD9 48 49 DD10 GND 50 51 NC NC 52 active low 112 ...

Page 113: ...ers and utilities are in a self extracting zip file located at the Octagon Systems web site on the XE 800 product page Download this file to a separate directory on your hard drive then double click on it to extract the files Support commands GETVIDEO I17HNDLR EXE PGMVIDEO EXE PHLASH EXE RESET COM 113 ...

Page 114: ...ideo to update the video BIOS settings This is a useful command to copy the video BIOS from one CPU card to another or to confirm the current video BIOS settings I17HNDLR EXE Purpose This support command is an alternate way to use the INT 17h functions when the extended BIOS area is disabled i e the jumper at the X position is removed at W1 Also use this support command to reprogram the extended B...

Page 115: ... also For more information on supported video BIOS files see the README TXT file PHLASH EXE Purpose This support command will program a BIOS image from a floppy drive or a subdirectory to the 512K flash EPROM Syntax PHLASH Remarks Phlash exe must have two files that are located the same directory as the Phlash exe file These files are BIOS ROM a 256K BIOS image and platform bin a support file that...

Page 116: ...ng the system Syntax RESET Remarks The RESET command also restarts all the expansion I O cards on the bus This differs from a CTRL ALT DEL reboot of the system which only restarts the system but not the expansion cards The RESET button on the XE 800 SBC also accomplishes the same thing as the RESET command 116 ...

Page 117: ...duct Description Octagon p n Cables CMA 10 24 24 cable for I O port 10 pin 1743 CMA 26 12 12 cable for digital IO port 26 pin 2776 CMA 26 24 24 cable for digital IO port 26 pin 1257 Terminal Boards STB 26 Terminal board 26 position 2905 STB 20 Terminal board 20 position 2904 STB 14 Terminal board 14 position 2902 STB 10 Terminal board 10 position 2901 TBD 100 Terminal board with LED indicators 118...

Page 118: ...basis without warranty The warranty and remedies set forth above are in lieu of all other warranties expressed or implied oral or written either in fact or by operation of law statutory or otherwise including warranties of merchantability and fitness for a particular purpose which Octagon specifically disclaims Octagon neither assumes nor authorizes any other liability in connection with the sale ...

Page 119: ...TED AND WILL BE RETURNED FREIGHT COLLECT Returns There will be a 15 restocking charge on returned product that is unopened and unused if Octagon accepts such a return Returns will not be accepted 30 days after purchase Opened and or used products non standard products software and printed materials are not returnable without prior written agreement Governing law This agreement is made in governed ...

Reviews: