Table
of Contents
16
C
HAPTER
2: S
CANNING
I
TEMS
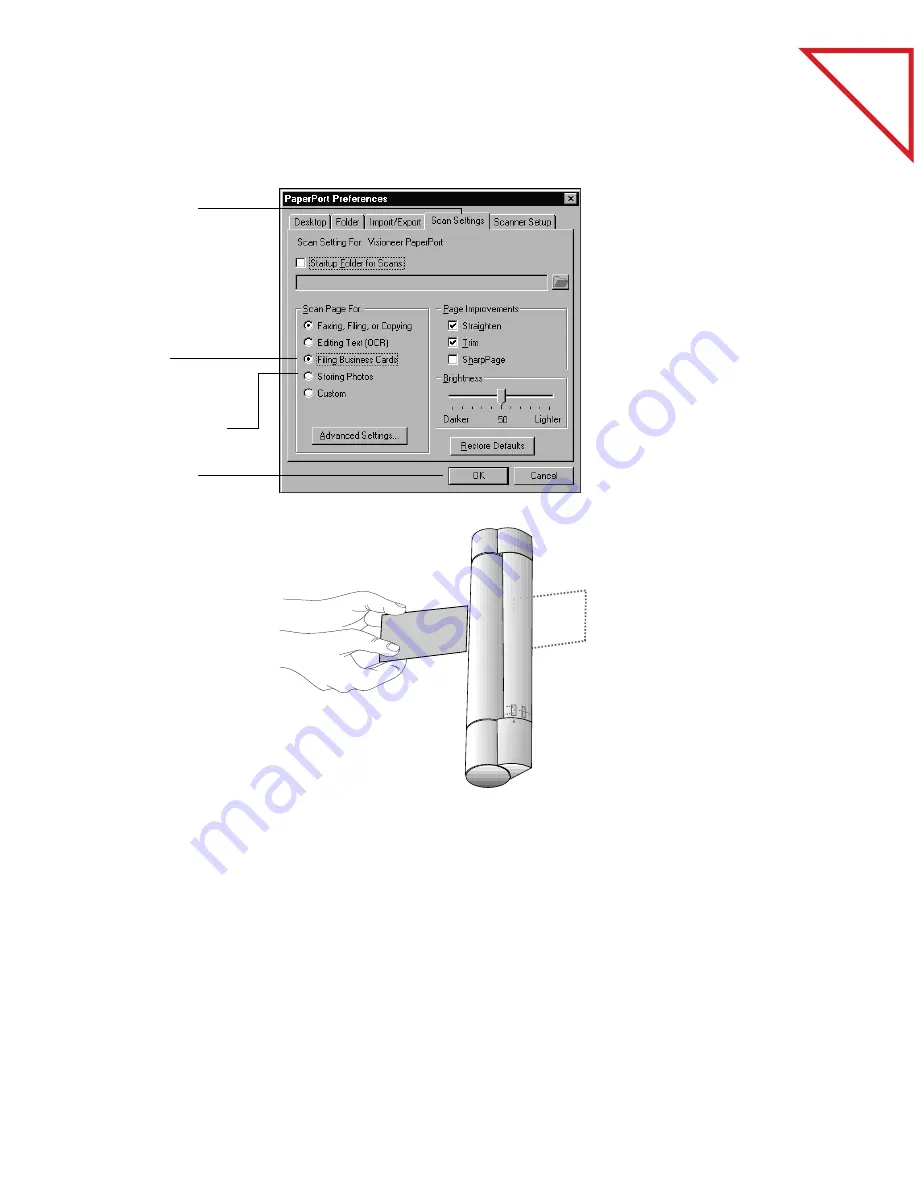
The card (or photo) feeds straight through the scanner, and a preview
of the scan appears as the scanning progresses. When scanning is
complete, the item appears on the PaperPort Desktop.
Make sure the
Scan Settings tab
is selected.
4.
If you are
scanning a
business card,
select the option,
Filing Business
Cards.
When scanning
photos, select
Storing Photos
5.
Click OK.
John Smythe
1212 Forbes Blvd.
S.S.F 941
10
Consolidated Mo
vers
6.
Insert the item,
face up, into the
front slot on the
PaperPort
scanner.
This example
shows scanning a
business card.
Summary of Contents for DRAGON NATURALLYSPEAKING PROFESSIONAL 4-
Page 4: ...vi TABLE OF CONTENTS...
Page 30: ...T a b l e o f C o n t e n t s 26 CHAPTER 3 VIEWING ITEMS...
Page 38: ...T a b l e o f C o n t e n t s 34 CHAPTER 4 STACKING ITEMS...
Page 44: ...T a b l e o f C o n t e n t s 40 CHAPTER 5 SENDING A FAX OR E MAIL MESSAGE...
Page 50: ...T a b l e o f C o n t e n t s 46 CHAPTER 6 USING SCANDIRECT...
Page 60: ...T a b l e o f C o n t e n t s 56 CHAPTER 7 CONVERTING A SCANNED ITEM TO TEXT...
Page 66: ...T a b l e o f C o n t e n t s 62 CHAPTER 8 FILLING IN PREPRINTED FORMS WITH FORMTYPER...
Page 88: ...T a b l e o f C o n t e n t s 84 CHAPTER 10 FILING ITEMS IN FOLDERS...
Page 90: ...T a b l e o f C o n t e n t s 86 APPENDIX A PAPERPORT VIEWER...


