Chapter 19 UPnP
365
Nortel Business Secure Router 252 Configuration — Basics
Installing UPnP in Windows example
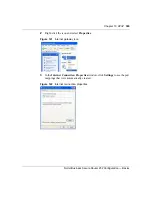
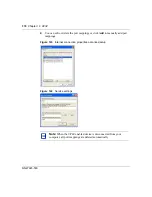
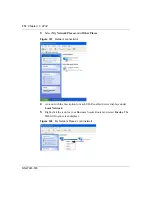
This section shows how to install UPnP in Windows Me and Windows XP.
Installing UPnP in Windows Me
Follow the steps below to install UPnP in Windows Me.
1
Click
Start
and
Control Panel
. Double-click
Add/Remove Programs
.
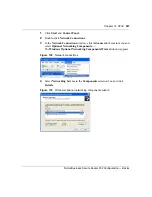
2
Click on the
Windows Setup
tab and select
Communication
in the
Components
selection box. Click
Details
.
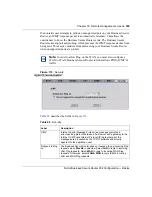
External Port
This field displays the port number that the Business Secure Router
listens on (on the WAN port) for connection requests destined for the
Internal Port
and
Internal Client
of the NAT rule. The Business Secure
Router forwards incoming packets (from the WAN) with this port number
to the
Internal Client
on the
Internal Port
(on the LAN). If the field
displays “0”, the Business Secure Router ignores the
Internal Port
value and forwards requests on all external port numbers (that are
otherwise unmapped) to the
Internal Client
.
Protocol
This field displays the protocol of the NAT mapping rule (TCP or UDP).
Internal Port
This field displays the port number on the
Internal Client
to which the
Business Secure Router forwards incoming connection requests.
Internal Client
This field displays the DNS host name or IP address of a client on the
LAN. Multiple NAT clients can use a single port simultaneously if the
internal client field is set to 255.255.255.255 for UDP mappings.
Enabled
This field displays whether or not this UPnP-created NAT mapping rule
is turned on. The UPnP-enabled device that connected to the Business
Secure Router and configured the UPnP-created NAT mapping rule on
the Business Secure Router determines whether or not the rule is
enabled.
Description
This field displays a text explanation of the NAT mapping rule.
Lease Duration This field displays the time to live (in seconds) for a dynamic
port-mapping rule. It displays “0” if the port mapping is static.
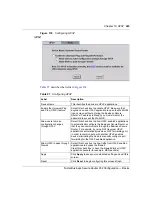
Apply
Click
Apply
to save your changes to the Business Secure Router.
Refresh
Click
Refresh
to update the table.
Table 98
UPnP Ports
Label
Description
Summary of Contents for BSR252
Page 28: ...28 Tables NN47923 500 ...
Page 44: ...44 Chapter 1 Getting to know your Business Secure Router NN47923 500 ...
Page 52: ...52 Chapter 2 Introducing the WebGUI NN47923 500 ...
Page 70: ...70 Chapter 3 Wizard setup NN47923 500 ...
Page 96: ...96 Chapter 5 System screens NN47923 500 ...
Page 114: ...114 Chapter 7 WAN screens NN47923 500 Figure 27 WAN IP ...
Page 120: ...120 Chapter 7 WAN screens NN47923 500 Figure 31 Dial Backup Setup ...
Page 128: ...128 Chapter 7 WAN screens NN47923 500 ...
Page 152: ...152 Chapter 9 Static Route screens NN47923 500 ...
Page 194: ...194 Chapter 11 Firewall screens NN47923 500 ...
Page 210: ...210 Chapter 13 VPN NN47923 500 Figure 67 Summary IP Policies ...
Page 222: ...222 Chapter 13 VPN NN47923 500 Figure 71 VPN Branch Office rule setup ...
Page 256: ...256 Chapter 13 VPN NN47923 500 Figure 81 VPN Client Termination advanced ...
Page 260: ...260 Chapter 13 VPN NN47923 500 ...
Page 264: ...264 Chapter 14 Certificates NN47923 500 Figure 83 My Certificates ...
Page 270: ...270 Chapter 14 Certificates NN47923 500 Figure 85 My Certificate create ...
Page 274: ...274 Chapter 14 Certificates NN47923 500 Figure 86 My Certificate details ...
Page 282: ...282 Chapter 14 Certificates NN47923 500 Figure 89 Trusted CA details ...
Page 298: ...298 Chapter 14 Certificates NN47923 500 ...
Page 316: ...316 Chapter 16 IEEE 802 1x NN47923 500 ...
Page 320: ...320 Chapter 17 Authentication server NN47923 500 Figure 106 Local User database edit ...
Page 328: ...328 Chapter 17 Authentication server NN47923 500 ...
Page 376: ...376 Chapter 20 Logs Screens NN47923 500 Figure 150 Log settings ...
Page 386: ...386 Chapter 20 Logs Screens NN47923 500 ...
Page 393: ...Chapter 21 Call scheduling screens 393 Nortel Business Secure Router 252 Configuration Basics ...
Page 394: ...394 Chapter 21 Call scheduling screens NN47923 500 ...
Page 410: ...410 Chapter 22 Maintenance NN47923 500 ...


