10
7. Programming Outline
Use the following programming outline to guide you through the steps
required to set up the RA4200 software and program a PERS-4200
Console. Many of the programming options available in the RA4200
program can be left in their default settings, and do not need to be
changed for most installations.
7.1 Setup RA4200 Software
• Install the software on your computer (Section 8).
• Test your computer’s modem (if used) (Section 9).
• Start the RA4200 program (Section 10).
7.2 Customize an Account Template
• Open a new or existing account template (Section 11).
• Enter Customer information (Section 11.3).
• Set the Console’s password and operational options (Section 11.4).
• Enter any wireless sensor ID codes for sensors that won’t be learned locally
(Section 11.5).
• Select the Console’s communication method and options for PSTN and/or
IP reporting (Section 11.6).
• Choose the general communicator reporting options and assign any custom
reporting codes (Section 11.7).
• Set the Reminder Message schedules (Section 11.6).
7.3 Program the Console
• Connect to the Console (Section 12.2).
• Set the Console’s time and date (Section 12.3).
• Send the account template data to the Console (Section 12.3).
✲
IMPORTANT! AFTER ANY PRO
G
RAMMIN
G
CHAN
G
ES ARE MADE TO
A CONSOLE, PERFORM THOROU
G
H TESTIN
G
TO VERIFY THAT THE
CONSOLE OPERATES AS INTENDED.
8. RA4200 Software Installation
The RA4200 remote access software is available on the Web at this link:
www.nortekcontrol.com/downloads.php
The installation program will create a directory on your hard disk drive.
Be sure that you have at least 50 megabytes free on the hard disk for the
program and any account template fi les that you create.
8.1 To Install the Remote Access Program:
1.
Download the RA4200 programming software installation package
from the Web site at the link shown above.
2.
Extract the
RA4200Setup.ZIP
fi le to expand the fi les.
3.
Browse to fi nd the
SETUP.EXE
fi le. Double-click on
SETUP.EXE
and
the installation program will start.
4.
Click the Next button to install the Remote Access software. Follow
the on-screen instructions as the setup program creates the directory
and copies the program fi les onto your hard disk. The setup program
will also install a virtual COM port driver to support a USB connection.
If desired, select the check box to place a RA4200 Remote Access
icon your desktop.
✓
NOTE: If RA4200 already is on your system and you are performing a
reinstallation, or an update, you will be prompted to modify, remove, or
repair the RA4200 software.
8.2 To Remove the Remote Access Program:
1.
Press
START
,
SETTIN
G
S
,
CONTROL PANEL
. Double-click on
ADD/
REMOVE PRO
G
RAMS
.
2.
Select RA4200 and click
ADD/REMOVE
or
CHAN
G
E/REMOVE
button depending on your Windows Operating system.
✓
NOTE: Alternately, you can select UNINSTALL from the RA4200 folder
on the start menu.
9. Testing the Modem
A modem is used when connecting to a Console remotely, over the
telephone line. A modem
is not
required for local programming with a
USB cable.
When using a modem, be sure that the computer is running correctly
and that the modem is installed and working properly before you run the
RA4200 Remote Access Program.
Use the following steps to test the modem and determine the computer’s
COM port number that it is connected to.
9.1 To Test the Modem in Windows
Windows Control Panel can be used to test the modem and determine
what COM port the modem is connected to.
1.
Open Windows Control Panel.
2.
Select
PHONE
AND MODEM
.
3.
Click on the
MODEMS
tab. The modem and the COM port used
should be shown.
4.
Note the COM port number.
It’s used when setting COM port in the
RA4200 Send/Receive window (see Section 12.1).
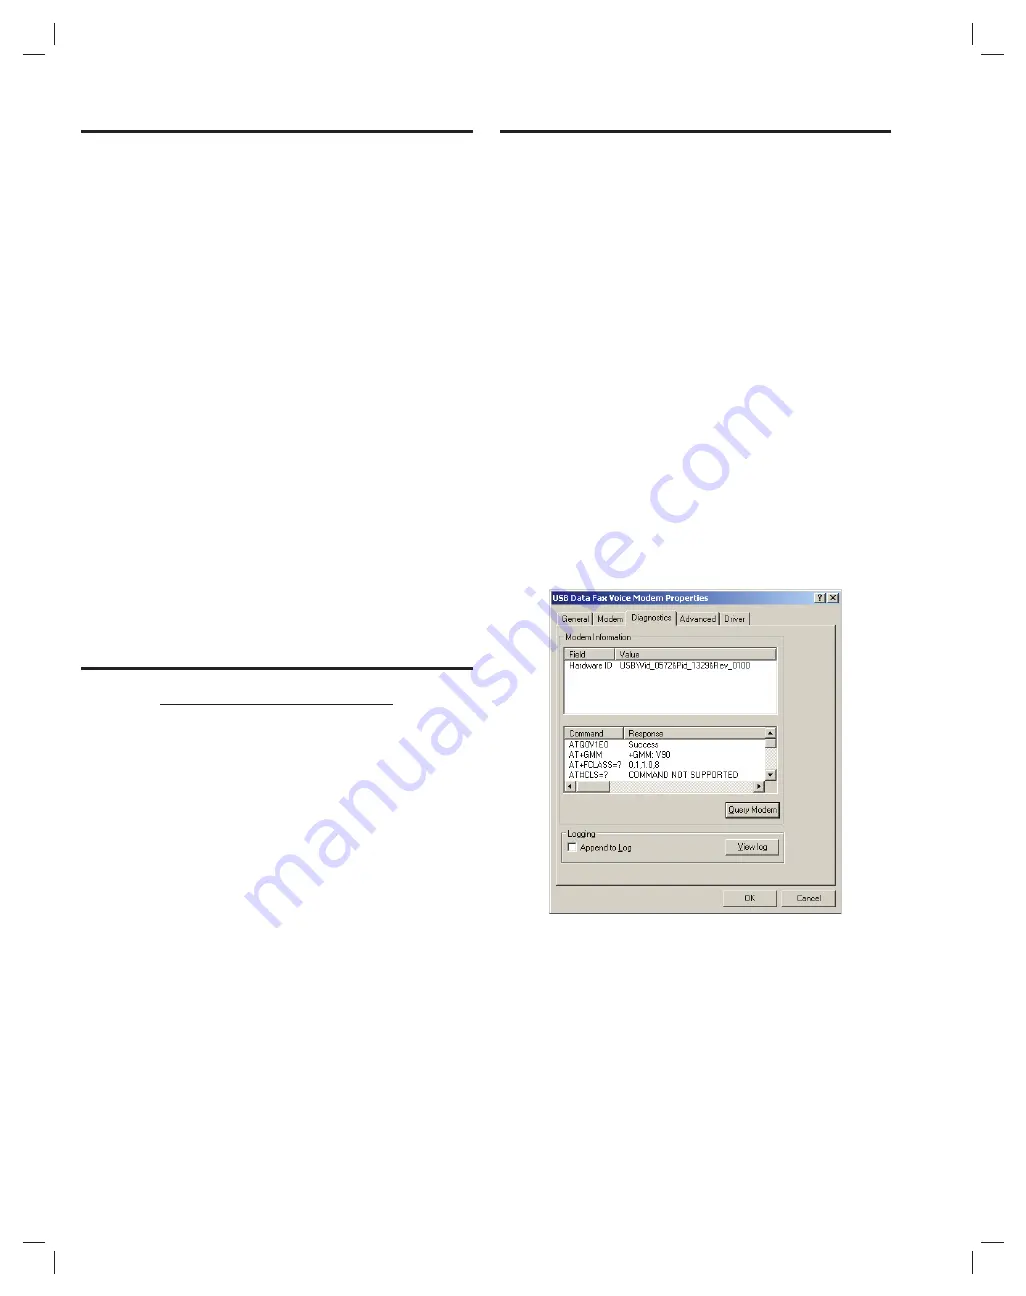
5.
Click
PROPERTIES
and select the
DIA
G
NOSTICS
tab.
6.
Click
QUERY MODEM
. If the modem is connected and working
properly, the Modem Information window will display detailed
Command and Response modem information. If the modem is not
working properly, Windows will notify you.
Windows Modem Test


