


Copyright © 2019 Nortek Security & Control LLC
53
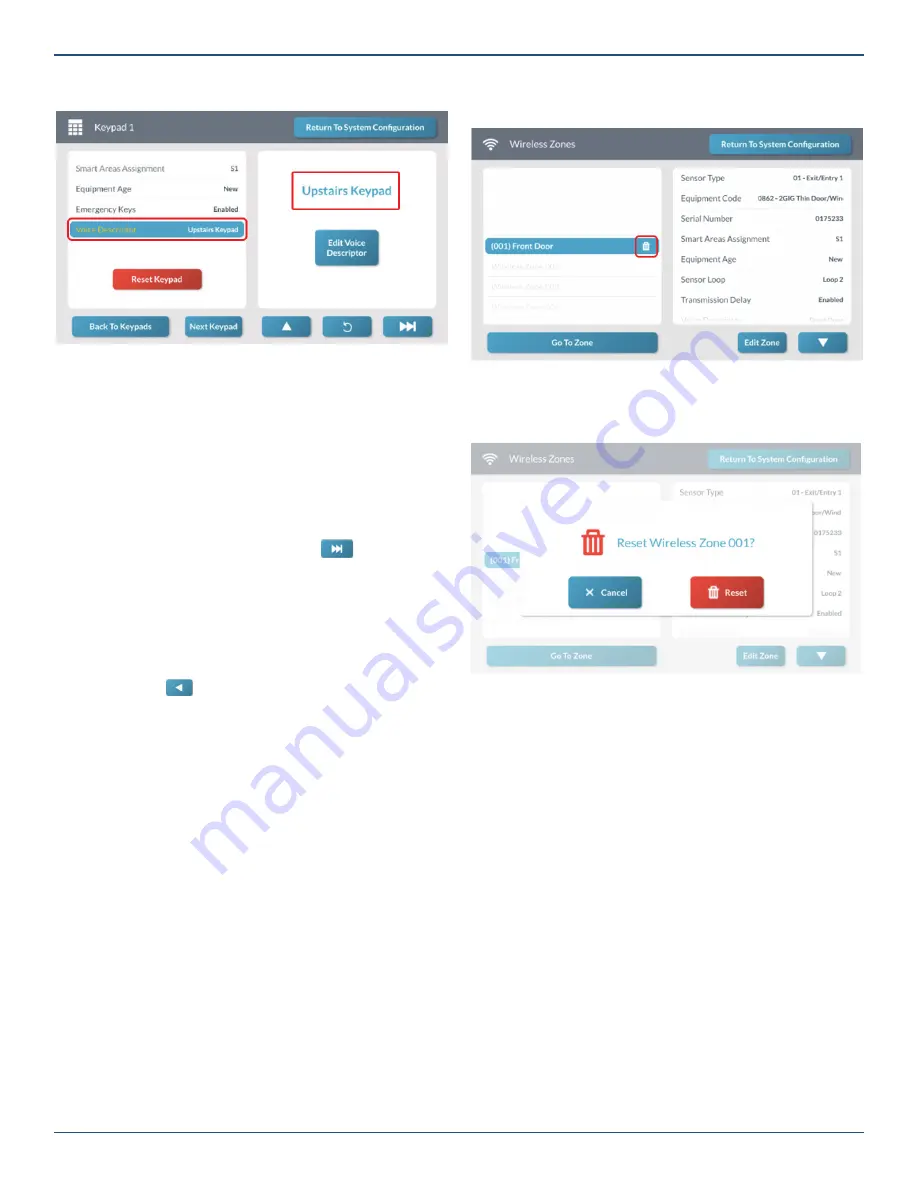
7. Review the voice descriptor.
Keypad <###> Screen—Review Voice Descriptor
Next Steps
You have
fi
nished programming a keypad. You can now
choose one of these options:
»
To program another keypad, tap
Next Keypad
repeat the programming steps for another keypad.
The system keeps track of all your programming
changes and prompts you to permanently save all
your changes as a group when you exit the
System
Con
fi
guration
menu.
»
To program the next keypad, tap
. This
button becomes visible and available only when
programming the last setting for a keypad.
»
To erase all of the settings you just programmed for
the keypad, tap
Reset Keypad
.
»
To permanently save the settings you just
programmed, tap
Return to System Con
fi
guration
.
Then tap
. At the
Con
fi
rm Changes
screen,
tap
Save
.
The following illustration is an example of the
Wireless
Zones
screen.
Example—Wireless Zones Screen
2. At the
Reset Zone
message, verify that you are
deleting the desired item. Then tap
Reset
.
Reset Zone Message
This restores the factory default settings for the speci
fi
ed
zone, keyfob, or keypad.
Reset a Zone, Keyfob, or Keypad to the Factory
Default Settings
When you reset the GC3 Panel to its factory default
settings, the system erases all of the programmed settings
for any of the zones, keyfobs, or keypads controlled by the
system.
To reset zone, keyfob, or keypad to its factory default
setting:
1. At the
Wireless Zones
,
Wired Zones
,
Keyfobs
, or
Keypads
screen, tap the trash can icon next to the
desired item.


