


Copyright © 2019 Nortek Security & Control LLC
35
See the section “Setting up a Static IP address” to manually
con
fi
gure a static connection to the network.
3. Tap
▼
.
NOTE:
Hardwired connection must be active for
the Wired tile to be available. Once a hardwired
connection is active the Wireless (WiFi) tile will be
greyed out.
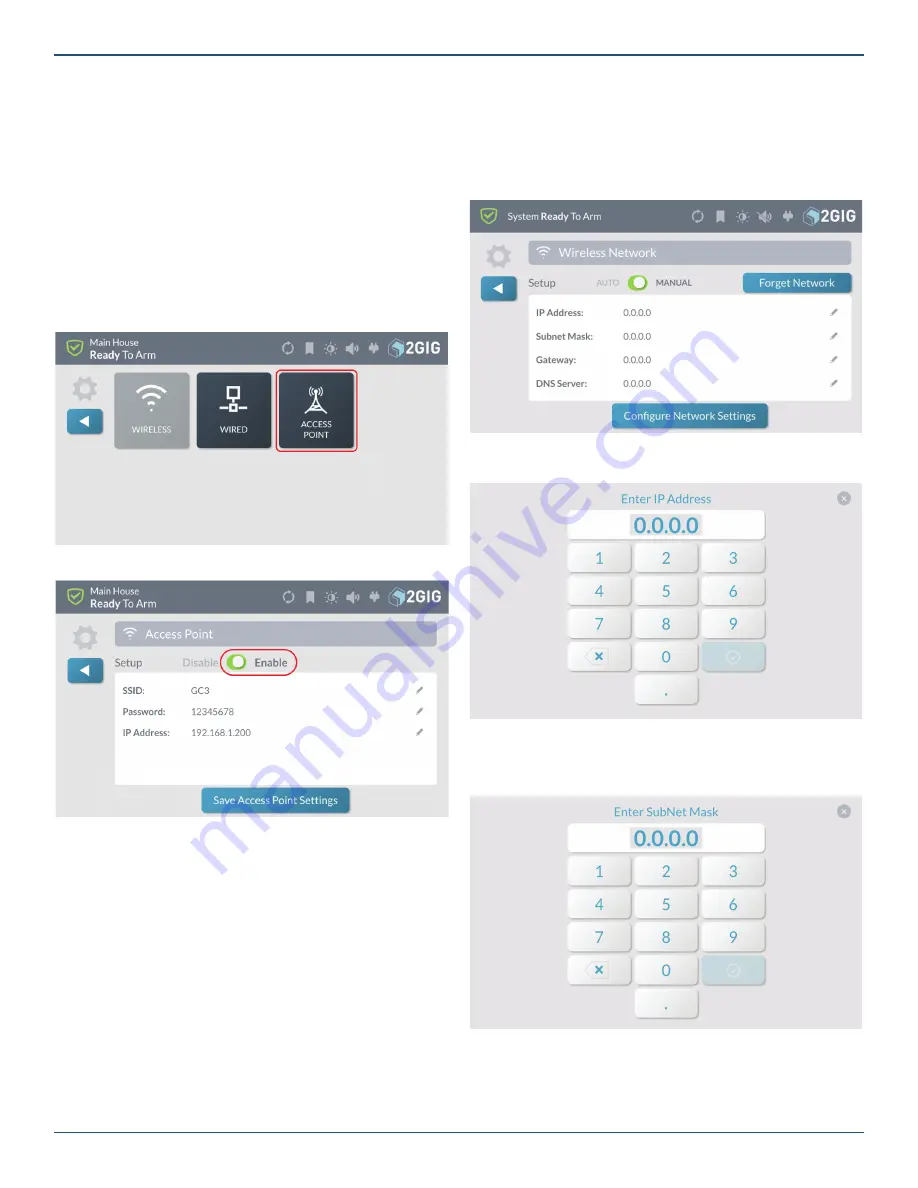
Access Point
Setup the GC3 Panel Access Point
1. Navigate to the
Installer Toolbox
menu and tap
Network Settings
.
2. Tap
Access Point
3. Enable Access Point
»
Optional:
Press
Edit
icon next to default SSID,
enter new SSID name
»
Optional:
Press
Edit
icon next to
Password
, enter
new password
»
Optional:
Press
Edit
icon next to
IP address,
the
last two octets of the Access Point can be changed
to customize setup.
4. After any edits have been made, press
Save
Access Point Settings
to save any con
fi
guration
settings.
Note:
Make a note of SSID and Password for use in
WiFi setup of SP1 and SP2 keypads.
5. Tap
▼
.
Setting Up a Static IP Address
By default the the GC3 Panel will connect using DHCP to
get the IP Address assignment. If you want to set a Static
IP Address, follow these steps.
1. Tap
Manual
and select the
Edit
icon for
IP Address
.
Auto/Manual
2. Enter the desired IP Address.
IP Address
3. Select the edit icon for
SubNet Mask
and enter the
desired
SubNet Mask Address
.
Subnet Mask


