


Copyright © 2019 Nortek Security & Control LLC
50
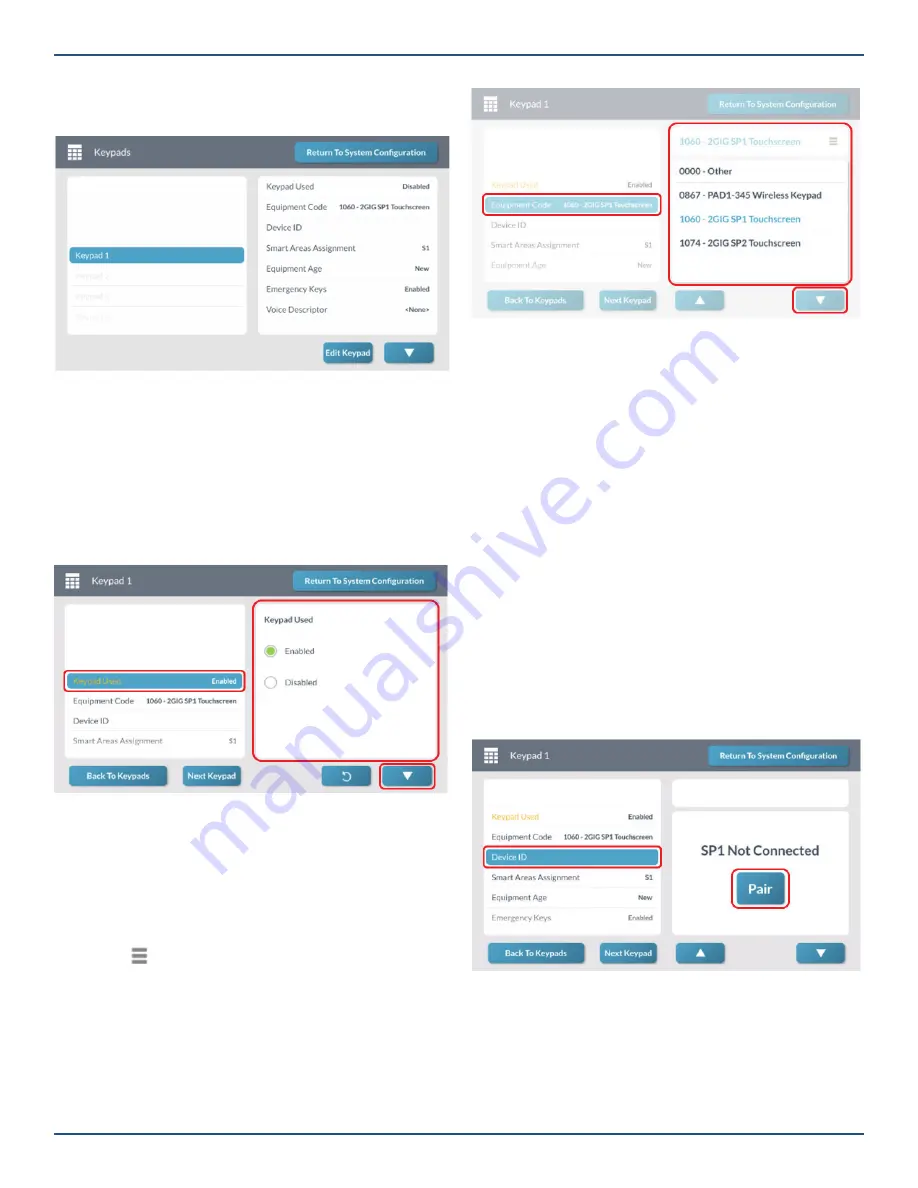
3. Tap
Edit Keypad
.
For example, tap
Keypad 1
to select it.
Keypads Screen—Edit Keypad
Step 2: Enable or Disable Keypad Used
Next, enable or disable the keypad. When enabled, the
keypad can be used with the system. When disabled, the
keypad cannot be used with the system.
1. At the
Keypad <###>
screen, highlight
Keypad
Used
.
2. Under
Keypad Used
, choose
Enabled
or
Disabled
.
Keypad <###> Screen—Keypad Used
3. Tap
▼
.
Step 3: Select Equipment Code
For a complete list of the system’s four-digit equipment
codes, see “Equipment Code.”
1. At the
Keypad <###>
screen, highlight
Equipment
Code
.
2. Tap to expand the list.
3. Tap to select the desired equipment code from the
list.
Keypad <###> Screen—Equipment Code
Tip:
You can alternatively use the touchscreen
keypad to enter the four-digit
Equipment Code
.
See “Equipment Codes.”
4. Tap
▼
.
Step 4A: Pair SP1 or SP2
Pair the SP1 or SP2 keypad to the system. If
SP1
or
SP2
was selected in
Equipment Code,
this option will show as
Device ID.
NOTE:
If programming a PAD1, the option will show
as Serial Number, follow Step 4B.
»
Before Pairing SP1 or SP2 the system and the
keypad must both be connected to the same
broadband network or keypad must be connect to
the systems internal Access Point via WiFi.
»
Before pairing a SP2, make note of the GC3s
broadband or Access Point IP address before
starting the process.
For more details, see the installation manual of the device.
1. Press
Pair
button.
2. Start pairing process on SP1 or SP2 (See SP1/2
installation manual for details).
3. System will show Device ID when paired.
4. Tap
▼
.


