


A
CCESS
G
ATEWAY
78
System Administration
serial connection with the CLI to disable the Access Control feature, or change the
range of allowed IP addresses to access the management interfaces.
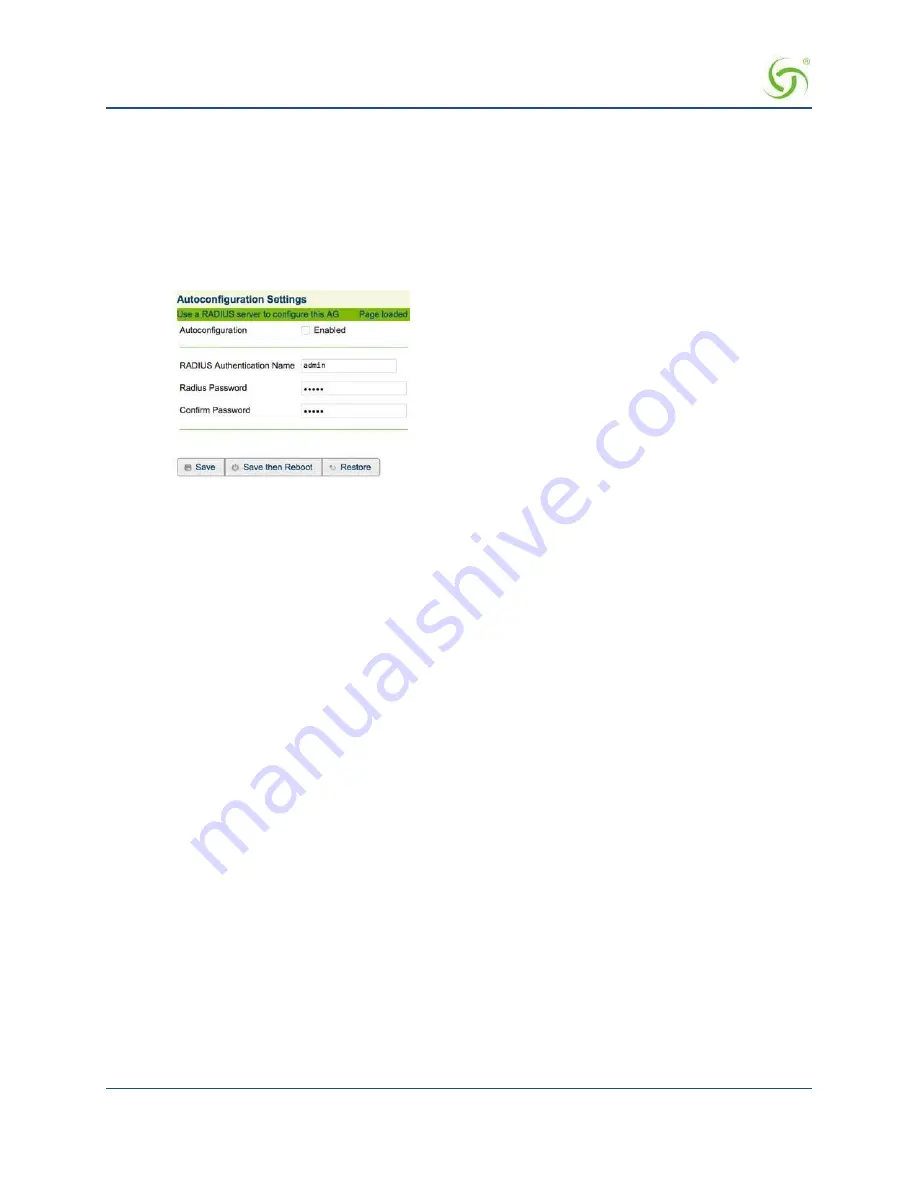
Defining Automatic Configuration Settings {Auto Configuration}
The Access Gateway allows you to define parameters to enable the automatic configuration of the system.
See also
RADIUS-driven Auto Configuration
on page 18.
1.
From the Web Management Interface, click on
Configuration
, then
Auto Configuration
.
The
Autoconfiguration Settings
screen appears:
2.
Enable or disable
Autoconfiguration
, as required.
3.
If you enabled
Autoconfiguration
, you must enter the following information into the corresponding
fields:
RADIUS Authentication Name
RADIUS Password
Confirm Password
4.
Click on the
Save
button to save your changes, click on
Save then Reboot
to reboot the Access
Gateway and make the changes take effect immediately, or click or the
Restore
button to reset all data
to its previous state.
Enabling Auto Configuration
As shown in the diagram below, two subsequent events drive the automatic configuration of Nomadix
devices:
1.
A flow of RADIUS Authentication Request and Reply messages between the Nomadix gateway and
the centralized RADIUS server that specifies the location of the meta configuration file (containing a
listing of the individual configuration files and their download frequency status) are downloaded
from an FTP server into the flash of the Nomadix device.
2.
Defines the automated login into the centralized FTP server and the actual download process into the
flash.
Step 1: RADIUS Authen Req/Response message to determine location of meta configuration file.
Step 2: FTP download of configuration files (secure)
Summary of Contents for AG 2300
Page 1: ......