


A
CCESS
G
ATEWAY
112
System Administration
8.
Click
Save
to save your changes, or click
Restore
if you want to reset all the values to their previous state.
When logging is enabled, log files and error messages are sent to these servers for future retrieval. To see
sample reports, go to
on page
on page
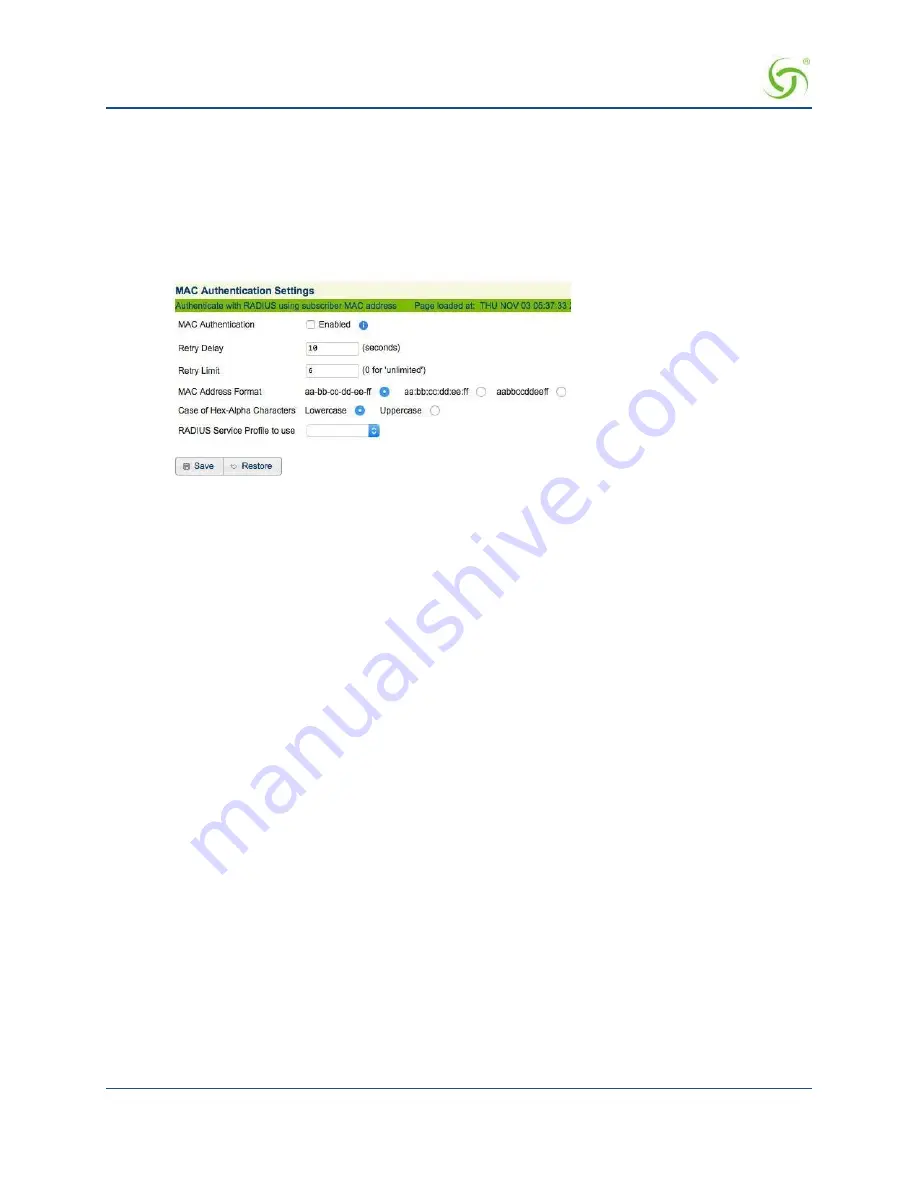
Enabling MAC Authentication {MAC Authentication}
1.
From the Web Management Interface, click on
Configuration
, then
MAC authentication
. The
MAC
Authentication Settings
screen appears:
2.
Check the
MAC Authentication
checkbox to enable the MAC-based authentication functionality.
The default setting is disabled.
3.
Enter the retry frequency (in seconds) in the
Retry Delay
field. This setting is the wait time before
reattempting MAC authentication following a failed attempt. The minimum (and default) value is 10
seconds.
4.
Enter a
Retry Limit
. This setting is the maximum number of failed attempts before ceasing to retry
authentication. Set this field to ‘0’ for unlimited attempts.
5.
Select the
MAC Address Format
. This setting is the format in which the subscriber’s MAC address
will be expressed in the RADIUS username and password attributes. The RADIUS server must use
the same format. The options are:
aa-bb-cc-dd-ee-ff
,
aa:bb:cc:dd:ee:ff
, or
aabbccddeeff
. The
default setting is
aa-bb-cc-dd-ee-ff
.
6.
Select the
Case of Hex-Alpha Characters
. This setting specifies, in the MAC addresses in RADIUS
username and password attributes, whether the hex-alpha characters A-F will be uppercase or lower
case. The options are
Lower
or
Upper
. The default setting is
Lower
.
7.
Select the
RADIUS Service Profile to use
from the
RADIUS Service Profile to use
menu. This
setting specifies the RADIUS Service Profile (and therefore, which RADIUS servers) to use for MAC-
based Authentication purposes.
8.
Click
Save
to save the settings or
Restore
to return the settings to the previous state.
Assigning Passthrough Addresses {Passthrough Addresses}
The Access Gateway allows up to 300 IP passthrough addresses and DNS names. This feature allows users to
“pass through” the Access Gateway and access predetermined services (for example, the redirected home
page) at the solution provider’s discretion, even though they may not have subscribed to the broadband Internet
service. This is useful if solution providers want to openly promote selected services to all users, even if they
are not currently subscribing (paying) for access. Allowing up to 300 passthroughs (IP and DNS) offers
customers greater promotional flexibility.
1.
From the Web Management Interface, click on
Configuration
, then
Passthrough Addresses
. The
Passthrough Address Settings
screen appears:
Summary of Contents for AG 2300
Page 1: ......