EN
6
– English
IMPORTANT!
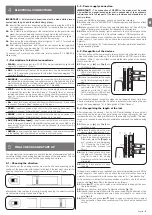
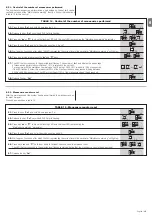
– If it is necessary to define the position of the limit switch with
greater precision, move the door back a few centimeters while giving the ope-
ning or closing commands (
s
or
t
) from the unit and then send the command
in the direction to be checked once more.
Note
– if you have already performed manual adjustment and need to repeat
the entire procedure, you may return the limit switches to their initial condition by
turning the 2 adjustment knobs toward the “
–
” sign until the micro-switches are
tripped (
fig. 15
). Then repeat the entire limit switch adjustment procedure.
Important
– If the door is not in the correct position midway along its travel
when the motor is anchored in place and the pin is moved along the rack, it
may be necessary to reduce the position of the limit switch on one side.
In this case, if the leaf opens until it hits the retainer, without complying with
the set position, turn the adjustment knob (identified by an arrow indicating
the direction in which the door moves) toward the “-” sign until the limit switch
is tripped. After this, oversee adjustment of the unit again and use precision
adjustment if necessary.
If necessary, adjust the door length again.
5.5 - Checking gate movements
On completion of the recognition of the length of the leaf, it is advisable to carry
out a number of manoeuvres in order to check the gate travels properly.
01.
Press the
[Open]
key to open the gate. Check that gate opening occurs
regularly, without any variations in speed. The leaf must only slowdown
and stop when it is between 70 and 50 cm from the opening mechanical
stop. Then, at 2÷3 cm from the mechanical opening stop the limit switch will
trigger.
02.
Press the
[Close]
key to close the gate. Check that gate closing occurs
regularly, without any variations in speed. The leaf must on ly slowdown and
stop when it is between 70 and 50 cm from the closing mechanical stop.
Then, at 2÷3 cm from the mechanical closing stop the limit switch will trigger.
03.
During the manoeuvre, check that the flashing light flashes at a speed of
0.5 seconds on and 0.5 seconds off. If present, also check the flashes of
the light connected to the OGI terminal: slow flashes during opening, quick
flashes during closing.
04.
Open and close the gate several times to make sure that there are no
points of excessive friction and that there are no defects in the assembly or
adjustments.
05.
Check that the fastening of the NAKED gearmotor, the rack and the limit
switch brackets are solid, stable and suitably resistant, even if the gate acce-
lerates or decelerates sharply.
5.6 - Connection of Other Devices
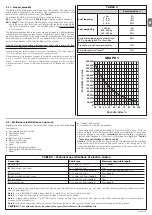
If the user needs to feed external devices such
as a proximity reader for transponder cards or
the illumination light of the key-operated selec-
tor switch, it is possible to tap power as shown
in Figure. The power supply voltage is 24Vdc
-30% - +50% with a maximum available current
of 100mA.
This is the most important stage in the automation system installation procedu-
re in order to ensure the maximum safety levels. Testing can also be adopted
as a method of periodically checking that all the various devices in the system
are functioning correctly.
IMPORTANT!
–
Testing of the entire system must be performed by qua-
lified and experienced personnel who must establish which tests to con-
duct on the basis of the risks involved, and verify the compliance of the
system with applicable regulations, legislation and standards, in particu-
lar with all the provisions of EN standard 12445 which establishes the test
methods for automation systems for gates.
6.1 - Testing
Each component of the system, e.g. safety edges, photocells, emergency
stop, etc. requires a specific testing phase. We therefore recommend obser-
ving the procedures shown in the relative instruction manuals. To test NAKED
proceed as follows:
01.
Ensure that the instructions outlined in this manual and in particular in
chapter 1 “WARNINGS” have been observed in full.
02.
Release the gearmotor as shown in “Release and manual movement”
paragraph in chapter “Instructions and Warnings for users of the NAKED
gearmotor”.
03.
Make sure you can move the door manually both during opening and clo-
sing with a force of max. 390N (40 kg approx.).
04.
Lock the gearmotor.
05.
Using the control or stop devices (key-operated selector switch, control
buttons or radio transmitter) test the opening, closing and stopping of the
TESTING AND COMMISSIONING
6
MAINTENANCE OF THE PRODUCT
The automation must be subjected to maintenance work on a regular basis, in
order to guarantee it lasts; to this end NAKED has a manoeuvre counter and
maintenance warning system; see paragraph “8.2.3 Maintenance warning”.
IMPORTANT!
–
The maintenance operations must be performed in strict
compliance with the safety directions provided in this manual and accor-
ding to the applicable legislation and standards.
If other devices are present, follow the directions provided in the corresponding
maintenance schedule.
01.
NAKED requires scheduled maintenance work every 6 months or 20,000
manoeuvres (max.) after previous maintenance.
02.
Disconnect the power supply (and buffer batteries, if featured).
03.
Check for any deterioration of the components which form the automation,
paying particular attention to erosion or oxidation of the structural parts.
Replace any parts which are below the required standard.
04.
Check the wear and tear on the moving parts: pinion, rack and the leaf
components; if necessary replace them.
05.
Connect the electric power sources up again, and carry out the testing and
checks provided for in Paragraph “6.1 Testing”.
gate and make sure that the leaves move in the intended direction.
06.
Check the proper operation of all the safety devices, one by one (photocel-
ls, sensitive edges, emergency stop, etc.) and check that the gate perfor-
ms as it should. In particular, each time a device is activated the “BlueBUS”
LED on the control unit flashes 2 times quickly, confirming that the control
unit recognizes the event.
07.
If the dangerous situations caused by the movement of the leaf have been
safeguarded by limiting the force of impact, the user must measure the
impact force according to EN Standard 12445. If the adjustment of the
“speed” and control of the “motor force” are used to assist the system for
the reduction of the impact force, try to find the adjustment that gives the
best results.
6.2 - Commissioning
Commissioning can take place only after all the testing phases of the NAKED
and the other devices have been terminated successfully. It is not permissible
to execute partial commissioning or to enable use of the system in makeshift
conditions.
01.
Prepare and store for at least 10 years the technical documentation for the
automation, which must include at least: assembly drawing of the automa-
tion, wiring diagram, analysis of hazards and solutions adopted, manufactu-
rer’s declaration of conformity of all the devices installed (for NAKED use the
annexed CE declaration of conformity); copy of the instruction manual and
maintenance schedule of the automation.
02.
Post a label on the gate providing at least the following data: type of auto-
mation, name and address of manufacturer (person re sponsible for the
“commissioning”), serial number, year of manufacture and “CE” marking.
03.
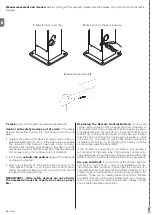
Post a permanent label or sign near the gate detailing the operations for the
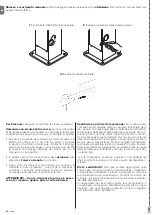
release and manual manoeuvre (
fig. 22
).
04.
Prepare the declaration of conformity of the automation system and deliver
it to the owner.
05.
Prepare the “Instructions and warnings for the use of the automation
system” and deliver it to the owner.
06.
Prepare the maintenance schedule of the automation system and deliver
it to the owner; it must provide all directions regarding the maintenance of
the single automation devices.
07.
Before commissioning the automation system inform the owner in writing
regarding dangers and hazards that are still existing (e.g. in the “Instructions
and warnings for the use of the automation system”).
STOP
SBS
(-)
(+)
24Vcc
Summary of Contents for Naked Sliding NKSL400
Page 2: ......
Page 43: ...I 405 mm 131 mm 135 mm 1 3 4 5 b d c c h l b f m g i n e a E C F D C F A B 2...
Page 44: ...II b a b a c 5 mm 6 7 10 11 8 9...
Page 46: ...IV 14 15...
Page 48: ...VI 19 20 a b c d e...
Page 49: ...VII 21 22...
Page 50: ......
Page 51: ......

