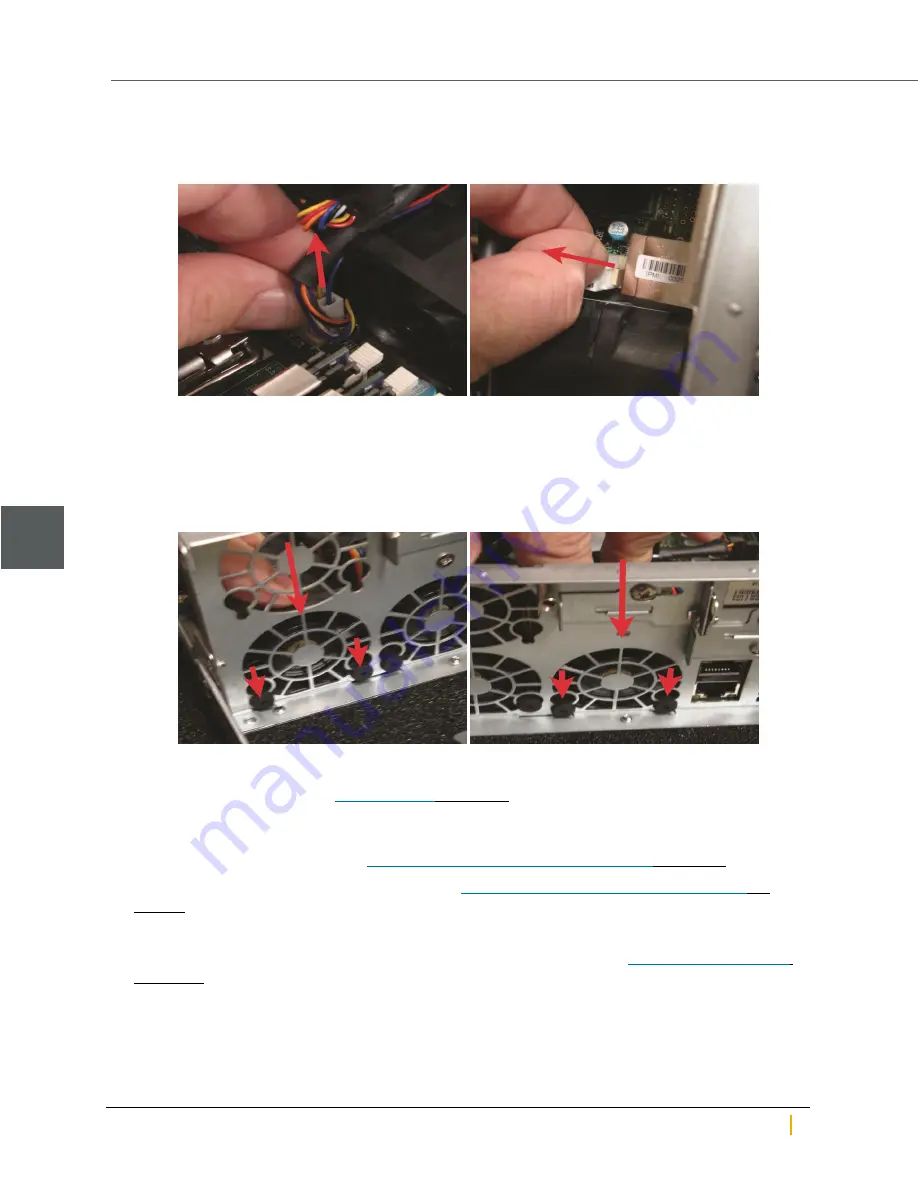
5. Snip the pull ties holding the fan’s power wires to the chassis.
6. Unclip the retaining tab and gently remove the power plug from the socket.
Figure 2-19: Disconnecting the fan’s power plug
7. Insert the power plug for the replacement fan into the socket and gently press until the retaining tab
clicks.
8. Re-secure the power wires with new pull ties.
9. Gently place the replacement fan into the slot. Press firmly down to ensure that it is properly seated.
Figure 2-20: Replacing Primary Fan 2 or 3
10. If necessary, replace the fan bracket.
11. Replace Secondary Fan 1 (see
on page 43, far left photograph). Press firmly down to
ensure that it is properly seated.
12. Guide the controller into the slot and slide it in until some resistance is met, then push the extraction
handle up to seat the controller. See
Replacing a Unity Storage System controller
13. Re-secure the extraction handle retaining bolt. See
Replacing a Unity Storage System controller
14. Replace all cables on the new controller.
Notes:
Be sure to put all cables back into the proper ports. See Step 4 under
If the controller does not automatically start up, select it in Unity and click the
Turn On
button in its
Properties panel at the bottom of the screen.
Fans
2
Nexsan Unity Hardware Maintenance Guide v. 5.1
Unity
50


