User’s Manual
61
Sequence Setup
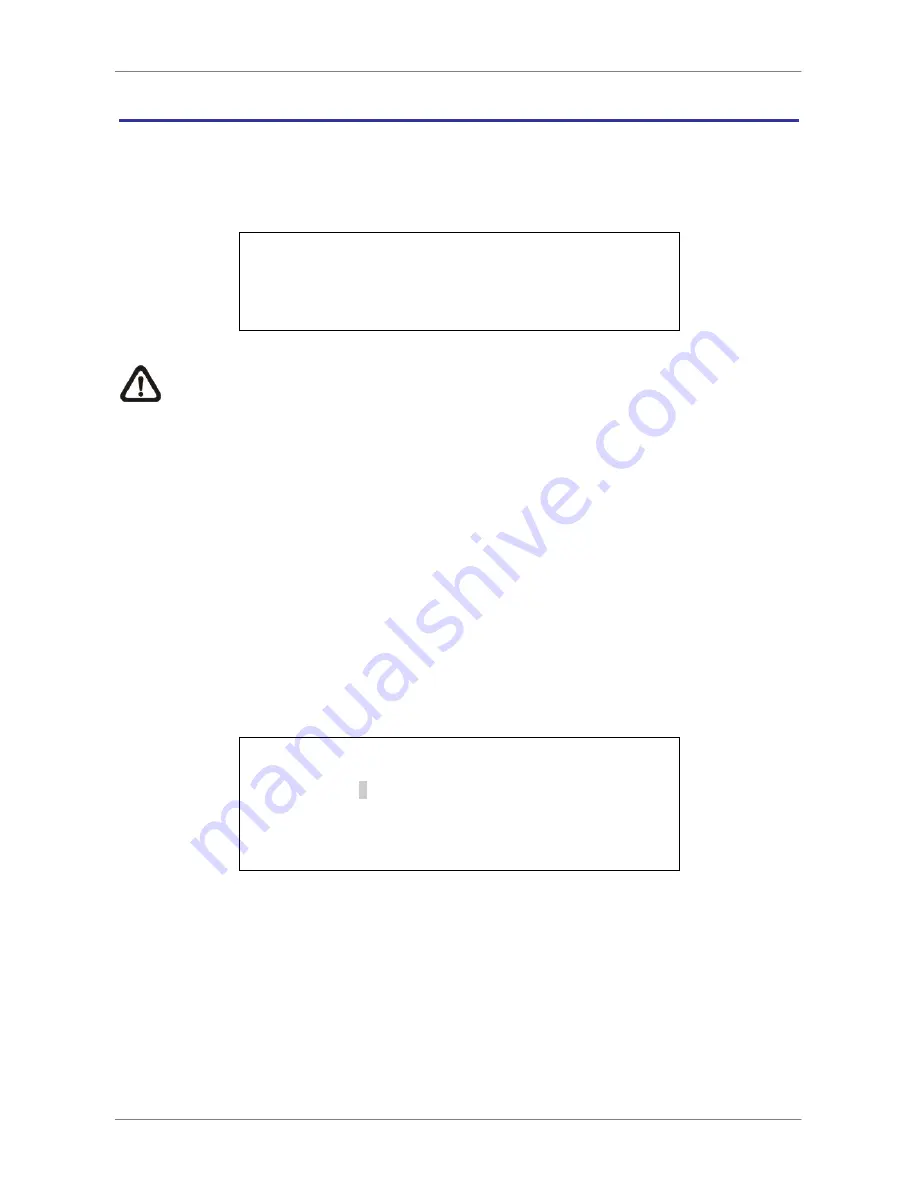
The Sequence Setup menu allows users to set the camera sequence schedule and dwell
time for main and call monitor. Select <Sequence Setup> in Main menu and press ENTER;
the menu displays as follows. Items in the Sequence Setup menu are described in the
subsections.
Sequence Setup
1. Main Monitor Dwell
2. Main Monitor Schedule
3. Call Monitor Dwell
4. Call Monitor Schedule
5 Sec
5 Sec
NOTE:
When the second main monitor is connected, there will be extra menu items
for configuring dwell and schedule settings of the second main monitor.
< Main / Call Monitor Dwell >
The Main / Call Monitor can be set to display full screen video of all installed cameras in
sequence. This item is used to set the Main / Call Monitor dwell time, which is the duration
of time elapsed before switching to the next channel. The dwell time is in the range of 1 to
120 seconds.
< Main / Call Monitor Schedule >
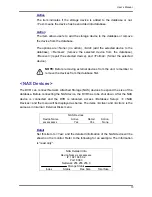
This item is used to set the Main / Call Monitor camera sequence in full screen format.
Move the cursor to <Main Monitor Schedule> and press ENTER; the menu is displayed as
follows.
Main Monitor Schedule
_
►
_
►
_
►
_
►
_
►
_
►
_
►
_
►
_
►
_
►
_
►
_
►
_
►
_
►
_
►
_
Press Channel Keys To Select Channel
Press
◄
Key To Delete
Follow these steps to set a sequence:
•
Press LEFT direction key to delete the original setting.
•
Press the desired Channel keys to assign a camera to that location in the sequence.
•
Continue the steps until the sequence is completed.
A sequence can have up to 16 entries. User can select fewer than 16 entries for camera
sequence and leave the remaining entries blank. The sequence can include a specific
camera or cameras multiple times.
Summary of Contents for Premium H.264 DVR
Page 1: ...Ness Ultimate Premium H 264 DVR OSD Setup Manual REV1 1 Sep11 ...
Page 49: ...User s Manual 49 This page is intentionally blank ...
Page 50: ...User s Manual 50 This page is intentionally blank ...
Page 51: ...User s Manual 51 This page is intentionally blank ...
Page 52: ...User s Manual 52 This page is intentionally blank ...
Page 53: ...User s Manual 53 This page is intentionally blank ...
Page 94: ...User s Manual 94 Click Finish to complete the process The Incoming connection is established ...
Page 100: ...User s Manual 100 Appendix D ezRecord Diagram Sample ...
Page 101: ...User s Manual 101 ...
Page 102: ...User s Manual 102 ...


