User’s Manual
34
Dial-out Password
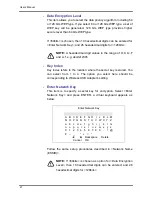
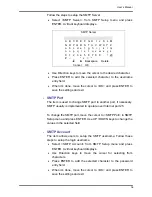
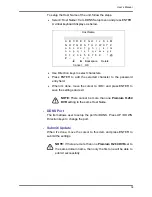
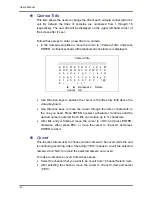
The item allows user to setup the Dial-out password. Follow these
steps to setup the login password.
•
Select <Dial-out password> from Dial-out Setup menu and press
ENTER. A virtual keyboard displays.
•
Use Direction keys to move the cursor for selecting from
characters.
•
Press ENTER to add the selected character to the password
entry field.
•
When it’s done, move the cursor to <OK> and press ENTER to
save the settings and exit.
Dial-out Idle Time
This item indicates the longest duration of time that the modem
connection remains active if there is no acknowledgement from the
remote PC. The value can be set in the range of 1 min to 600 min. If
selecting <0>, the modem connection remains active constantly.
Dial-out Max Time
The item indicates the longest duration of time that the connection
via modem remains active. The value can be set in the range of 1
min to 600 min, or <0> to keep the connection indefinitely.
Connect
When the Dial-out related settings are configured, set this item to
<Yes> to start dial-out or select <No> to disconnect.
- Dial Port Selection
The Dial Port Selection enables the user to assign the Dial-In/Out,
SMS, Text to the designated port of the DVR. For instance, when the
cable of a POS system is connected to the Serial Port of the DVR,
enter the Dial Port Selection menu and assign Text to the Serial Port.
The DVR will now be able to obtain data from the POS system.
Dial Port Selection
1. Serial Port
2. USB Port-Front
3. USB Port-Rear Top
4. USB Port-Rear Bottom
Text
None
None
None
Summary of Contents for Premium H.264 DVR
Page 1: ...Ness Ultimate Premium H 264 DVR OSD Setup Manual REV1 1 Sep11 ...
Page 49: ...User s Manual 49 This page is intentionally blank ...
Page 50: ...User s Manual 50 This page is intentionally blank ...
Page 51: ...User s Manual 51 This page is intentionally blank ...
Page 52: ...User s Manual 52 This page is intentionally blank ...
Page 53: ...User s Manual 53 This page is intentionally blank ...
Page 94: ...User s Manual 94 Click Finish to complete the process The Incoming connection is established ...
Page 100: ...User s Manual 100 Appendix D ezRecord Diagram Sample ...
Page 101: ...User s Manual 101 ...
Page 102: ...User s Manual 102 ...


