Disassembly and Reassembly 3-5
Replacing the System Unit Cover
Replace the system unit cover as follows.
Note:
To prevent damage to system cables, carefully
tuck the cables out of the path of the cover.
1.
Position the cover over the system unit. The front edge of the cover should
be about one-half inch behind the front edge of the chassis.
2.
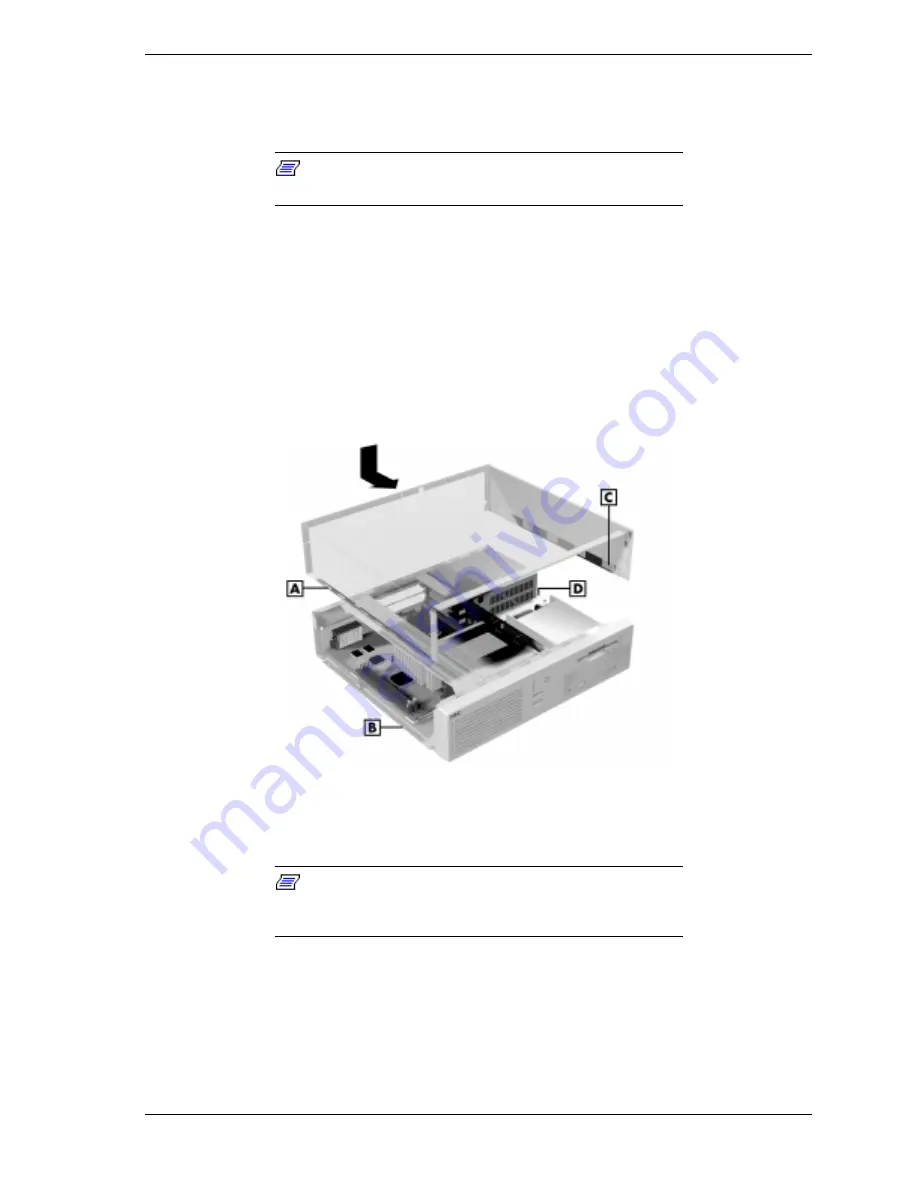
Fit the cover into the chassis, making sure that the tabs along the lower left
edge of the cover are aligned with the slots on the left side of the chassis. In
addition, make sure the five tabs on the right side of the cover engage the
securing rail on the edge of the chassis (see the following figure).
Replacing the Cover
A – Slot (1 of 7)
B – Tab (1 of 7)
C – Tab (1 of 5)
D – Metal Securing Rail
3.
Slide the cover forward to meet the front panel.
Note:
The cover fits tightly. If the cover does not slide
all the way to the front panel, place one hand on the front of
the unit while sliding the cover forward from the rear.
4.
Secure the cover with the thumb screw.
5.
Reconnect all external peripherals.
6.
Plug in all power cords.
Summary of Contents for POWERMATE 5100 - SERVICE
Page 15: ...1 System Overview Configurations Features Components ...
Page 28: ...2 System Configuration Interrupt Requests Jumper Settings BIOS Setup Video Modes Utilities ...
Page 108: ...4 System Board Connectors Jumpers and Sockets Components Pin Assignments Resources ...
Page 167: ...7 Preventive Maintenance System Cleaning Keyboard Cleaning Mouse Cleaning ...
Page 171: ...8 Troubleshooting Checklist Diagnostics ...
Page 205: ...A Release Notes General Notes Windows 95 Issues Windows NT Issues ...


