


Synchronization
This feature synchronizes the time, date, and contact fields of PIM applications and phonebook with a provider on the Inter/Intranet (remote server) or local server with the
use of PC applications.
The PIM applications that are synchronized are Scheduler with calendar, phonebook with contacts, and ToDo list. The phone can synchronize the PIM applications all
together, at the same time, or separately, one at a time. (See Flag.)
Setup for Synchronization
Remote Server
A remote server is over the air using the Internet or Intranet. The Remote feature may not be offered by your service provider. If the service is offered, the service provider
may charge a fee to synchronize a wireless phone on their server. (See Flag.)
The settings for a remote server are established in Remote server of Other settings sub-menu of the Settings menu (see page 57).
Local Server
To synchronize via a local server, connect the phone to your PC with a USB cable.
The settings for a local server are established in Local server of Other settings sub-menu of the Settings menu (see page 58).
Synchronizing
You must wait for the red diagonal bar on the XCPC icon to disappear before you initiate synchronization.
When XCPC is installed on a computer with a slow processing speed, individual synchronization (synchronize one item at a time) of phonebook contacts, Scheduler, or ToDo
should be done. Specifying more than one (for example, phonebook contacts and ToDo tasks) may cause an error message to appear.
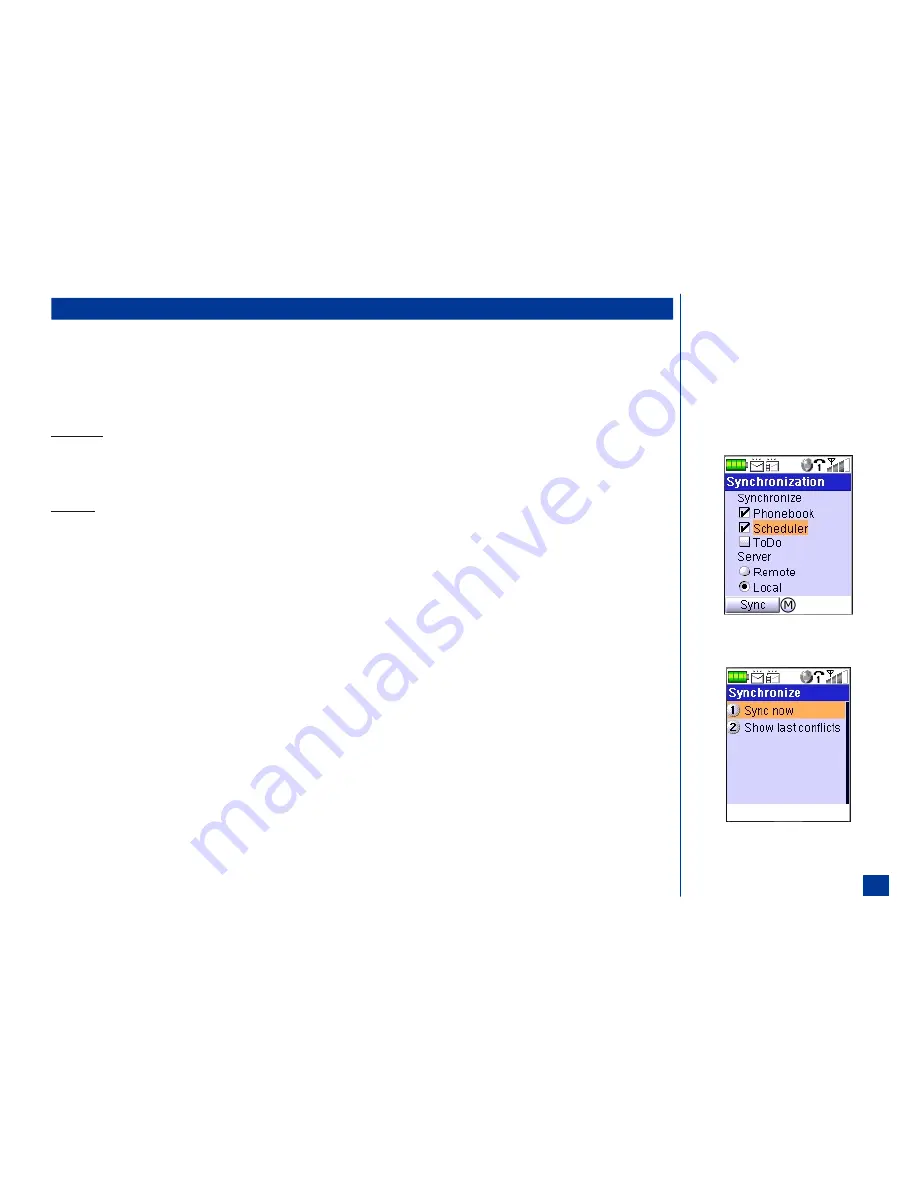
To access Synchronization:
*
Press
MENU
(Main)
,
8,
and
6
to display the security code entry screen or the Synchronization screen.
If the security code has not been entered during current use of the phone since last powering On, input your security code and press
Softkey 1
(OK). The
Synchronization screen displays.
Highlight and select the items to be synchronized to check or uncheck the box. The items with the box checked will be synchronized.
Highlight and select the server type radio button to select the server type.
Press
Softkey 1
(Sync) or press
MENU
(Options Menu) and
1
to begin the synchronization process. A busy screen displays during synchronization.
When the synchronization is completed and successful, the Summary screen displays.
The
Softkey 2
(Conflicts) displays only when conflicts occur during synchronization. Press
Softkey 2
(Conflicts) to display the Conflicts screen with the
number of conflicts that occurred in each application.
Press
Softkey 1
(OK) to return to the Summary screen.
Press
Softkey 1
(OK) to return to the Synchronization screen.
I
You must perform all synchronizations from
your PC.
O
Two synchronization sessions should be at
least 30 seconds apart to finish processing the
files for a previous session. If the previous sync
has not finished, “sync cancel” displays.
O
A separate service may be required for Remote
synchronization.
O
If PIM lock is enabled, you will be prompted to
enter your security code.
I
If you do not wait for the red diagonal bar to
disappear, your computer port may freeze and
a reboot may be necessary.
157
Summary of Contents for MDview 232
Page 35: ...27 ...
Page 62: ...54 ...
Page 79: ...71 ...
Page 80: ...72 ...
Page 97: ...89 ...
Page 106: ...98 ...
Page 167: ...159 ...
Page 175: ...167 ...


