© by N&W GLOBAL VENDING S.p.A.
21
11 2008 3275 00
POWEr ON
After having powered on for the first time and initialised
the database, set up the type of vending machine by
specifying the number of columns in the machine.
Whenever you power on, the display will show the
software release number on the machine if you close the
machine door.
DIesIs
software rev. x.x
total VenDs: xxxxxx
You can programme the machine to display the number
of selections you have made for some seconds.
the machine is set to the normal operation mode after
some seconds. the display will show a message requir-
ing the user to select a product.
select a proDUct
OPErATiON STATES
The machine may work in three different operation
states. the functions the keyboard buttons may assume
will vary according to its operation state.
possible states are listed here below:
FUnctIons
Normal operation
coin acceptance
dispensing selections
Filler menu
test dispensing cycles
machine maintenance
Technician menu
programming
parameters
the display and keyboard functions vary according to
the operation mode, as it is described by the following
paragraphs.
K
EyboarD
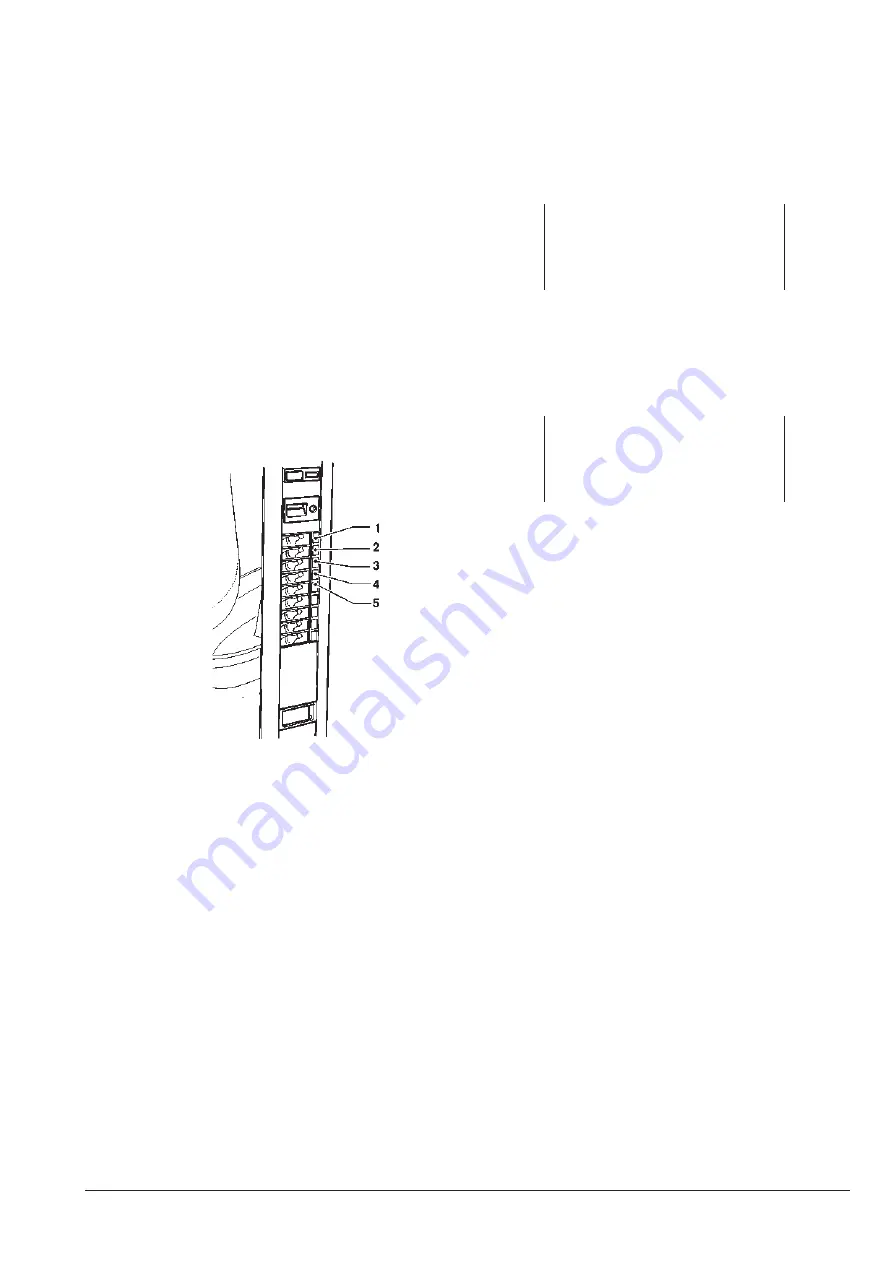
If the machine is in the Filler or technician mode, the
keys of the selection pushbutton panel assume the func-
tions specified by the figure:
s
crolliNg
K
Eys
�
aND
�
:
used to move to the previous or next menu option and to
change the values (plus and minus).
E
NtEr
K
Ey
�
:
used to move from a menu to a sub-menu or to confirm
the data item on the display.
E
xit
K
Ey
�
:
used to go back from a sub-menu to a higher level menu
or not to confirm the data item that is currently active.
It is also used to move from the “technician” mode to the
“Filler” mode and vice versa.
to access the programming menus, power on the ma-
chine when the machine door is open by acting on the
door switch and by pressing the programming button.
Fig. 29
�
1-
previous function / increase value
�
2-
next function / decrease value
�
3-
confirm
�
4-
delete
�
5-
direct price programming


