GT10/GT30
7.1
Switching Screens
118
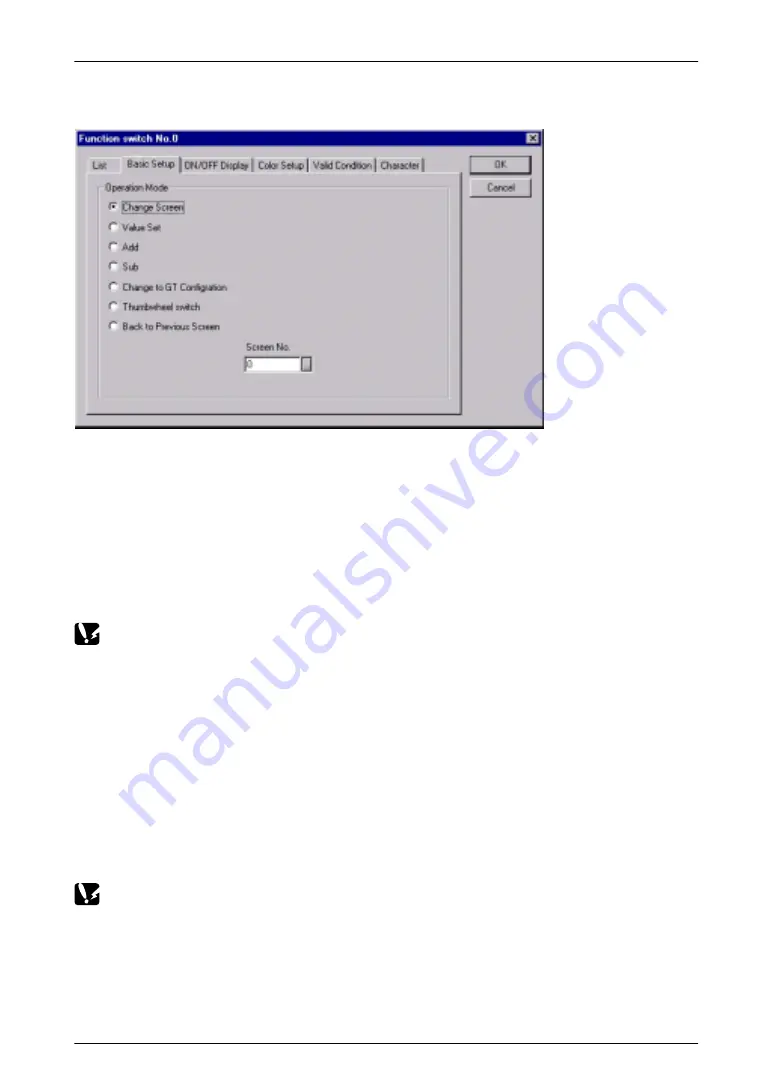
Function switching parts: Attribute editing dialog box
Double–clicking on the parts arranged on the base screen, or selecting a switch part,
and clicking on the “Parts (T)” menu and then the “Edit Attribute” sub–menu displays
the dialog box shown above.
(1) Using the “Change Screen” operation mode
Select the “Change Screen” operation mode and specify the number of the screen to
be changed. Then press the switch part to switch the screen to the specified screen.
To return to the screen displayed just prior to the currently displayed screen, the “Return
to Previous Screen” operation mode can be used.
In this case, the value of the third word in the basic communication area / word
device (the number of the currently displayed screen) changes to that of the new screen
number, but please be aware that the contents of the first word (the screen number
specified by the PLC) do not change. For detailed information, see page 120.
(2) Using the “Value Set” operation mode
Select the “Value Set” operation mode and enter the following settings:
– Data format: Specify 1 word
– Output destination: Specify to first word of basic communication area / word device
– Value: Number of screen to be changed to (hexadecimal specification)
Each time the GT main unit switch part is pressed, the screen number is forcibly written
by the GT main unit to the first word of the basic communication area / word device, and
the screen is switched.
If using this method, the values for both the first word of the basic communication
area / word device (the screen number specified by the PLC) and the third word (the
number of the currently displayed screen) are changed.
Using the auto–paging function
The GT main unit has an “Auto–paging” function that automatically switches the screen
to a specified screen number when a certain period of time has elapsed. This function
can be used to switch screens automatically.
Summary of Contents for GT10
Page 9: ...Table of Contents GT10 GT30 viii...
Page 10: ...ix Part I GT10 GT30 Main Unit...
Page 23: ...Safety Precautions GT10 GT30 xxii...
Page 24: ...Chapter 1 Specifications...
Page 37: ...GT10 GT30 1 5 Dimensions 14...
Page 38: ...Chapter 2 Installation and Wiring...
Page 48: ...Chapter 3 Setup...
Page 63: ...GT10 GT30 3 4 Setting the Basic Communication Area GT30 and PLC 40...
Page 64: ...Chapter 4 Connecting and Communicating with the PLC...
Page 94: ...Chapter 5 GT10 Configuration Settings...
Page 115: ...GT10 GT30 5 3 Entering Configuration Settings from the GT10 92...
Page 116: ...Chapter 6 GT30 Configuration Settings...
Page 138: ...Chapter 7 How the Various Functions Are Used...
Page 149: ...GT10 GT30 7 3 GT30 Bit Device Functions 126...
Page 150: ...Chapter 8 Servicing and Maintenance...
Page 157: ...GT10 GT30 8 5 Replacing the Backlight GT30 Only 134...
Page 158: ...Chapter 9 Troubleshooting...
Page 170: ...147 Matsushita Electric Works Europe AG Part II Screen Creation Tool Terminal GTWIN...
Page 174: ...Chapter 10 Preparing GTWIN...
Page 187: ...GT10 GT30 10 4 Procedures for Using GTWIN 164...
Page 188: ...Appendix A Code Tables...
Page 191: ...GT10 GT30 A 2 ASCII Code Table 168...


