8 U s i n g M C 3 5 C o m p a n i o n P r o g r a m s
Media-related programs
179
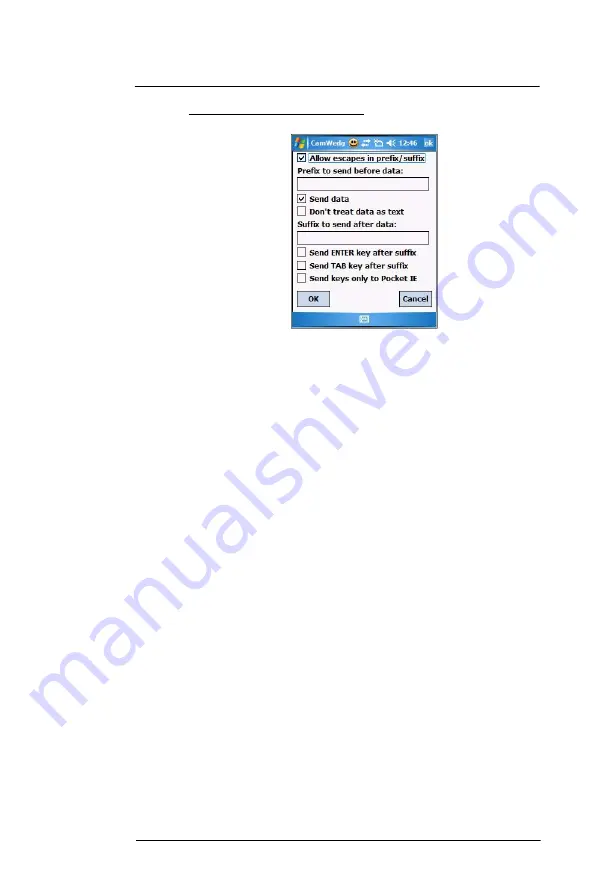
To specify the bar code prefix/suffix options:
1
On the CamWedge menu, select
Barcode > Prefix/Suffix
.
2
Set the following options:
•
Tap the “Allow escapes in prefix/suffix” check box to enable escape
sequences to be embedded in prefix and suffix strings. Escape
sequences allow non-textual data to be transmitted as part of the prefix
or suffix string. All escape sequences begin with the backlash “\”
character. The supported escape sequences include:
•
\b Backspace
•
\f Form feed
•
\n New line (line feed)
•
\r Carriage return
•
\t Tab
•
\xHH ASCII character represented in Hexadecimal notation. Consult a
standard ASCII chart for suitable values.
•
\vHH Virtual key code represented in Hexadecimal notation.
•
In the “Prefix to send before data” box, enter the string to be sent before
the captured data.
•
Tap the “Send data” check box to disable this option. By default, this
option is enabled to allow transfer of the captured bar code data to the
device. Disabling this option prevents the actual data from being
transmitted. The prefix and suffix strings, if present, are still transmitted
even if this option is disabled.
•
Tap the “Don’t treat data as text” check box to read bar code data as
binary data and transmit the data in hexadecimal format. By default, this
checkbox is disabled. This option does not affect the Test function in
CamWedge, which has its own mechanism to display Hex and text
formats.
•
In the “Suffix to send after data” box, enter the desired string to be sent
after the captured data.
•
Tap the “Send ENTER key after suffix” check box to transmit an ENTER
key (VK_RETURN virtual key code) following all other data.
•
Tap the “Send TAB key after suffix” check box to transmit a TAB key
(VK_TAB virtual key code) following all other data.
•
Tap the “Send keys only to Pocket IE” check box to enable the AutoPIE
mode. The AutoPIE mode allows CamWedge to work correctly with
Pocket Internet Explorer. AutoPIE mode enables bar code data capture
when the cursor is on a field that can accept keyboard input. This allows
for better power management and eliminates any confusion caused by
capturing when there is no field to accept the data.
3
Tap
ok
.
Summary of Contents for MC35 EDA
Page 1: ...MC35 EDA User Guide ...
Page 2: ......
Page 3: ...User Guide MC35 Enterprise Digital Assistant ...
Page 6: ...Welcome vi ...
Page 10: ...x ...
Page 118: ...6 Using the Windows Mobile Programs Pocket MSN 108 ...
Page 154: ...7 Using Phone Phone preferences 144 ...
Page 230: ...10 User Support Troubleshooting 220 ...
Page 234: ...224 ...
Page 235: ......


