HARDWARE PREPARATION AND INSTALLATION
2-14
M68HC11EVB/D
2.5 CHECKOUT PROCEDURE
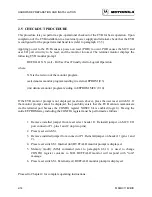
This procedure lets you perform a pre-operational checkout of the EVB for basic operation. Upon
completion of the EVB installation to an external power supply and terminal, check that the EVB
is configured for the proper terminal baud rate (refer to paragraph 2.3.5.).
Applying power to the EVB causes a power-on reset (POR) to occur. POR causes the MCU and
user I/O port circuitry to be reset, and the monitor invoked. The terminal monitor displays the
following EVB monitor prompt:
BUFFALO X.X (ext) - Bit User Fast Friendly Aid to Logical Operation
where:
X.X is the revision of the monitor program.
(ext) denotes monitor program residing in external EPROM (U3).
(int) denotes monitor program residing in EEPROM MCU (U10).
If the EVB monitor prompt is not displayed (as shown above), press the user reset switch S1. If
the monitor prompt cannot be displayed, the possibility exists that the EVB cannot communicate
via the terminal port because the CONFIG register NOSEC bit is enabled (logic 0). Erasing the
entire EEPROM array including the CONFIG register must be performed as follows:
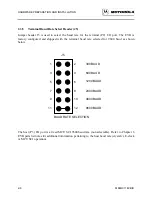
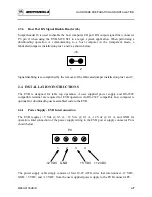
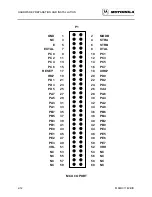
1. Remove installed jumper from reset select header J1. Reinstall jumper on MCU I/O
port connector P1, pins 1 and 2 (top two pins).
2. Press reset switch S1.
3. Remove installed jumper from connector P1. Reinstall jumper on header J1 (pins 1 and
2).
4. Press reset switch S1. Internal (int) BUFFALO monitor prompt is displayed.
5. Memory modify (MM) command (refer to paragraph 4.6.11) is used to change
CONFIG register contents to $0D. BUFFALO monitor will respond with "rom"
message.
6. Press reset switch S1. External (ext) BUFFALO monitor prompt is displayed.
Proceed to Chapter 4 for complete operating instructions.
Summary of Contents for M68HC11EVB
Page 9: ...CONTENTS x M68HC11EVB D ...
Page 35: ...MONITOR PROGRAM 3 8 M68HC11EVB D ...
Page 81: ...OPERATING INSTRUCTIONS 4 46 M68HC11EVB D ...
Page 97: ...SUPPORT INFORMATION 6 12 M68HC11EVB D Figure 6 3 EVB Schematic Diagram Sheet 2 of 2 ...
Page 103: ...APPLICATIONS B 2 M68HC11EVB D Figure B 1 Single Chip Mode Configuration ...

