


LOW wählen, wenn der Alarm durch einen
Schließer (NO) oder TTL-Low-Pegel ausgelöst
werden soll.
HIGH wählen, wenn der Alarm durch einen
Öffner (NC) oder TTL-High-Pegel (5 V) ausgelöst
werden soll.
REC (Aufnahme des Kamerakanals)
1) Mit der Taste
oder
die Spalte REC an-
wählen.
2) Mit der Taste + oder - die Einstellung ON oder
OFF wählen:
ON wählen, wenn der Kamerakanal generell
aufgezeichnet werden soll.
OFF wählen, wenn der Kanal gar nicht aufge-
zeichnet werden soll.
BR (BRIGHTNESS), CT (CONTRAST), CL (COL-
OUR) und HUE (Einstellung von Helligkeit, Kon-
trast, Farbintensität und Farbton)
1) Zur optimalen Bildeinstellung lassen sich Hellig-
keit (BR), Kontrast (CT), Farbintensität (CL) und
Farbton (HUE) verändern. Mit der Taste
oder
die jeweilige Spalte anwählen
2) Der Wert lässt sich mit der Taste + oder - zwi-
schen 0 und 63 einstellen. Die Veränderung wirkt
sich sofort auf das jeweilige Kamerabild aus.
Zum
Verlassen der Menüseite
und Zurückkehren in
das Hauptmenü die Taste MENU drücken. Um wei-
tere Einstellungen vorzunehmen, mit der Taste
oder
ein anderes Untermenü anwählen oder zum
Speichern der Einstellungen
das Hauptmenü durch
Drücken der Taste MENU verlassen.
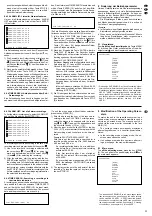
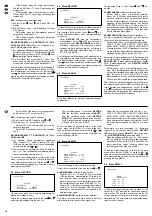
9.4 Menü RECORD
Auf dieser Menüseite werden die Aufnahmeparame-
ter für manuell gestartete Aufnahmen eingestellt.
Die jeweilige Zeile mit der Taste
oder
an-
wählen und mit der Taste + oder - die Einstellungen
vornehmen.
Unter RECORD IPS wird die Aufnahmege-
schwindigkeit, unter QUALITY die Aufnahme-
qualität und unter RECORD MODE der Aufnah-
memodus eingestellt. Die möglichen Einstell-
optionen sind die gleichen wie bei der timerge-
steuerten Aufnahme: siehe dazu Kap. 9.2 unter
IPS, QLT und MODE.
Zum
Verlassen der Menüseite
und Zurückkehren in
das Hauptmenü die Taste MENU drücken. Um wei-
tere Einstellungen vorzunehmen, mit der Taste
oder
ein anderes Untermenü anwählen oder zum
Speichern der Einstellungen
das Hauptmenü durch
Drücken der Taste MENU verlassen.
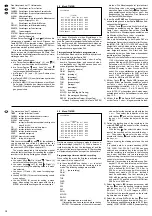
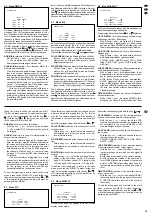
9.5 Menü ALARM
Auf dieser Menüseite werden Alarmeinstellungen
durchgeführt.
Die jeweilige Zeile mit der Taste
oder
an-
wählen.
ALARM ENABLE (Externer Alarm ein/aus)
Mit der Taste + oder - die Funktion „externer
Alarm“ ein- (YES) oder ausschalten (NO). Ist die
Funktion „externer Alarm“ eingeschaltet, laufen
bei einem Alarmsignal an einem der vier Alarm-
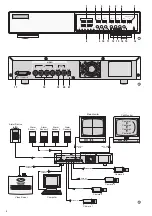
eingänge [siehe Kontaktbelegung der Buchse
EXTERNAL I/O (17), Kap. 4.2.1] die in Kap. 10.1
beschriebenen Alarmvorgänge ab. Ist die Funk-
tion ausgeschaltet, reagiert der Recorder nicht
auf ein externes Alarmsignal.
ALARM DURATION (Einstellen der Alarmdauer)
Die hier eingestellte Alarmdauer gilt für externen
Alarm und Alarm bei Ausfall eines Videosignals.
Mit der Taste + oder - die Alarmdauer auswählen:
10 SEC, 15 SEC, 20 SEC, 30 SEC, 1 MIN, 2 MIN,
3 MIN, 5 MIN, 10 MIN, 15 MIN, 30 MIN, ALWAYS
(Daueralarm) oder AUTO (Alarmdauer ist so lang
wie ein externes Alarmsignal an einem der Alarm-
eingänge anliegt, jedoch immer min. 10 s).
Parameter für Alarmaufnahmen (d. h. Aufnahmen, die
durch ein externes Alarmsignal ausgelöst werden):
RECORD IPS (Aufnahmegeschwindigkeit), QUA-
LITY (Aufnahmequalität) und RECORD MODE
(Aufnahmemodus)
Mit der Taste + oder - die Einstellungen vorneh-
men. Die Einstelloptionen sind die gleichen wie
bei der timergesteuerten Aufnahme: siehe dazu
Kap. 9.2 unter IPS, QLT und MODE. Für die
Alarmaufnahme sollten Aufnahmegeschwindig-
keit und -qualität möglichst hoch gewählt werden.
Zum
Verlassen der Menüseite
und Zurückkehren in
das Hauptmenü die Taste MENU drücken. Um wei-
tere Einstellungen vorzunehmen, mit der Taste
oder
ein anderes Untermenü anwählen oder zum
Speichern der Einstellungen
das Hauptmenü durch
Drücken der Taste MENU verlassen.
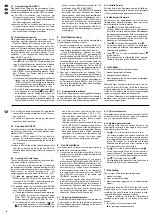
SUPERVISOR
[ALARM]
ALARM ENABLE YES
ALARM DURATION 10 SEC
RECORD IPS 25
QUALITY HIGH
RECORD MODE MULTIPLEX
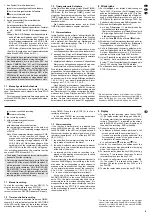
SUPERVISOR
[RECORD]
RECORD IPS 25
QUALITY NORMAL
RECORD MODE MULTIPLEX
Select HIGH if the alarm is to be triggered by
an NC contact or TTL high level (5 V).
REC (recording of the camera channel)
1) Select the column REC with the key
or
.
2) With the key + or -, select ON or OFF:
Select ON if the camera channel is to be
generally recorded.
Select OFF if the channel is not to be recorded
at all.
BR (BRIGHTNESS), CT (CONTRAST), CL (COL-
OUR), and HUE
1) For optimum picture adjustment, brightness
(BR), contrast (CT), colour intensity (CL), and
HUE can be modified. Select the corresponding
column with the key
or
.
2) The value can be set between 0 and 63 with the
key + or -. The modification immediately affects
the corresponding camera picture.
To
exit the menu page
and to return to the main
menu, press the key MENU. To make further set-
tings, select another submenu with the key
or
,
or to
memorize the settings,
exit the main menu by
pressing the key MENU.
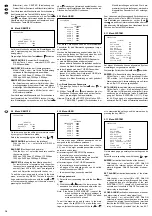
9.4 Menu RECORD
On this menu page, the recording parameters for
manual recordings are set.
Select the corresponding line with the key
or
and make the settings with the key + or -.
The recording speed is set under RECORD
IPS, the recording quality under QUALITY,
and the recording mode under RECORD
MODE. The options available are the same as
for the timer-controlled recording: see chapter
9.2 under IPS, QLT, and MODE.
To
exit the menu page
and to return to the main
menu, press the key MENU. To make further set-
tings, select another submenu with the key
or
,
or to
memorize the settings,
exit the main menu by
pressing the key MENU.
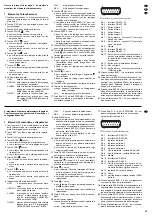
9.5 Menu ALARM
On this menu page, alarm settings are made.
Select the corresponding line with the key
or
.
ALARM ENABLE (external alarm on/off)
With the key + or -, activate (YES) or deactivate
(NO) the function “external alarm”. With the func-
tion “external alarm” activated, in case of an
alarm signal at one of the four alarm inputs [see
pin configuration of the jack EXTERNAL I/O (17),
chapter 4.2.1], the alarm procedures described in
chapter 10.1 will be executed. With the function
deactivated, the recorder will not respond to an
external alarm signal.
ALARM DURATION (setting of alarm duration)
The alarm duration set here applies to external
alarm and alarm in case of video signal loss.
Select the alarm duration with the key + or -:
10 SEC, 15 SEC, 20 SEC, 30 SEC, 1 MIN, 2 MIN,
3 MIN, 5 MIN, 10 MIN, 15 MIN, 30 MIN, ALWAYS
(permanent alarm) or AUTO (alarm lasts as long
as an external alarm signal is available at one of
the alarm inputs, however, at least 10 s in each
case).
Parameters for alarm recordings (i.e. recordings
triggered by an external alarm signal): RECORD
IPS (recording speed), QUALITY (recording qual-
ity), and RECORD MODE (recording mode)
Make the settings with the key + or -. The options
are the same as for timer-controlled recording:
see chapter 9.2 under IPS, QLT, and MODE. For
alarm recording, select recording speed and
recording quality as high as possible.
To
exit the menu page
and to return to the main
menu, press the key MENU. To make further set-
tings, select another submenu with the key
or
or
to memorize the settings
, exit the main menu by
pressing the key MENU.
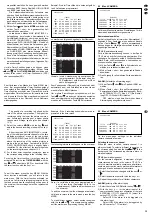
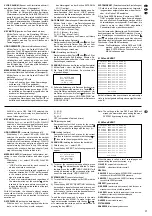
9.6 Menu DWELL
On this menu page, settings can be made for the
output CALL (20) provided for connecting an auxil-
iary monitor. The auxiliary monitor shows the full
screen pictures of the camera channels in sequen-
tial switching. The dwell time can be adjusted sepa-
rately for each channel.
SUPERVISOR
[DWELL]
NORM ALARM
CAM1 02 02
CAM2 02 02
CAM3 02 02
CAM4 02 02
SUPERVISOR
[ALARM]
ALARM ENABLE YES
ALARM DURATION 10 SEC
RECORD IPS 25
QUALITY HIGH
RECORD MODE MULTIPLEX
SUPERVISOR
[RECORD]
RECORD IPS 25
QUALITY NORMAL
RECORD MODE MULTIPLEX
14
GB
D
A
CH


