background image

punkt der ausgewählten Aufzeichnung und läuft –
wenn sie nicht vorzeitig mit der Taste STOP (5)
gestoppt wird – ununterbrochen bis zum End-
punkt der letzten Aufzeichnung.

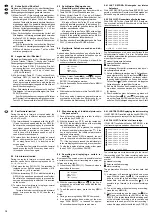
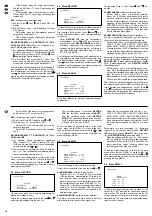
8.4.3 ALARM LIST: Liste aller Alarmaufnahmen
Um nur die Alarmaufnahmen aufzulisten, ALARM
LIST anwählen und die Liste mit der Taste ENTER
(10) aufrufen:

2004-SEP-26 23:05:58 M

2004-SEP-26 01:58:52 M

2004-SEP-20 04:59:32 M

2004-SEP-13 05:03:00 M

2004-SEP-09 22:36:29 M

2004-SEP-01 00:07:04 M

2004-AUG-29 02:43:02 M

2004-AUG-22 04:12:33 M

:PAGE UP  

:PAGE DOWN

Die Aufzeichnungen sind nach dem Zeitpunkt des
Aufnahmestarts sortiert und mit dem Symbol 

ver-

sehen.

1) Die Auswahl einer Aufzeichnung erfolgt wie bei

der Gesamtliste mit den Cursor-Tasten 

(7) und

(6) zum Vor- und Rückblättern sowie den Cur-

sor-Tasten (4) und (5) zum 

Anwählen 

der

Aufzeichnung.

2) Nach der Auswahl die Wiedergabe mit der Taste

ENTER oder der Taste PLAY (3) starten: Die
Wiedergabe beginnt ab dem Startpunkt der aus-
gewählten Alarmaufzeichnung und läuft – wenn
sie nicht vorzeitig mit der Taste STOP (5) ge-
stoppt wird – ununterbrochen bis zum Endpunkt
der letzten Aufzeichnung. Dabei werden nicht nur
die Alarmaufnahmen dieser Liste durchlaufen,
sondern alle Aufnahmen, die nach der ausge-
wählten Alarmaufnahme aufgezeichnet wurden.

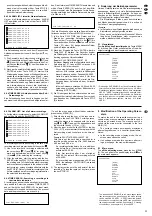
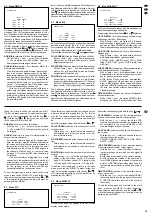
8.4.4 TIME SEARCH: Aufnahmesuche über Zeit- /

Datumsangabe

Eine Aufzeichnung kann über die Angabe von Auf-
nahmezeit und -datum gesucht und aufgerufen wer-

den. Das Untermenü TIME SEARCH anwählen und
mit der Taste ENTER (10) aufrufen. Auf dem Bild-
schirm erscheint eine Eingabemaske für die Suche.
Voreingestellt sind das aktuelle Datum und die aktu-
elle Stunde, z. B.:

[Soll die Menüseite ohne weitere Auswahl wieder
verlassen werden, die Taste MENU (9) drücken.]

1) In die Zeile PLAY TIME das Datum und die

Stunde der gesuchten Aufnahme eingeben.
Dazu mit der Cursor-Taste 

(6) oder 

(7) die

zu verändernden Stellen anwählen und mit der
Taste + (13) oder - (14) das gewünschte Datum
und die Stunde einstellen.

2) Nach der Eingabe die Taste ENTER oder die

Taste PLAY (3) drücken. Der Recorder beginnt
die Wiedergabe mit der ersten Aufnahme, die zu
der eingegebenen Uhrzeit stattfand.

Beispiel: PLAY TIME: 2005-JAN-27  06
Bei dieser Eingabe wird die Festplatte nach einer
Aufnahme am 27. Januar 2005 zwischen 6:00
Uhr und 6:59 Uhr durchsucht.

Wenn eine Aufnahme vor 6 Uhr begann und
nicht vor 6 Uhr endete, startet die Wiedergabe
dieser Aufnahme ab dem Zeitpunkt 06:00:00.

Hatte die erste Aufnahme nach 6 Uhr ihren
Aufnahmestart um 06:45:00, startet die Wie-
dergabe dieser Aufnahme ab dem Zeitpunkt
06:45:00.

Ist keine Aufnahme zwischen 06:00 und 06:59
vorhanden, erscheint auf dem Bildschirm die
Meldung „NOT FOUND“.

3) Die Wiedergabe läuft ununterbrochen bis zum

Endpunkt der letzten Aufzeichnung. Zum vorzeiti-
gen Beenden der Wiedergabe die Taste STOP
(5) drücken.

9 Änderung der Betriebsparameter

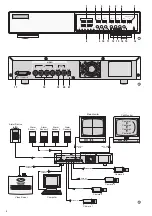
Um das Gerät optimal an die Überwachungsanlage
anzupassen, lassen sich viele Betriebsparameter
über ein Bildschirm-Menü einstellen. Es kann nur
über den an der Buchse MAIN (19) angeschlosse-
nen Hauptmonitor aufgerufen werden.

Die Einstellungen bleiben nach dem Verlassen

des Menüs dauerhaft gespeichert, d. h. auch nach
Ausfall der Versorgungsspannung.

Hinweise:
a Im Aufnahme- bzw. Wiedergabebetrieb kann das

Einstellmenü nicht aufgerufen werden.

b Wenn nach dem Aufruf einer Menüseite 1 Minute

lang keine Einstellungen mehr vorgenommen
werden, blendet sich das Menü aus.
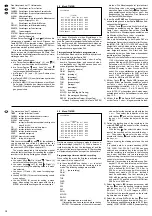
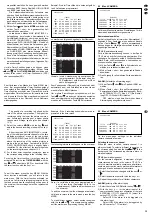
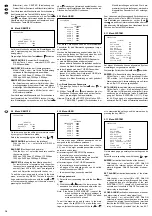
9.1 Hauptmenü

Zum Aufrufen des Einstellmenüs die Taste MENU
(9) drücken. Das Gerät schaltet auf das Quad-An-
zeigeformat 

und das Hauptmenü erscheint:

SUPERVISOR*

[MENU]
TIMER
CAMERA
RECORD
ALARM
DWELL
PIP
DISPLAY
REMOTE
USER
SYSTEM
EVENT

PLAY TIME:2005-JAN-27  06

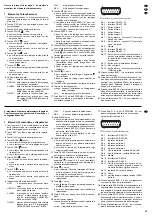
8.4.3 ALARM LIST: List of all alarm recordings 
To list the alarm recordings only, select ALARM LIST
and call the list with the key ENTER (10):

2004-SEP-26 23:05:58 M

2004-SEP-26 01:58:52 M

2004-SEP-20 04:59:32 M

2004-SEP-13 05:03:00 M

2004-SEP-09 22:36:29 M

2004-SEP-01 00:07:04 M

2004-AUG-29 02:43:02 M

2004-AUG-22 04:12:33 M

:PAGE UP  

:PAGE DOWN

The recordings are sorted according to the time of the
recording start and are provided with the symbol  .

1) Like in the total list, a recording is selected with

the cursor keys 

(7) and 

(6) for going for-

ward and backward and with the cursor keys 
(4) and 

(5) for selecting the recording.

2) After the selection, start the replay with the key

ENTER or the key PLAY (3): The replay starts from
the starting point of the selected alarm recording
and is continuously replayed to the end point of the
last recording – unless it is stopped before with the
key STOP (5). Not only the alarm recordings of this
list are replayed but all recordings registered after
the selected alarm recording.

8.4.4 TIME SEARCH: Searching a recording via

the time/date indication

A recording can be searched and called via recording
time and date. Select the submenu TIME SEARCH
and call it with the key ENTER (10). An input mask
for the search is inserted on the screen. The present
date and the present hour are preset, e. g.:

[To exit the menu page without further selection,
press the key MENU (9).]

1) Enter the date and the hour of the required re-

cording in the line PLAY TIME. For this purpose,
select the places to be changed with the cursor
key 

(6) or 

(7) and set the desired date and

the hour with the key + (13) or - (14).

2) After the input, press the key ENTER or the key

PLAY (3). The recorder starts the replay with the
first recording which took place at the time en-
tered.

Example: PLAY TIME: 2005-JAN-27   06
With this input, the hard disk is searched for a
recording made on January 27th, 2005 between
6:00 a.m. and 6:59 a.m.

If a recording started before 6 a.m. and did not
stop before 6 a.m., the replay of this recording
will start at 06:00:00.
If the first recording after 6 a.m. started at
06:45:00, the replay of this recording will start
at 06:45:00.
If no recording was made between 06:00 and
06:59, the message “NOT FOUND” is inserted
on the screen. 

3) The replay continues to the end point of the last

recording. To stop the replay at any time, press
the key STOP (5).

9 Modification of the Operating Param-

eters 

To match the unit to the surveillance system in an
optimum way, many operational parameters can be
set via an on-screen menu. The menu can only be
called via the main monitor connected to the jack
MAIN (19).

The settings remain permanently memorized

after exiting the menu, i.e. even after power failure. 

Notes:
a In the recording mode or replay mode, the on-

screen menu cannot be called.

b If no settings are made for one minute after call-

ing a menu page, the menu will disappear.
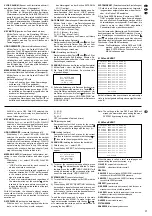
9.1 Main menu

To call the adjusting menu, press the key MENU
(9). The unit goes to the quad display format 

and

the main menu appears:

SUPERVISOR*

[MENU]
TIMER
CAMERA
RECORD
ALARM
DWELL
PIP
DISPLAY
REMOTE
USER
SYSTEM
EVENT

PLAY TIME:2005-JAN-27  06

11

GB

D

A

CH

* Die Anzeige SUPERVISOR auf den Menüseiten signa-

lisiert, dass alle Untermenüs aufgerufen und die Menü-
Einstellungen geändert werden können. Wird stattdessen
USER1 ... USER7 angezeigt, lassen sich zwar alle Unter-
menüs (außer dem Menü USER) aufrufen, die Einstellun-
gen können jedoch nicht geändert werden. Siehe dazu
Kap. 5.2 „Bedientasten sperren“ und Kap. 9.10 „Menü
USER“.

* The indication SUPERVISOR on the menu pages shows

that all submenus can be called and the menu settings
can be modified. If USER1 ... USER7 is inserted instead,
all submenus (except the menu USER) can be called but
the settings cannot be modified. See chapter 5.2 “Locking
of control keys” and chapter 9.10 “Menu USER”.

Summary of Contents for DMR-425

Page 1: ...LOI ISTRUZIONI PER L USO VEILIGHEIDSVOORSCHRIFTEN CONSEJOS DE SEGURIDAD RODKI BEZPIECZE STWA SIKKERHEDSOPLYSNINGER S KERHETSF RESKRIFTER TURVALLISUUDESTA 4 KANAL DIGITAL MULTIPLEXRECORDER 4 CHANNEL DI...

Page 2: ...e nemen Door de veiligheidsvoor schriften op te volgen zal een slechte werking vermeden worden en zal een eventueel letsel aan uzelf en schade aan uw toestel tengevolge van onzorgvuldig gebruik worden...

Page 3: ...Camera 3 Camera 4 Camera 1 Camera 2 CCD CAMERA Camera 3 CCD CAMERA Camera 4 CCD CAMERA VIDEO OUT MAIN VIDEO IN 1 VIDEO IN 2 VIDEO IN 3 VIDEO IN 4 VIDEO OUT CALL REMOTE CONTROL ALARM OUT 4 x ALARM IN R...

Page 4: ...9 13 Technische Daten 20 13 1 Kompatible Festplatten 20 13 2 Aufnahmekapazit t 21 1 Operating Elements and Connections 5 2 Safety Notes 6 3 Applications 6 4 Connecting the Units 6 4 1 Video connection...

Page 5: ...im Vollbild Format mit automatischer Bildweiterschaltung 21 Stromversorgungsbuchse DC 19V f r den An schluss des beiliegenden Netzger tes 1 9 8 15 Please unfold page 3 Then you can always see the ope...

Page 6: ...rch un sachgem es Vorgehen besteht die Gefahr eines elektrischen Schlages Au erdem erlischt beim ffnen des Netzger ts oder des Recorders jeg licher Garantieanspruch 2 Safety Notes The recorder and its...

Page 7: ...VIDEO IN 1 4 18 2 Connect the video input of the main monitor for live surveillance in various display formats to the jack VIDEO OUT MAIN 19 This monitor also displays the recordings and the pages of...

Page 8: ...s werden w hrend einer Aufnahme folgende Informationen rechts oben eingeblendet 3 To modify the basic settings and to programme the unit to the individual requirements of the user see chapter 9 4 To s...

Page 9: ...findet in diesem Fall keine Aufnahme statt for timer controlled recording for alarm recording 2 the recording symbol 3 with activated overwrite function OW overwrite with deactivated overwrite functio...

Page 10: ...einer Aufnah me wieder verlassen werden die Taste MENU 9 dr cken 3 Zum Ausw hlen einer Aufzeichnung diese mit der Cursor Taste 4 oder 5 anw hlen und sie mit der Taste ENTER oder der Taste PLAY 3 aufr...

Page 11: ...JAN 27 06 8 4 3 ALARM LIST List of all alarm recordings To list the alarm recordings only select ALARM LIST and call the list with the key ENTER 10 2004 SEP 26 23 05 58 M 2004 SEP 26 01 58 52 M 2004...

Page 12: ...START END IPS QLT MODE OFF 00 00 00 00 25 BASE MUX OFF 00 00 00 00 25 BASE MUX OFF 00 00 00 00 25 BASE MUX OFF 00 00 00 00 25 BASE MUX OFF 00 00 00 00 25 BASE MUX OFF 00 00 00 00 25 BASE MUX OFF 00 00...

Page 13: ...following information will appear in the overview Note If a certain date has been programmed as a day of recording September 30th in the example above this date will not be shown in the overview To ex...

Page 14: ...SUPERVISOR ALARM ALARM ENABLE YES ALARM DURATION 10 SEC RECORD IPS 25 QUALITY HIGH RECORD MODE MULTIPLEX SUPERVISOR RECORD RECORD IPS 25 QUALITY NORMAL RECORD MODE MULTIPLEX Select HIGH if the alarm i...

Page 15: ...E DISPLAY YES OSD COLOR YELLOW LOSS SCREEN BLUE TIME POSITION NORMAL SUPERVISOR PIP FULL SCREEN CAM1 PIP SCREEN CAM2 POSITION D R SUPERVISOR DWELL NORM ALARM CAM1 02 02 CAM2 02 02 CAM3 02 02 CAM4 02 0...

Page 16: ...LATCH NO DATE DISPLAY Y M D DATE 2004 SEP 30 THU TIME 16 50 06 CLEAR HDD NO SYSTEM RESET NO SUPERVISOR USER PASSWORD SUPERVISOR 0000 USER 1 0000 USER 2 0000 USER 3 0000 USER 4 0000 USER 5 0000 USER 6...

Page 17: ...xxx xxx xx xx xx xx xxxxxxxxx xxxx xxx xx xx xx xx xxxxxxxxx xxxx xxx xx xx xx xx xxxxxxxxx xxxx xxx xx xx xx xx xxxxxxxxx xxxx xxx xx xx xx xx CLEAR ALL DATA IN HDD WILL BE CLEARED ARE YOU SURE NO YE...

Page 18: ...eigeformats f hrt ver schwindet bzw LOSS im Bild des Kanals 2 Um alle Alarmvorg nge zu beenden ein Alarm Reset Signal 0 V TTL Signal oder Schlie kon takt NO auf Pin 13 der Buchse EXTERNAL I O 17 geben...

Page 19: ...Q Taste 5A Z Taste 70 p Taste SLOW 53 S Taste REC 72 r Taste PLAY 50 P Taste REW 4C L Taste PAUSE 55 U Taste STOP 4E N Taste FF 52 R Bediensperre 4B K Taste f r Kanal 1 31 1 Taste f r Kanal 2 32 2 Ta...

Page 20: ...pplied with an 80 GB hard disk installed Ambient temperature 10 40 C Operating voltage 19 V 2 A via supplied power supply unit connected to 100 240 V 50 60 Hz Dimensions 345 x 70 x 245 mm Weight 1 9 k...

Page 21: ...6 h 20 h 8 60 h 75 h 2 240 h 300 h 4 120 h 150 h 1 480 h 600 h BASIC 64 h 32 h 120 h 480 h 240 h 959 h BEST 107 h 53 h 200 h 799 h 400 h 1599 h Q FI QUAD FIELD HIGH NORMAL 30 h 38 h 15 h 19 h 57 h 71...

Page 22: ...dur 37 13 Caract ristiques techniques 38 13 1 Disques durs compatibles 38 13 2 Capacit d enregistrement 39 22 I F B CH Table des mati res 1 Elementi di comando e collegamenti 23 2 Avvertenze di sicure...

Page 23: ...on DC 19V pour brancher le bloc secteur livr 1 9 8 15 Vi preghiamo di aprire completamente la pagina 3 Cos vedrete sempre gli elementi di comando e i collegamenti descritti 1 Elementi di comando e col...

Page 24: ...lectrique En outre l ou verture du bloc secteur ou de l enregistreur rend tout droit la garantie caduque 2 Avvertenze di sicurezza Il registratore e il suo alimentatore sono conformi alla direttiva C...

Page 25: ...l appareil aux besoins de tout type d utilisa tions voir chapitre 9 4 Pour teindre d branchez le cordon secteur de la prise secteur N allumez ou n teignez pas l appareil dans un intervalle bref Vous d...

Page 26: ...e gistrement l appareil revient au mode d enregistre ment pr c dent lorsque l alimentation est r tablie Sur l image du moniteur principal les informa tions suivantes s affichent en haut droite pendant...

Page 27: ...egistrazione registrazione manuale registrazione con timer registrazione da allarme 2 il simbolo di registrazione 3 se attiva la funzione di sovrascrittura OW overwrite se non attiva la funzione di so...

Page 28: ...5 et appe lez le en appuyant sur la touche ENTER ou la touche de d marrage PLAY 3 la lecture d marre partir du point de d marrage de l enre LAST RECORD FULL LIST ALARM LIST TIME SEARCH 8 1 Avanzament...

Page 29: ...sole registrazioni di allarmi selezionare la riga ALARM LIST e chiamarla con il tasto ENTER 10 2004 SEP 26 23 05 58 M 2004 SEP 26 01 58 52 M 2004 SEP 20 04 59 32 M 2004 SEP 13 05 03 00 M 2004 SEP 09...

Page 30: ...X OFF 00 00 00 00 25 BASE MUX OFF 00 00 00 00 25 BASE MUX OFF 00 00 00 00 25 BASE MUX OFF 00 00 00 00 25 BASE MUX TIMER ENABLE YES Il men principale ha 11 sottomen TIMER impostazioni delle funzioni de...

Page 31: ...azioni impostate sono caratterizzate da dei numeri Esempio Se nel men Timer sono programmate le seguenti 6 registrazioni nel prospetto si legge N B Se per il giorno di registrazione program mata una d...

Page 32: ...ionnez un autre sous menu ou pour m moriser les r glages quittez le menu principal en appuyant sur la touche MENU 9 6 Menu DWELL SUPERVISOR DWELL NORM ALARM CAM1 02 02 CAM2 02 02 CAM3 02 02 CAM4 02 02...

Page 33: ...l option NORMAL incrustation de la date et de l heure en SUPERVISOR DISPLAY TITLE DISPLAY YES OSD COLOR YELLOW LOSS SCREEN BLUE TIME POSITION NORMAL SUPERVISOR PIP FULL SCREEN CAM1 PIP SCREEN CAM2 POS...

Page 34: ...ER 4 0000 USER 5 0000 USER 6 0000 USER 7 0000 SUPERVISOR REMOTE REMOTE MODE RS 232 BAUD RATE 9600 ID 000 TIME POSITION posizione di data e ora sullo schermo Con il tasto o scegliere l opzione NORMAL d...

Page 35: ...xxxx xxxx xxx xx xx xx xx xxxxxxxxx xxxx xxx xx xx xx xx xxxxxxxxx xxxx xxx xx xx xx xx xxxxxxxxx xxxx xxx xx xx xx xx xxxxxxxxx xxxx xxx xx xx xx xx CLEAR ALL DATA IN HDD WILL BE CLEARED ARE YOU SURE...

Page 36: ...e ripristinata dopo interruzione con la password USER1 M HD REMS master hard disk removal Disco rigido tolto oppure accesso non possibile a disco rigido M HD REPL master hard disk replacement Disco ri...

Page 37: ...Les fonctions des touches de commande sont cod es comme suit 12 Sostituire il disco rigido L apparecchio equipaggiato con un disco rigido di 80 GB che pu essere sostituito con un altro disco rigido Si...

Page 38: ...IDE UDMA 66 possibili oltre 250 GB disco rigido di 80 GB installato alla consegna Temperatura d esercizio 10 40 C Tensione d esercizio 19 V 2 A tramite alimentatore in dotazione con 100 240 V 50 60 H...

Page 39: ...5 h 450 h 1350 h Q FI QUAD FIELD HIGH NORMAL 31 h 40 h 15 h 19 h 64 h 80 h 192 h 241 h 128 h 160 h 385 h 481 h BASIC 64 h 31 h 128 h 385 h 256 h 772 h BEST 106 h 51 h 214 h 641 h 427 h 1282 h Q FR QUA...

Page 40: ...org ervoor dat de ventilatieopeningen van de kast door geen enkel voorwerp afgedekt worden Zorg ervoor dat u niets in de ventilatieopeningen steekt Dit kan immers tot een defect in het toestel leiden...

Page 41: ...emperatur 10 40 C Placera inte f rem l inneh llande v tskor t ex vaser eller dricksglass p enheterna V rmen som alstras vid anv ndning leds bort genom sj lvcirkulering av luften T ck d rf r aldrig ver...

Page 42: ...Copyright by MONACOR INTERNATIONAL GmbH Co KG Bremen Germany All rights reserved A 0281 01 01 09 2004...

Reviews: