


Gpredict User Manual
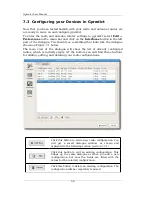
1. Select the satellite in the Target box.
2. Select the transponder you want to track.
3. Enable the Track button. You should now see the Radio frequency
being corrected for Doppler shift with respect to the Satellite
frequency.
4. Select the proper radio device(s) in the Settings area.
5. Enable the Engage button.
You can at any time disable the Doppler correction by disabling the Track
button – regardless of whether the radio device is engaged or not.
Similarly, engaging and disengaging the device can be done at any time.
Note that if gpredict detects too many communication errors with hamlib it
will automatically disengage the device(s).
Note that when tracking is enabled Doppler correction will be applied
regardless of whether the satellite is within range or not.
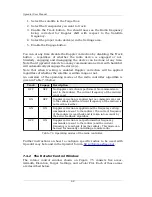
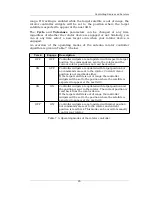
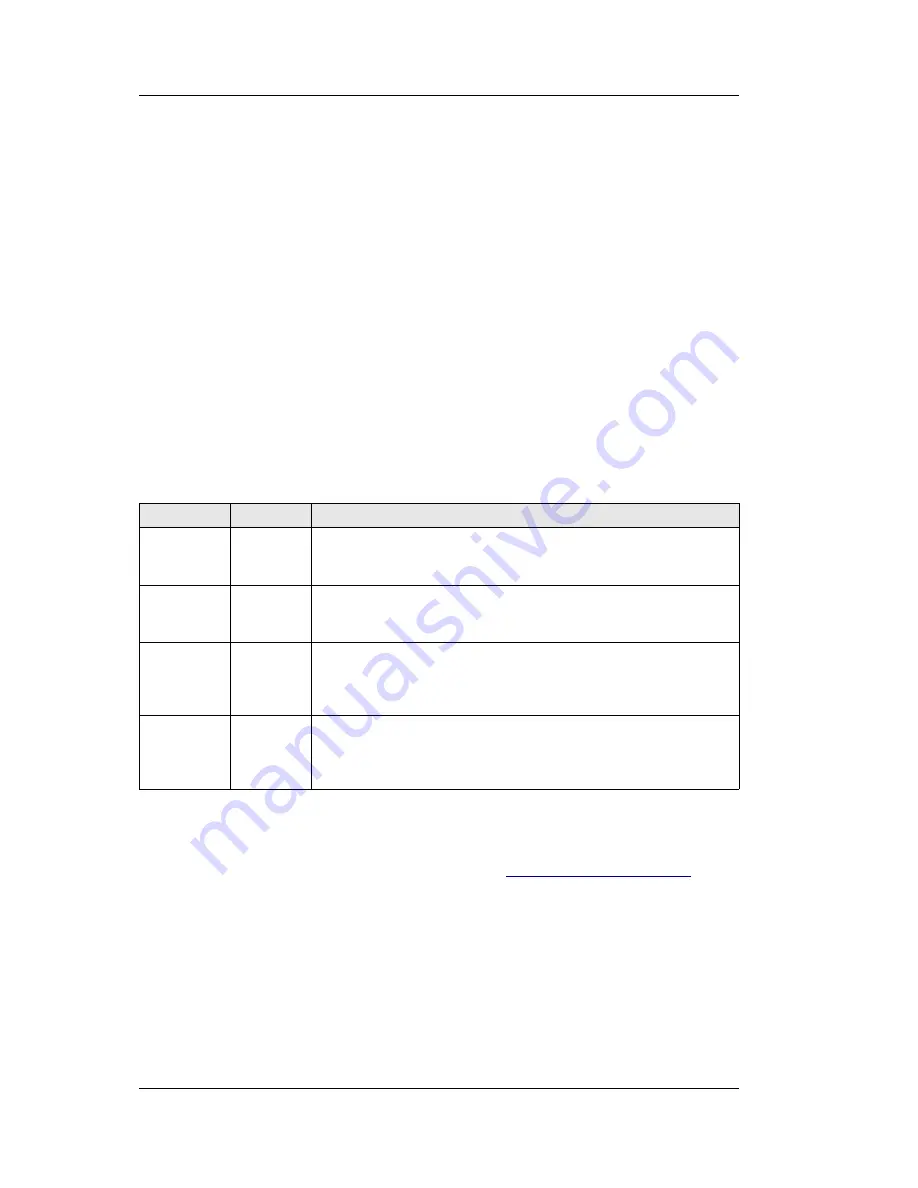
An overview of the operating modes of the radio controller algorithm is
given in Table 7.3 below.
Track
Engage
Description
OFF
OFF
No Doppler correction is performed. No commands are
sent to the radio(s). The current frequency of the radio(s)
is not read.
ON
OFF
Doppler correction is applied, but no commands are sent
to the radio(s) and the current frequency of the radio(s) is
not read back either.
ON
ON
Doppler correction is applied and the frequency setting
commands are sent to the radio(s). The current frequency
of the radio(s) is read back and is taken into account by
the active feedback algorithm.
OFF
ON
Doppler correction is not performed but frequency
commands are sent to the radio(s) and the current
frequency is read back from the radio(s). This mode can
be used for manually controlling a remote radio.
Table 7.2: Operating modes of the radio controller.
Further instructions on how to configure specific radios to be used with
Gpredict may be found in the Gpredict forum:
http://forum.oz9aec.net
.
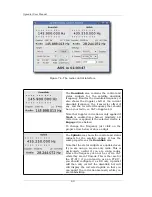
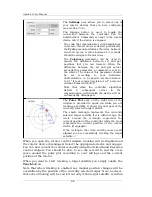
7.4.2 The Rotator Control Window
The rotator control window shown on Figure 7.5 consists five areas:
Azimuth, Elevation, Target, Settings, and a Polar Plot. Each of these areas
are described below.
62


