Gpredict User Manual
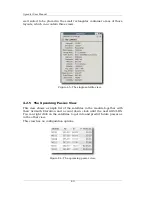
the next upcoming pass for this satellite.
●
Future Passes:
This will bring up the dialogue window showing the
summary for the next N passes, N being a user configurable
parameter (see section 5.1).
●
Sky Track:
Checking this option will show the sky track of the
satellite on the polar graph. If you select this option again, the sky
track of the satellite will be hidden. The polar view can show the sky
tracks for any number of satellites at the same time. When a satellite
goes down, i.e. disappears from the polar view, its sky track will
disappear, too.
●
Set Target:
Selecting this option will select the satellite as
communication target. This function is currently disabled.
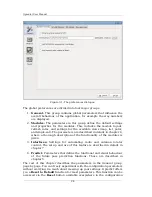
Gpredict offers you many configuration options to customise the look of the
polar view. The global default settings can be modified in the preferences
dialogue, i.e.
Edit → Preferences → Modules → Polar View
, and the
settings for the polar view in a specific module can be accessed via
Module Pop-Up → Configure → Properties → Polar View
. A description
of the configuration options is given below.
●
Orientation:
This setting determines the orientation and direction
of the polar graph. The first letter defines the cardinal direction that
should be placed at the top of the graph, then it continues clockwise
with the second, third, and fourth letters:
○
N/E/S/W
(default): North is at the top, South at the bottom, East
on the right side, and West on the left side.
○
N/W/S/E:
Same as the above but East and West swapped, hence
we have West on the right side.
○
S/E/N/W:
North and South swapped, as compared to the default
setting.
○
S/W/N/E:
Both North/South and East/West swapped as compared
to the default setting.
●
Extra Contents:
Using these setting you can determine which extra
content should be displayed on the polar view:
○
QTH Info:
Checking this box will show the name of the ground
station in the upper left corner of the polar view. The polar view
on figure 4.3 shows
sample
, since this is the name of the default
ground station.
○
Next Event:
Checking this box will show in the upper right
corner which satellite will come up next as when it will come up.
The time is shown as a countdown to the event. Figure 4.3 shows
that the next satellite will be SUITSAT and that it will come up in
4 minutes and 10 seconds. Please note that the countdown is not
necessarily updated in real-time. Actually, it is only updated every
time the polar view is refreshed, see description of refresh rates
in section 2.3.3 - Module Properties.
○
Cursor Position:
If this option is set, the polar coordinates of the
mouse pointer will be displayed in real-time in the lower left
38

