


4-22 ScanWizard Pro for Windows Users Guide
English
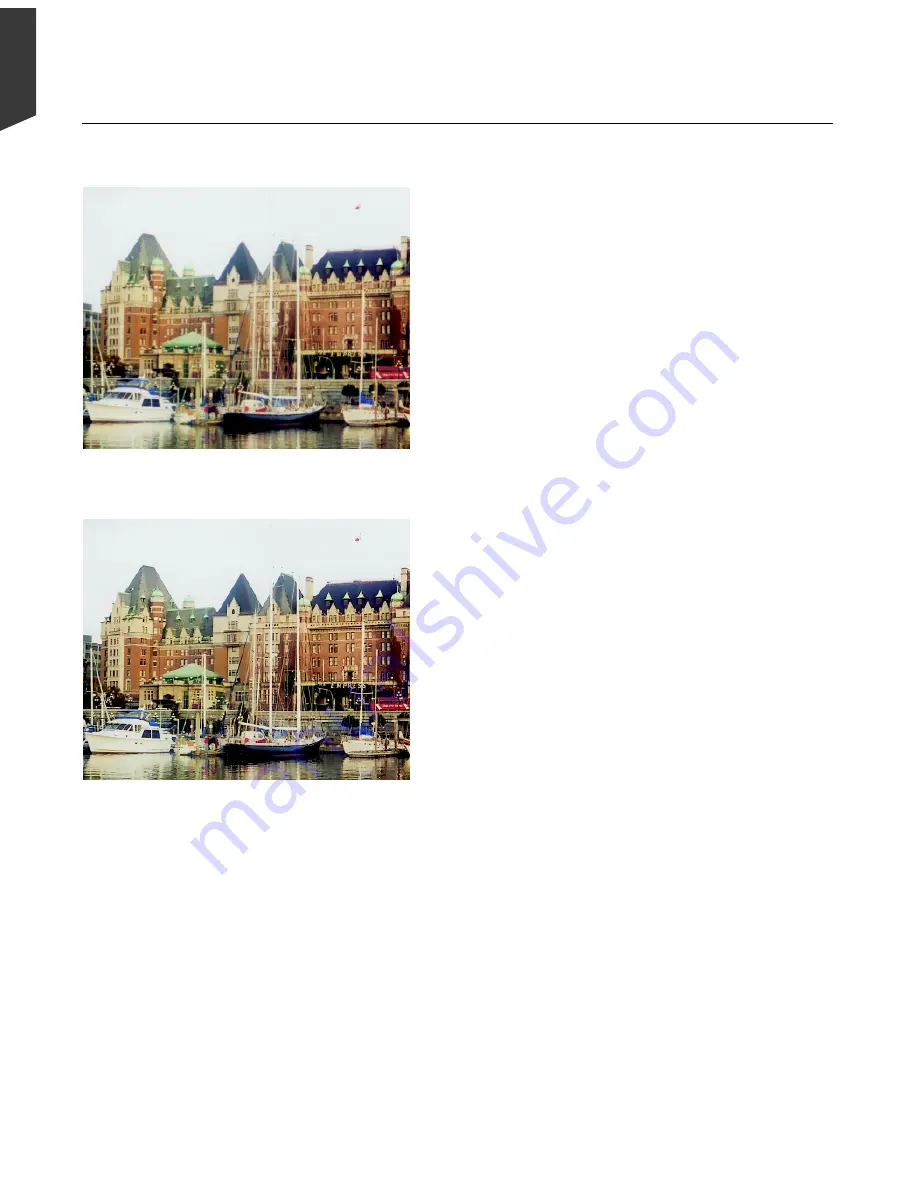
Using the Filter Tool
The Filter tool is used to apply special effects to
your images. Several filters are provided in
ScanWizard Pro, including various Blur / Blur More,
Sharpen / Sharpen More, Emboss, and Edge
Enhancement.
In the example here, the original is a bit blurry to
begin with. The solution: Use the Unsharp Masking
filter to increase sharpness in an image.
1. Place the image to be corrected on your scanner.
2. Click the Overview button, and you will see the
image appear in your Preview window.
3. Select the area to be prescanned with the Scan
Frame tool, then click the Prescan button to
obtain a prescan image, and switch to the
Prescan view from the View menu.
4. Click the Filter tool in the Settings window. The
Filter dialog box will appear.
5. Check the option, Simulate Unsharp Mask Effect
on Preview Images.
6. Check the option, Apply Filter to Lightness
channel only.
7. Select Unsharp Masking from the Filter drop-
down menu. The Unsharp Masking dialog box
will appear.
8. Adjust the Strength and Mask Size parameters
until you are satisfied with the effect displayed
by the thumbnail.
9. Click OK to return to the Filter screen.
10. Check the Preview box so that the image in the
Preview window is updated with the latest image
correction. The update is done in the background
and so may take a few seconds to display the
result.
11. Click OK to confirm the correction.
Image corrected with Unsharp Masking filter
tool
Original image
Summary of Contents for ScanMaker 5
Page 1: ...Microtek ScanWizard Pro User s Guide for Windows...
Page 49: ...Special Features 5 3 English 2 1 3 4 5 Kid Beach City View...
Page 51: ...Special Features 5 5 English 6 8 4 2 5 3 7...
Page 55: ...Special Features 5 9 English 1 5 3 4 2 5 7 6...
Page 57: ...Special Features 5 11 English 7 2 4 3 5 6...
Page 61: ...Special Features 5 15 English 4 5 2 8 3 7 6...
Page 68: ...Appendix 7 English...


