Using AIC Tools 4-5
English
Adding a Custom Setting
To the right side of each AIC tool is a custom pull-down menu that features
predefined settings for the AIC tool. For instance, some of these settings include
Automatic or No Correction. You can also add your own image correction setting for
each AIC tool. That way, you can retrieve or load the setting at any time in the future.
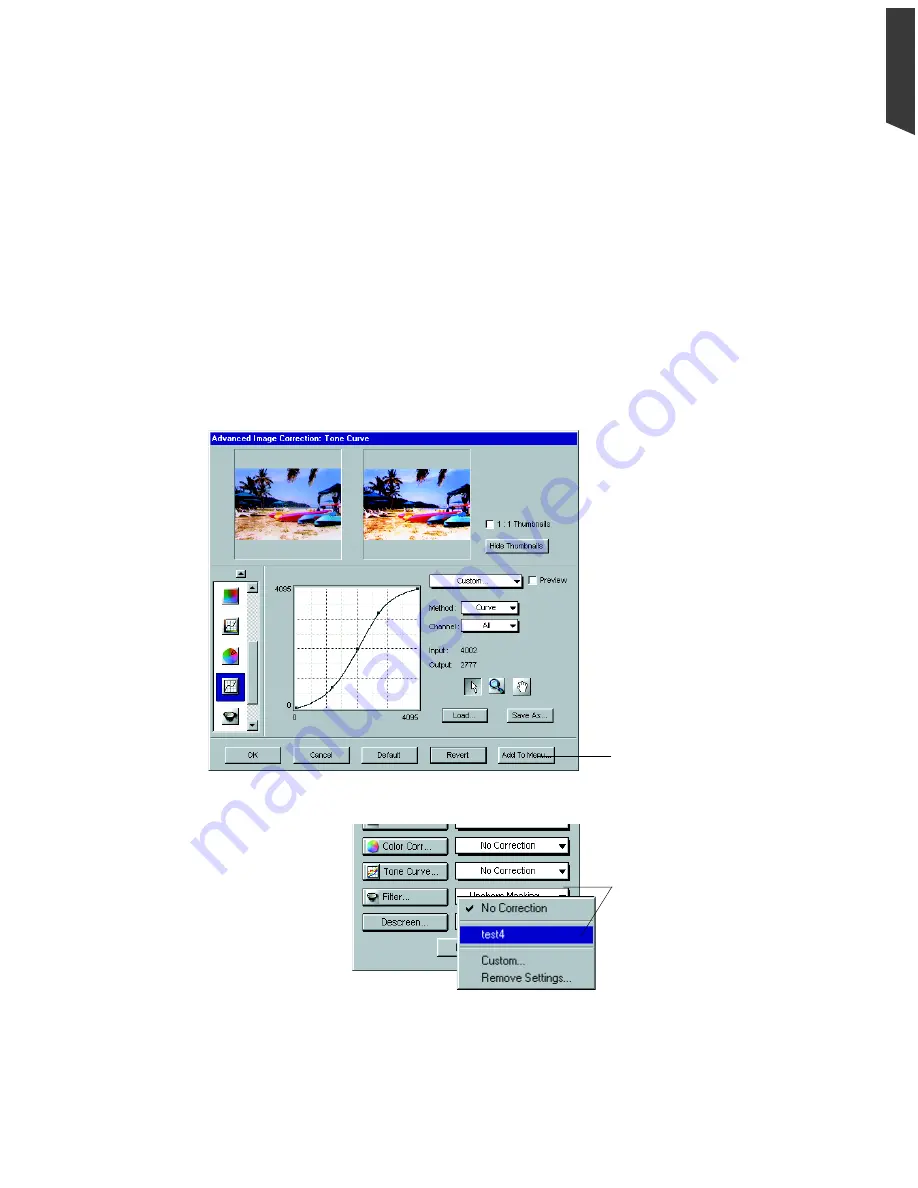
To do this, choose an AIC tool and make the adjustments you desire to the image.
Then click the Add to Menu button in the AIC dialog box.
When another dialog box comes up, enter the name for the new setting. The new
setting will appear in the custom pull-down menu of the Settings window for that
particular AIC tool.
Saved custom setting (e.g.,
test4
) is stored here. To
retrieve and apply
test4 to
a
new image to be subjected to
a
Tone Curve
adjustment,
click on this expansion
arrowhead and choose
test4
from the menu
Click to save current custom
setting and add into AIC (
Tone
Curve
in this example)
predefined settings menu in
the
Settings
window (see
below)
Summary of Contents for ScanMaker 5
Page 1: ...Microtek ScanWizard Pro User s Guide for Windows...
Page 49: ...Special Features 5 3 English 2 1 3 4 5 Kid Beach City View...
Page 51: ...Special Features 5 5 English 6 8 4 2 5 3 7...
Page 55: ...Special Features 5 9 English 1 5 3 4 2 5 7 6...
Page 57: ...Special Features 5 11 English 7 2 4 3 5 6...
Page 61: ...Special Features 5 15 English 4 5 2 8 3 7 6...
Page 68: ...Appendix 7 English...


