M
‑
I SWACO
MONGOOSE PRO Shale Shaker
19
Field Installation and Operation Manual 9092F02001AENG (D)
19
NOTE
REFER TO THE WIRING SCHEMATICS IN PARAGRAPH 21.1 OF THIS DOCUMENT.
1.
Remove the bolts securing the control panel enclosure.
2.
Open control panel door.
3.
Confirm grounding cables are secured to ground bolt within the panel.
4.
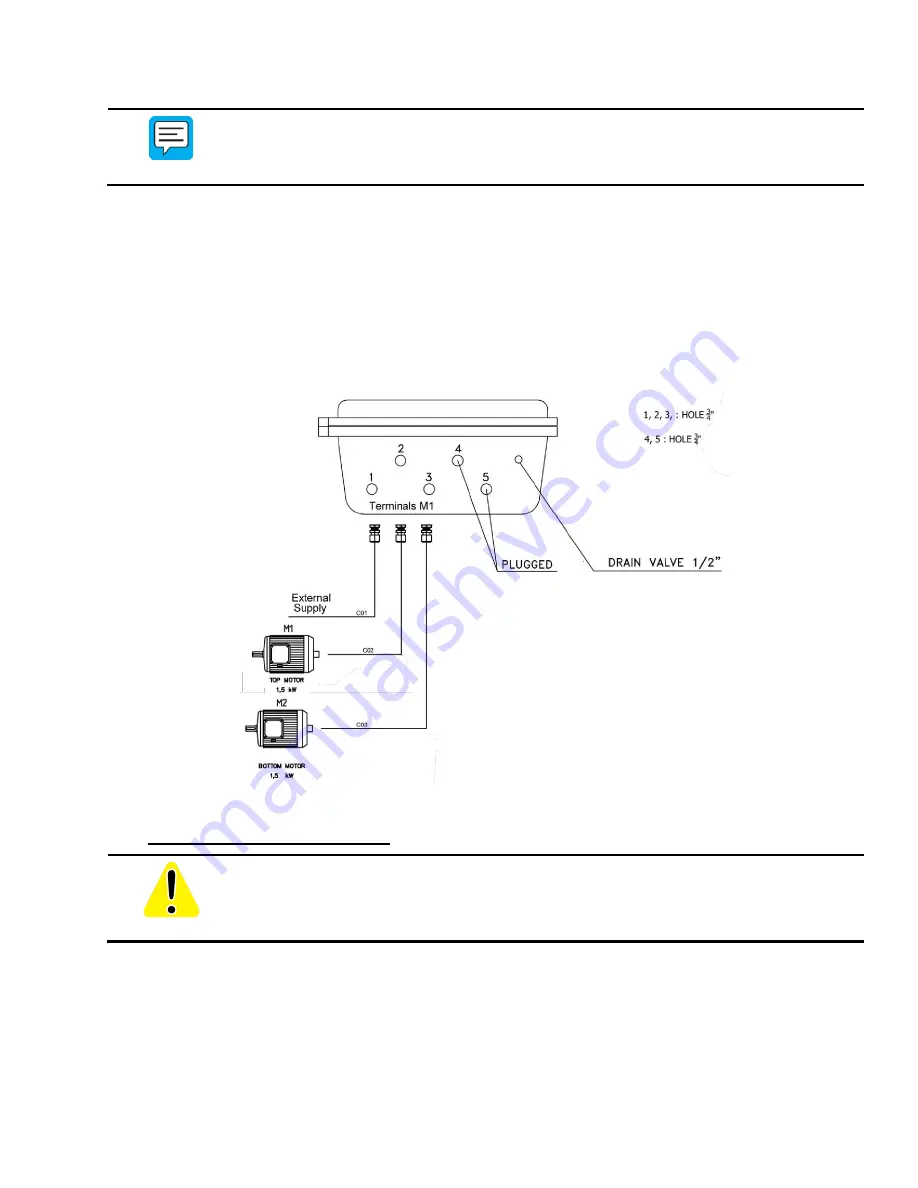
Confirm power supply and motor connections are properly secured. External power supply and motor wire inlet
ports are labeled in Figure 17.
5.
Inspect o-ring seal on door surface. Replace if damaged.
6.
Install ALL exterior door bolts to completely close and seal the enclosure.
Figure 17. ATEX/IECEx Control Panel View
10.2
Removing Shipping Brackets
CAUTION
THE SHIPPING BRACKETS RETAIN THE BASKET ONTO THE SKID DURING ITS
TRANSPORTATION. THEY ARE TO REMAIN SECURED TO THE UNIT UNTIL IT IS
PLACED IN ITS FINAL LOCATION. KEEP THESE BRACKETS SAFE FOR TRANSFERS
OR LONG-TERM STORAGE OF THE SHALE SHAKER.
The MONGOOSE PRO is equipped with special shipping brackets for the feed and discharge ends of the
assembly. After the equipment is confirmed to be intact, the shipping brackets may be removed.
1.
Locate the shipping brackets on the MONGOOSE PRO. Units arrive with shipping brackets locking the basket
to the skid (Refer to Figure 18, Figure 19).
2.
Using a 30mm socket wrench, loosen the bolt on the discharge end shipping brackets (Refer to Figure 18).


