


25
INITIAL SETUP MENU (CONTINUED)
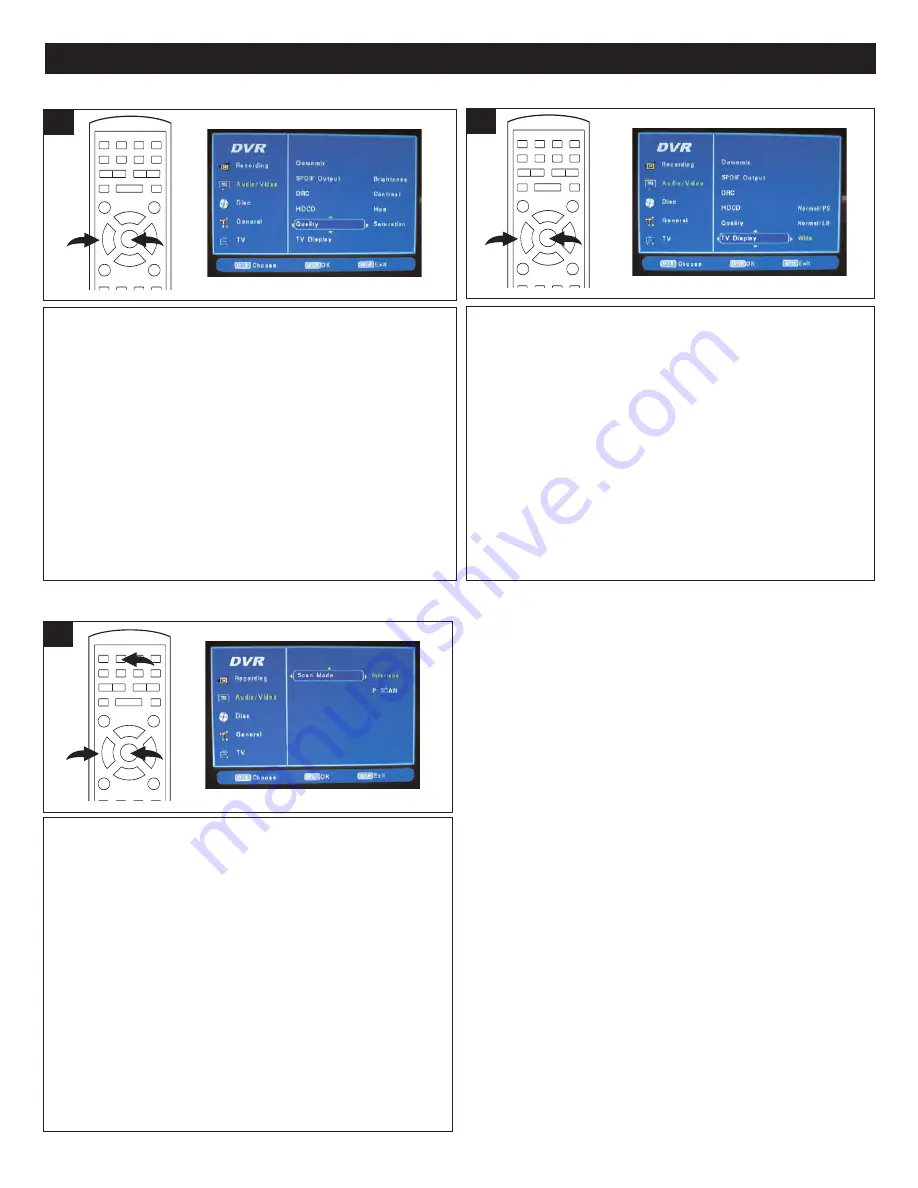
Enter the AUDIO/VIDEO Setup page as described on page 23.
Then, select QUALITY using the Navigation (
π
,
†
) buttons
1
,
then the Navigation (
®
) button
1
to select it.
Select the desired option to adjust (Brightness, Contrast, Hue
or Saturation) using the Navigation (
π
,
†
) buttons
1
, then
press the ENTER button
2
.
At the next screen, adjust the selected setting using the
Navigation (
√
,
®
) buttons
1
, then press the ENTER button
2
.
Repeat the above step to adjust the other settings (Brightness,
Contrast, Hue or Saturation).
QUALITY
2
1
1
Enter the AUDIO/VIDEO Setup page as described on page 23.
Then, select TV DISPLAY using the Navigation (
π
,
†
) buttons
1
, then the Navigation (
®
) button
1
to select it.
Select the desired setting (see below) using the Navigation
(
π
,
†
) buttons
1
, then press the ENTER button
2
.
Normal/PS:
use when you connect a normal TV to the
recorder. Displays a wide picture on the whole TV screen with
a portion (right and left sides of the picture) automatically cut
off.
Normal/LB:
use when you connect a normal TV to the
recorder. Displays a wide picture with bands displayed on the
upper and lower portions of the screen.
Wide:
use when you connect a wide screen TV to the system.
(Please see additional information in NOTES below.)
TV DISPLAY
2
1
1
NOTES:
• Some wide-screen discs that do not permit Pan &
Scan mode playback are automatically played in
Letterbox mode.
• Depending on the DVD, 4:3 Letterbox may be
selected automatically instead of 4:3 Pan & Scan and
vice versa.
• You must also set the screen mode on your wide
screen TV to “FULL”.
• If WIDE is selected and a normal TV is connected,
16:9 content will appear distorted during playback
(objects look thin).
•
To return to the previous row of options, press the
Navigation (
√
) button.
•
To exit setup, press the SETUP button.
Enter the AUDIO/VIDEO Setup page as described on page 23.
Then, select SCAN MODE using the Navigation (
π
,
†
)
buttons
1
, then the Navigation (
®
) button
1
to select it.
Select the desired setting (see below) using the Navigation
(
π
,
†
) buttons
1
, then press the ENTER button
2
.
INTERLACE:
Select Interlace when connecting via other
methods.
P-SCAN:
Select P-SCAN (Progressive-Scan) when
connected to the Component jacks for a more stable, flicker
free picture.
For Progressive-Scan, your TV must have the Progressive-
Scan function with the Component Input jacks. Otherwise,
select Interlace mode.
You can also use the I/P button
3
to select the Progressive
or Interlace modes.
SCAN MODE
2
1
3
1


