SECTION 5
MAINTENANCE
156
11.
Turn the printer’s Main Power Switch ON; then press the control panel’s ON/OFF button.
After printer initialization (~45 seconds) the Print Engine will automatically pull the Service Station
the rest of the way in.
NOTICE
: If the Service Station should get jammed during this process (you hear motor stall noise or
gear slipping noise); immediately turn OFF the printer’s Main Power Switch. This is one of the only
exceptions for turning off the printer using the main power switch, before properly powering-down the
print engine. Remove the Service station by turning the Large Gear counter-clockwise. Re-check that
the Wiper Roller is properly installed and latched at each end. Then re-install the Service Station
starting from step 8 above.
Tip:
The “Eject Service Station” button, located in the M Series Toolbox, should be used if the service
station needs to be removed in the future.
12.
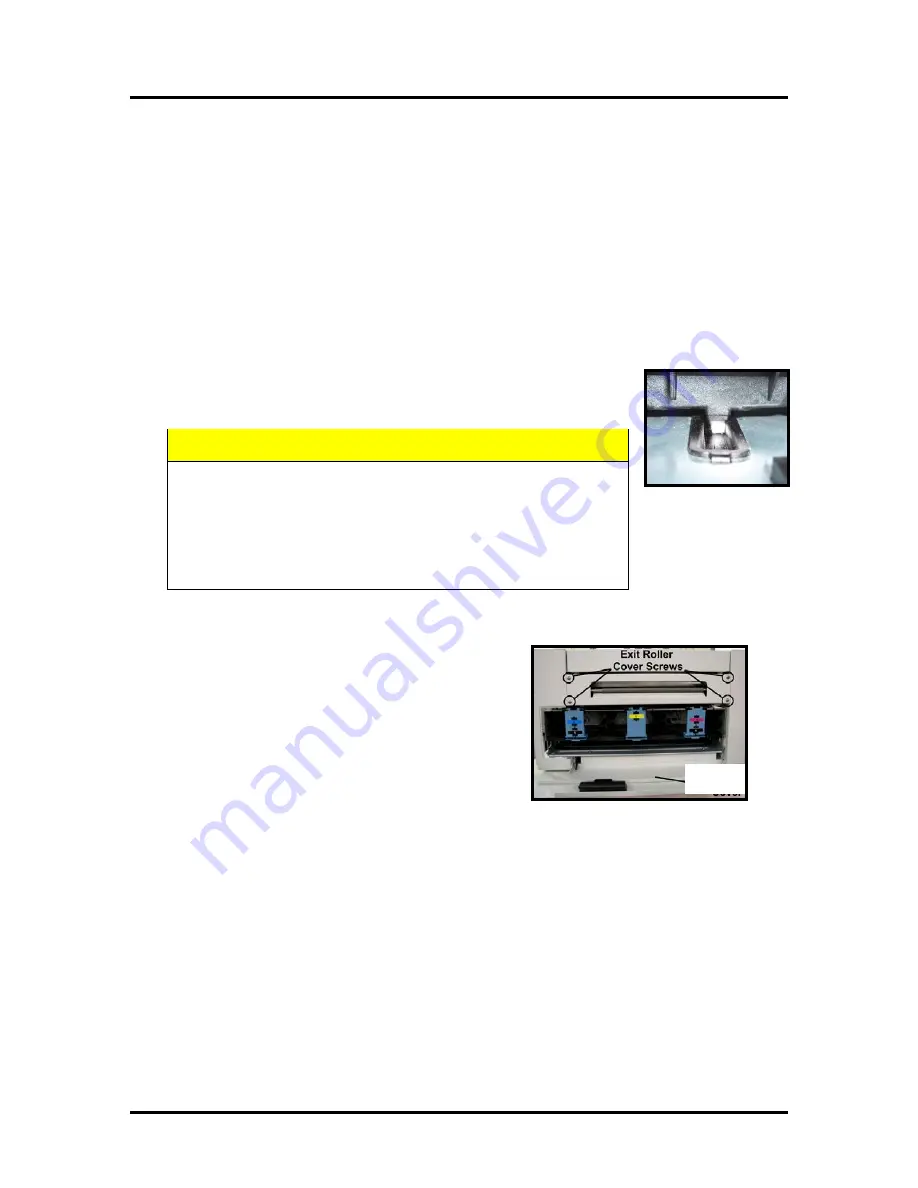
Verify that the wick, located on the bottom of the Service Station, is hanging
into the waste ink trough; as shown (as viewed looking into the Service
Station Slot, from the exit end of the printer).
13.
Close the Ink Tank Door.
NOTE:
If using an older printer you will need to re-install
the Exit Roller Cover plate, using the 4 screws, before
closing the Ink Tank Door.
Make sure the cover is installed in the proper orientation.
TIP:
Since the Exit Roller Cover is also an integral part of
the frame structure; you may need to push in on the outer
frames to get the screw holes in the Exit Roller Cover to
align.
14.
Close the Top Cover
15.
Power the printer on and Test for proper operation.
Still Experiencing Print Quality Issues?
If you still experience print quality issues, after performing all the cleaning processes, outlined in this
section, please refer to the “Troubleshooting Guide” for additional help. If you have exhausted all cleaning
and troubleshooting options, and you have replaced the Printhead Cartridge and Wiper Roller; then this
may indicate that the printer requires technical service.
WARNING
Waste-ink from the Service Station flows through wicking
material and out the hole, located on the bottom of the service
station. If this wicking material is not directed into the trough;
waste-ink will build up on the base of the Service Station Slot.
This misdirected waste-ink will eventually find its way onto
the Ink Tanks, inside the body of the printer and even under
the printer; causing damage to the system.
Ink Tank
Door
Summary of Contents for AS-1180C
Page 75: ...SECTION 4 DISASSEMBLY AND ASSEMBLY 73 a J1002 Cable J1002 Socket Location Connection ...
Page 76: ...SECTION 4 DISASSEMBLY AND ASSEMBLY 74 b J1000 Cable J1000 Socket Location Connection ...
Page 77: ...SECTION 4 DISASSEMBLY AND ASSEMBLY 75 c J551 Cable J551 Socket Location Connection ...
Page 78: ...SECTION 4 DISASSEMBLY AND ASSEMBLY 76 d J703 Cable J703 Socket Location Connection ...
Page 79: ...SECTION 4 DISASSEMBLY AND ASSEMBLY 77 e P2002 Cable P2002 Socket Location Connection ...
Page 80: ...SECTION 4 DISASSEMBLY AND ASSEMBLY 78 f P2004 Cable P2004 Socket Location Connection ...
Page 81: ...SECTION 4 DISASSEMBLY AND ASSEMBLY 79 g P2006 Cable P2006 Socket Location Connection ...
Page 82: ...SECTION 4 DISASSEMBLY AND ASSEMBLY 80 h J35 Cable J35 Socket Location Connection ...
Page 83: ...SECTION 4 DISASSEMBLY AND ASSEMBLY 81 i P1 Cable P1 Socket Location Connection ...
Page 84: ...SECTION 4 DISASSEMBLY AND ASSEMBLY 82 j P2005 Cable P2005 Socket Location Connection ...
Page 85: ...SECTION 4 DISASSEMBLY AND ASSEMBLY 83 k P2003 Cable P2003 Socket Location Connection ...
Page 86: ...SECTION 4 DISASSEMBLY AND ASSEMBLY 84 l J20 Cable J20 Socket Location Connection ...
Page 87: ...SECTION 4 DISASSEMBLY AND ASSEMBLY 85 m J2001 Cable J2001 Socket Location Connection ...
Page 180: ......
Page 181: ...Copyright Neopost USA 2014 ...


