SECTION 5
MAINTENANCE
150
Cleaning the Service Station
Caution:
Please be sure that you are using proper cleaning techniques to clean items that come in contact
with the printhead. Use only distilled or deionized water and lint free cloths. If you don’t follow this rule,
you will introduce contamination into the printhead; which can damage the printhead and ink system.
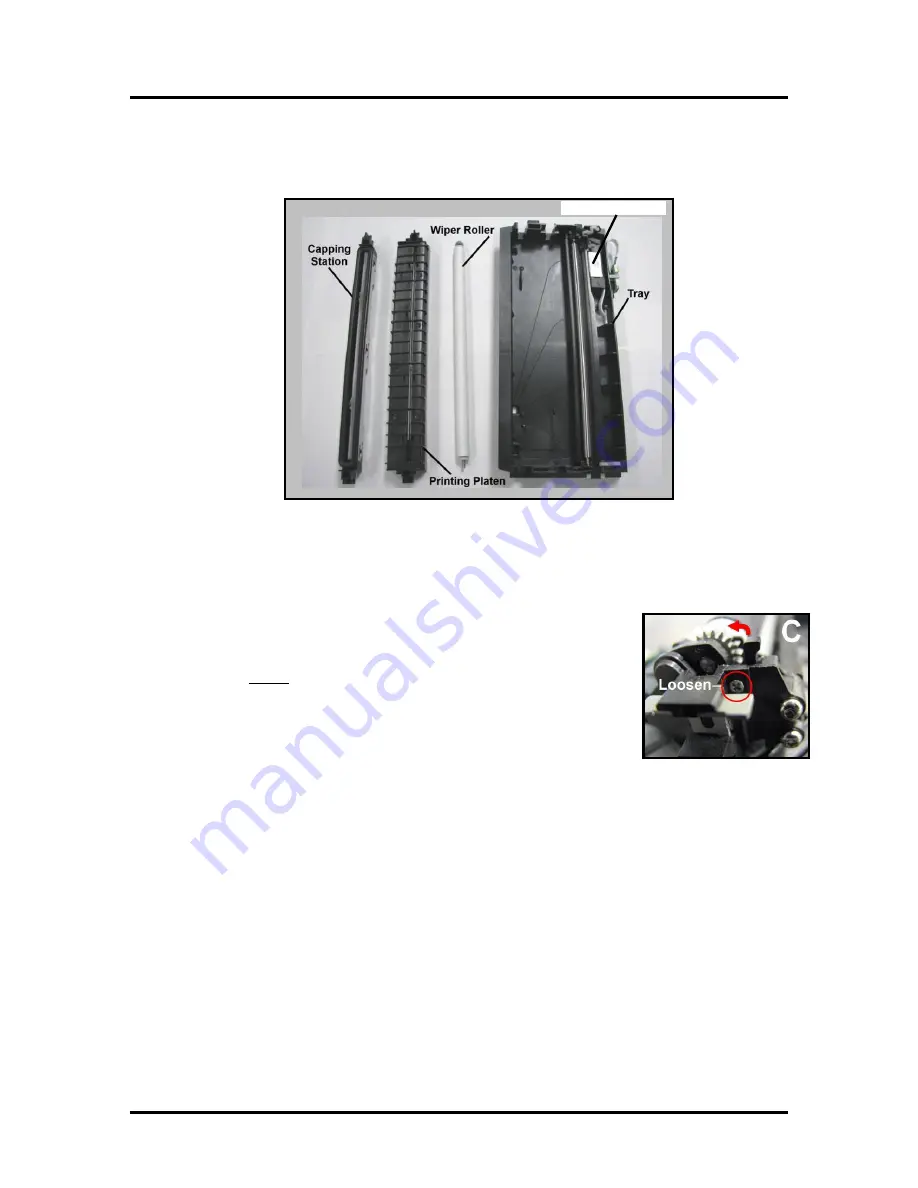
Wiper Roller Removal and Cleaning or Replacement
Tip: Although the wiper roller can be cleaned; this process is time-consuming. When you factor in labor
costs; you may find it more cost-effective to replace the wiper roller instead. We also recommend that the
wiper roller be replaced whenever a new printhead is installed.
Removal:
1.
Lift up, about one inch, on the Wiper Motor Assembly; to expose the
latch retaining screws [C] (one at each end).
NOTE
: Early versions of this assembly did not have retaining screws.
2.
Carefully loosen the two small screws retaining the wiper roller latches.
Tip:
To avoid loosing these screws; don’t remove the screws. You only
need to back-out the screws far enough so the latches can be opened.
3.
Release the two latches that secure the wiper roller.
4.
Remove the Wiper Roller from the Wiper Motor Assembly.
Cleaning/Replacement:
1.
Using distilled water; immerse for 10 minutes, then remove and pat dry with absorbent lint free
towel.
WARNING!
Do NOT rub the roller, when cleaning or drying it. This will cause damage to the
roller fabric. Do NOT use tap/mineral/spring water to clean the wiper roller; doing so will
introduce contaminants into the roller. A contaminated roller will cause damage to the printhead
and ink system. Allow the roller to dry completely, before re-installing it.
2.
If the Wiper Roller shows signs of wear (fabric surface torn, un-even or fuzzy), it should be
replaced. Be sure to remove the plastic cover from the new Wiper Roller before installing it.
Install:
1.
Re-install the Wiper Roller into the Wiper Motor Assembly. Make sure the gear on the Wiper
Roller engages the gear in the Wiper Motor Assembly.
TIP:
If you are planning to clean the Wiper Motor Assembly; don’t re-install the wiper roller until
you have completed the Wiper Motor Assembly cleaning process.
2.
Carefully close the latches. Make sure the latches are fully locked and then tighten the latch
retaining screws [C] (don’t over-tighten).
Wiper Motor Assy
Summary of Contents for AS-1180C
Page 75: ...SECTION 4 DISASSEMBLY AND ASSEMBLY 73 a J1002 Cable J1002 Socket Location Connection ...
Page 76: ...SECTION 4 DISASSEMBLY AND ASSEMBLY 74 b J1000 Cable J1000 Socket Location Connection ...
Page 77: ...SECTION 4 DISASSEMBLY AND ASSEMBLY 75 c J551 Cable J551 Socket Location Connection ...
Page 78: ...SECTION 4 DISASSEMBLY AND ASSEMBLY 76 d J703 Cable J703 Socket Location Connection ...
Page 79: ...SECTION 4 DISASSEMBLY AND ASSEMBLY 77 e P2002 Cable P2002 Socket Location Connection ...
Page 80: ...SECTION 4 DISASSEMBLY AND ASSEMBLY 78 f P2004 Cable P2004 Socket Location Connection ...
Page 81: ...SECTION 4 DISASSEMBLY AND ASSEMBLY 79 g P2006 Cable P2006 Socket Location Connection ...
Page 82: ...SECTION 4 DISASSEMBLY AND ASSEMBLY 80 h J35 Cable J35 Socket Location Connection ...
Page 83: ...SECTION 4 DISASSEMBLY AND ASSEMBLY 81 i P1 Cable P1 Socket Location Connection ...
Page 84: ...SECTION 4 DISASSEMBLY AND ASSEMBLY 82 j P2005 Cable P2005 Socket Location Connection ...
Page 85: ...SECTION 4 DISASSEMBLY AND ASSEMBLY 83 k P2003 Cable P2003 Socket Location Connection ...
Page 86: ...SECTION 4 DISASSEMBLY AND ASSEMBLY 84 l J20 Cable J20 Socket Location Connection ...
Page 87: ...SECTION 4 DISASSEMBLY AND ASSEMBLY 85 m J2001 Cable J2001 Socket Location Connection ...
Page 180: ......
Page 181: ...Copyright Neopost USA 2014 ...


