background image

Table of Contents 

Centauri user manual revision level 01 /2007 

21


3.2. 

Set Time, Date and Date Format  

CENTAURI Gateways have an internal clock that is supplied with a battery in the event of 
a power cut etc. This is why it is only rarely necessary to set the internal clock. 

To set the Merk II’s internal clock and/or date and/or the format for time displays, proceed 
as follows: 

a) 

  Via the front panel: 


Select the 

SETUP

 option in the start mask (see 

Figure 4

). The Setup mask appears. 


Select 

DATE & TIME

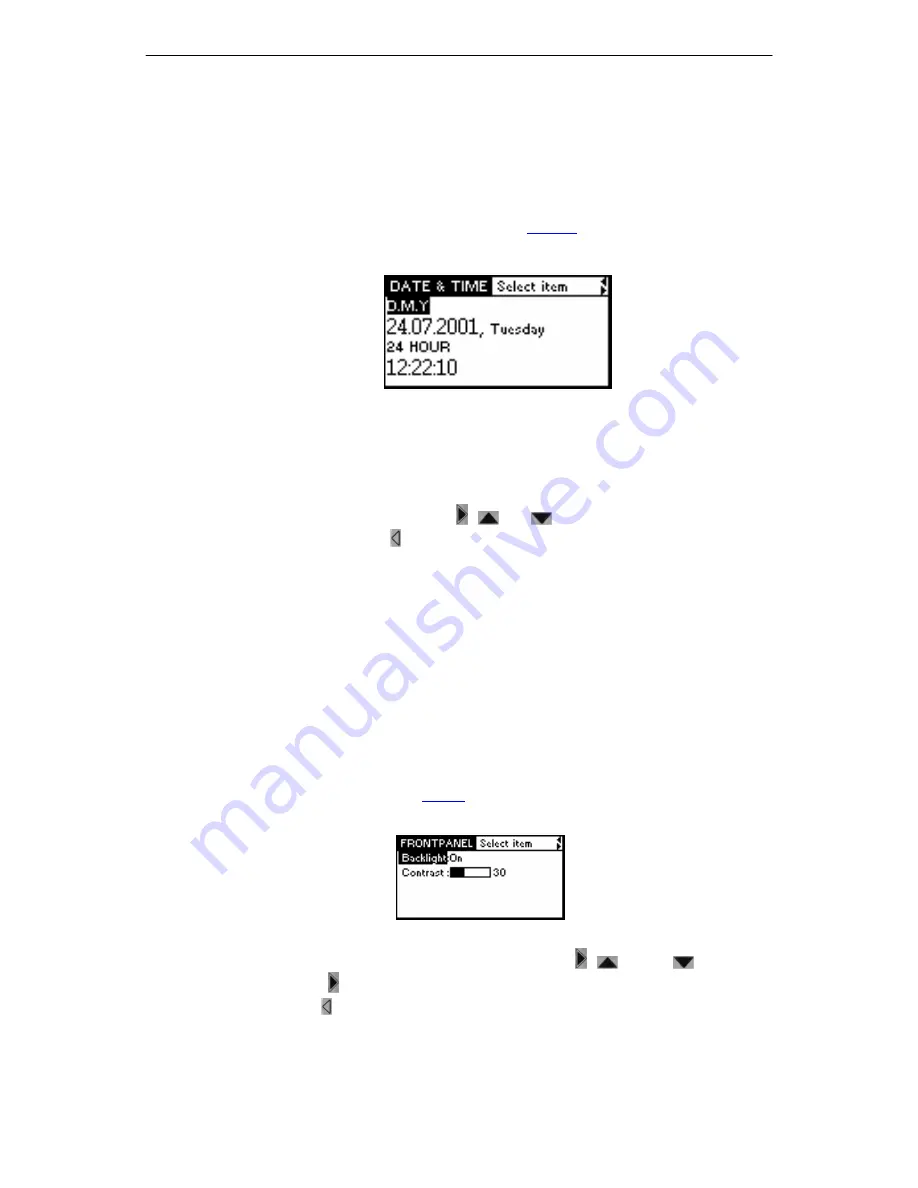
. The following mask appears: 

Figure 14:  

The 

DATE & TIME


mask


The abbreviations in the mask have the following meanings: 

– 

  Y-M-D = Year, Month, Day (format can be sorted) 

– 

  D-M-Y = Day, Month, Year (Germany) 

– 

  M-D-Y = Month, Day, Year (US format) 


Set the desired information with the 

 and 

 keys and the number/letter keys. 


To close and save press  . 

The time and date format set here affects the display in the journal. The time and 
date information in the journal is shown in the format set here. 

a) 

  Via the remote software: 


Select 

STATUS CENTAURI TIME


Set the desired time and date with the mouse; 


Click on 

OK

3.3. 

Set Display Contrast/Background Lighting 

To set the contrast of the LCD and to switch the background lighting on and off, please 
proceed as follows: 


Select the 

SETUP

 option (see 

Figure 

4 in the start mask. The Setup mask appears. 


Select the 

FRONTPANEL

. The following mask appears: 

Figure 15:  

The


FRONTPANEL

 mask 


Set the desired values for contrast and lighting with the 

 and the 

 keys. 


To save press 


To quit press  . 

Summary of Contents for Merk II

Page 1: ...Mayah Communications Merk II Audio Codec Mixer User Manual Order No MHH001 1...

Page 2: ...SHCAST are registered trademarks All other trademarks used are acknowledged with this Copyright by MAYAH Communications GmbH in 2007 For copying this manual even by extract an explicit written permiss...

Page 3: ...1 Scope of Delivery 18 2 2 Environment and Operating Conditions 18 2 3 Connections 18 2 4 Program Installation 18 2 5 Start Remote Control Software 19 2 6 Control Remote Control Software via the Keyb...

Page 4: ...rofile 51 5 2 4 Save communication profile on the PC 52 5 2 5 Transfer communication profile file to the CENTAURI 52 6 Connections Transmissions 53 6 1 Automatic Acceptance of Calls 53 6 2 Prepare Con...

Page 5: ...Request of the Current Version Status 73 8 2 2 Software Updating via ISDN 74 8 2 3 Updating via FTP 75 8 2 4 Updating via Internet 75 8 2 5 Updating via the RS232 Remote Port 75 8 3 Remote Control Sof...

Page 6: ...meters for full audio mixing remote control Figure 1 Merk II Portable Audio Codec Mixer MERK II supports dual codec mode as well as point to multipoint transmissions the dream of a reporter to reach u...

Page 7: ...Microphone Line Inputs on the front and 2 Line Inputs on the rear 4 Headphone Outputs with 2 different mixes 2 Line Out Monitor XLR Outputs on the rear see Figure 12 1 2 1 The Function Keys Each funct...

Page 8: ...he LED expires During LINE operation the red LED will only be lit if the headroom of 18 dBu is used to full capacity The entrance level then has to be lowered accordingly since the Merk II doesn t fea...

Page 9: ...Control CENTAURI Gateways can be programmed such that they react to particular pre determined events in a set way Events can thus be linked with actions The event dependent control is described in th...

Page 10: ...art Mask Select CONNECT with the arrow key and press The Connect Dialog will now appear on the display Figure 5 Connect Dialog Mask There are already entries with test numbers entered in the phone boo...

Page 11: ...displays the level of the in and out signal If the establishment of the connection has been successful the device switches back to the mask that was displayed beforehand If the connection cannot be e...

Page 12: ...is as follows 0 9 Numbers 0 9 and letters if permitted press respective key several times if necessary For example by repeatedly pressing the 2 key the sequence 2 A a B b C c 2 etc is generated Specia...

Page 13: ...must press After pressing the key in phone book or communication profile the OK or CANCEL dialogs appear In this the OK icon is pre selected and furnished with a thicker outline see Figure 113 Pressin...

Page 14: ...files see section Mixer Profiles Audio Encoder see section Set Encoder Audio Decoder see section Set Decoder Timeouts see section Set Time Limit Timeout Communication Interface see section Set Device...

Page 15: ...y one of the serial interfaces 2 to 8 the number of the ports to be scanned must be increased in the remote control menu item EXPERT OPTIONS correspondingly 1 5 2 Remote Control via IP The Merk II can...

Page 16: ...ntrolled with the software under Add New MERK II Port 2000 has nothing to do with Port 2001 that has been entered in the MERK II under Network Changing one of these two or both values results in commu...

Page 17: ...ber of com ports for setting the number of serial interfaces that are to be examined or Select UDP Scan Yes for scanning the LAN for other Merk IIs Click on OK for activating the scan The current acti...

Page 18: ...o radiators direct sunlight or mechanical stress e g shaking Make sure that the ventilation openings of the device are not obstructed when the device is in operation so that the air exchange necessary...

Page 19: ...central switch surface with the mouse End Ends the MERK II s current connection is the same as clicking on the Disconnect switch with the mouse All dialogs Enter Is the same as mouse clicking on OK Es...

Page 20: ...lay can be set using the keys on the front of the housing Select the SETUP option in the start mask see Figure 4 The Setup mask appears Select MISCELLANEOUS The following mask appears Figure 13 The MI...

Page 21: ...an be sorted D M Y Day Month Year Germany M D Y Month Day Year US format Set the desired information with the and keys and the number letter keys To close and save press The time and date format set h...

Page 22: ...l times where several MERK IIs are involved e g company name etc This identification number is exchanged both ways during communication To enter the identification number proceed as follows a On the f...

Page 23: ...ck You can copy a MERK II s phone book on to a connected PC and save it there On the other hand you can also transfer such a telephone file back onto a MERK II where you can use the entries You theref...

Page 24: ...s that fit in the input line the line is shifted so that the cursor position can always be seen For ENCPROFILE and DECPROFILE you can enter a communication profile The transfer medium is entered with...

Page 25: ...New or press the Insert key on the keyboard The following dialog window opens Figure 20 The NEW PHONE BOOK ENTRY dialog window Enter name number of the ISDN line or network address and select a commu...

Page 26: ...the same style as for new entries see Figure 18 and can now be edited Change the data as desired Save the changes by pressing the key and finish with b Via the remote control software Click on the Pho...

Page 27: ...Via the remote control software Click on the Phone book button or press the P key The Phone book dialog window opens see Figure 19 Click on the entry to be deleted This is marked with an inverse displ...

Page 28: ...ice from another manufacturer the data flow coming from this device is used to determine with which setting this encoder works This setting is then used for the decoder and also the MERK II s encoder...

Page 29: ...endency Local Format depends upon remote device Asymmetrical coding encoder settings identical to remote device decoder settings decoder settings identical to remote device encoder settings Format J 5...

Page 30: ...then press the key A list of all possible values appears Select the desired value with the and keys and then press the key Repeat this procedure if required for additional parameters End the setting...

Page 31: ...rs Select AUDIO DECODER and press The following mask appears Figure 23 The DECODER mask Select the parameter to be changed with the and keys and then press the key A list of all possible values appear...

Page 32: ...you know exactly which device is on the receiving end you can pre set this device at the multiplexer The Merk II s however able to recognize the opposite station automatically and set itselve accordi...

Page 33: ...ct the SETUP option in the Start mask see Figure 4 The Setup mask appears Select COMMUNICATION INTERFACE and press The following mask appears Figure 27 The COMMUNICATION INTERFACE mask Press Select th...

Page 34: ...s manually using the front panel of the MERK II Select the option in the device Start mask see Figure 4 die Option SETUP The Setup mask appears Select ANCILLARY and press The following mask appears Fi...

Page 35: ...OMMUNICATION INTERFACE mask Select the ADDRESS parameter with the and keys and press the key Enter the desired address using the and keys as well as the numeric keys and then press the key Repeat this...

Page 36: ...ter which needs to be changed Exit the configuration mode by pressing the key b Via the remote control software Select SETTINGS ISDN The following dialog window opens Figure 33 The ISDN CONFIGURATION...

Page 37: ...io 7 0 kHz audio video packet mode 56 kB s rate adapt telephony facsimile 2 3 facsimile 4 1 teletex mixed mode teletex processable mode teletex basic mode videotext telex x 400 x 200 7 0 kHz telephony...

Page 38: ...dialog box appears Figure 35 The OTHER SETTINGS Dialog Box Select the appropriate parameter setting under Dial in protection On or Off In order to activate the new setting click the OK button 2 Settin...

Page 39: ...e SETUP option in the Start mask see Figure 4 The Setup mask appears Select MISCELLANEOUS and press The MISC mask appears Figure 37 The MISC mask Press again Select the respective parameter for G711 A...

Page 40: ...are automatically cut off The parameter Stat framing gives the time interval after which the G 722 decoder should be started automatically in the case of a single channel ISDN connection if no other...

Page 41: ...k see Figure 4 The Setup mask appears Select MISCELLANEOUS and press The MISC mask appears Figure 41 The MISC mask Select DUALMODE with the and keys and press Enter the desired value with the and keys...

Page 42: ...can choose the input source for the 4 channels Also the Directors Channel can be set to appropireate input This setting is only possible via the front panel and not via the remote software a Via the...

Page 43: ...ophone Settings mask Select the appropriate item with the and keys and press Select the desired parameters with the and keys and press To end press the key 5 1 14 Line In Settings Here you can adjust...

Page 44: ...y possible via the front panel and not via the remote software c Via the front panel Select the SETUP option in the Start mask see Figure 4 The Setup mask appears Select Line IN and press The Line In...

Page 45: ...ect the appropriate item with the and keys and press Select the desired parameters with the and keys and press To end press the key 5 1 17 Set Mute Here you can adjust wether the different channels sh...

Page 46: ...ect the desired parameters with the and keys and press To end press the key 5 1 19 Set Number Of COM Ports To Be Checked After the program is started the remote control software automatically requests...

Page 47: ...ailable in the MERK II if the corresponding option has been set To switch the display option on and off proceed as follows Select EXPERT OPTIONS in the remote control software The following dialog win...

Page 48: ...box next to Enhanced Status Messages a tick in the control box means display on no tick means display off To make the setting effective click on OK Switch Disconnect Dialog On Off The remote control...

Page 49: ...obtain the respective release codes on order from Mayah Communications after stating your MERK II serial number When you have received the release key code for the desired software module enter it as...

Page 50: ...II and use the entries there see section Transfer phone book to MERK II Once you have created a communication profile file you can distribute the same communication profile file to as many MERK IIs as...

Page 51: ...log window appears with the existing communication profiles Select the profile to be edited and double click on the corresponding line or press on the E key This leads to another dialog window opening...

Page 52: ...section Saving Phonebook on a PC 5 2 5 Transfer communication profile file to the CENTAURI You can also transfer the communication profiles along with the phone book entries from the PC to a MERK II...

Page 53: ...en a call comes in the Connection Setup mask appears in the display for a short time When the connection is made the connection data with respect to the opposite end is displayed in this mask as a pro...

Page 54: ...us possible to set the sampling rate of the encoder to the optimum value for the transmission procedure and bit rate independent of the environment How the sampling rate and the bandwidth of a monopho...

Page 55: ...g the connection Otherwise you should enter the desired phone number DIRECT DIAL or select a subscriber from the phone book In the phone book you enter a letter with the letter keys and the list then...

Page 56: ...ected interfaces Select the desired parameter in the dialog window Click on OK The device then starts to set up the connection to the desired communication partner You can follow this process on the M...

Page 57: ...ally used headroom 18 dB with 18 dBu fullscale default Merk II setting 18 dBf is equal to 0 dBu Since not all the information relating to a connection can be displayed on the LC display at the same ti...

Page 58: ...played in the window of the remote control software Figure 66 Remote control software status display Black time Green connection time without synchronization Red connection time with synchronization N...

Page 59: ...k appears Figure 67 The SPEED DIAL mask Select DISCONNECT and press the key once again The connection is broken off immediately All of the channels utilized by the connection are closed i e both B cha...

Page 60: ...was called The address of the partner is displayed behind it If the device has found the address in the phone book it displays the name of the entry or the address itself If you select a list entry w...

Page 61: ...P IP connection is set up with a PC on which the remote control software provided runs The data exchange is achieved via a simple IP Port Protocol This protocol can also be used for the development of...

Page 62: ...by more than one IP packet In specific situations e g if the bit rate is high and the sample rate is low the frame length can be larger than the packet size In this case the first IP packet would only...

Page 63: ...000 0000 0010 0000 0000 MODE_MASK 000000C0 0000 0000 0000 0000 0000 0000 1100 0000 MODE_EXT_MASK 00000030 0000 0000 0000 0000 0000 0000 0011 0000 PROTECTION_MASK 00010000 0000 0000 0000 0001 0000 0000...

Page 64: ...Header information 64 MAYAH Communication GmbH LENGTH_MASK_AAC_LD 001FFF00 0000 0000 0001 1111 1111 1111 0000 0000...

Page 65: ...e slot available Algorithm Samplerate Bitrate and Mode must be used as defined in the encoder section of the Centauri Gateway Communication Reference Manual Streaming with different sample rates does...

Page 66: ...s stopped 7 5 Establishing IP connections 7 5 1 Unicast RTP Unicast RTP connections can be established by CENTAURI s of type 300x 330x 400x MERKII and GANYMED s 1102 using system software version 2 0...

Page 67: ...mote Decoder dependency remote Note At such bidirectional RTP connections different settings for sending and receiving can be used The encoder settings determine which quality is sent whereas the deco...

Page 68: ...port number e g 225 0 0 2 5004 Click the OK button to establish connection 2 Multicast RTP connection to other decoders Old RTP protocol implementation is used provided system software 2 1 0 46 2 1 Co...

Page 69: ...ss and not from the SDP Encoder SAP announcements are sent on port 9875 There are two advantages of SAP streaming compared to SDP streaming a Since the SDP file must not be retrieved from the encoder...

Page 70: ...about the session that is to be established SIP addresses are composed using a syntax similar to email addresses e g sip merkII mayah com The complete separation of signalling and transport layer i e...

Page 71: ...h an ACK message Now a direct media connection between the two user agents is established In some cases e g a automatic answer mode the messages Trying and Ringing are not sent by the user agent A Ses...

Page 72: ...tablishment is not differing from the simple call flow in 2 2 3 The proxy server or servers are completely transparent to the user agents 3 Configuration steps on side 3 1 Codec settings Configure the...

Page 73: ...igure 4 and press Select SYSTEM HEALTH or VERSIONS and press To close the respective mask again press b Via the remote control software The remote control software provides a range of operational and...

Page 74: ...vailable The result is shown on the display It can also be recognized e g also by the device versions without display by the lighting up of the LED s ALARM LED flashes 0 33 transmitted CONNECT LED fla...

Page 75: ...r device To update the software via ISDN proceed as follows a Via the front panel Select the MISC option in the Start mask see Figure 4 and press Select SYSTEM UPDATE and press Figure 77 System Update...

Page 76: ...ite is that it is possible to control from the PC via IP and there is an Internet connection Select EXPERT UPDATE CENTAURI VIA RS232 FTP INTERNET A dialog window opens Click on OK A Windows file manag...

Page 77: ...is entered in the MERK II under Network A change of one or both of these values results in communication problems Address1 IP Address of the first MERK II to be controlled Address2 IP Address of the...

Page 78: ...nt IP Address Address1 to Address200 Type Character series IP Addresses of MERK II s still to be addressed IPControl Type Character series in capitals TRUE IP Control FALSE RS232 Control a HKEY_CURREN...

Page 79: ...you no longer know the Superuser Password it is easy to find it out It is stored in the registry under HKEY_CURRENT_USER Software Mayah Communications Centauri Remote SuperUserPassword Switch off Sup...

Page 80: ...tification number In order to display your MERK II s identification number proceed as follows Select the SETUP option in the Start mask see Figure 4 SETUP and press Select IDENTIFICATION and press The...

Page 81: ...suring a test pattern If the connection path changes during transmission it leads to breakdowns and it is neces sary to set up a connection again This method is called BONDING and is mainly used in th...

Page 82: ...o over IP A TCP connection is always bi directional both encoder and decoder are activated UDP UDP is the abbreviation for User Datagram Protocol and describes an unsecured or connectionless data tran...

Page 83: ...vel G 711 ISDN Service of System Compon Connection Entries New Phonebook Entry Edit Phonebook Entry Delete Phonebook Entry Input Microphone Settings Line In Line Out Mute Mixer Profiles Audio Encoder...

Reviews: