


Gocator 2300 & 2880 Series
Gocator Web Interface • Scan Setup and Alignment • 84
2.
Choose Profile or Surface mode in the
Scan Mode
panel, depending on the type of measurement
whose decision you need to configure.
If one of these modes is not selected, tools will not be available in the
Measure
panel.
3.
Expand the
Sensor
panel by clicking on the panel header.
4.
Click the button corresponding to the sensor you want to configure.
The button is labeled
Top
,
Bottom
,
Top-Left
, or
Top-Right
, depending on the system.
Transformations can be configured separately for each sensor.
5.
Expand the Transformations area by clicking on the expand button
.
See the table above for more information.
6.
Set the parameter values.
See the table above for more information.
7.
Save the job in the
Toolbar
by clicking the
Save
button
.
8.
Check that the transformation settings are applied correctly after profiling is restarted.
Exposure
Exposure determines the duration of camera and laser on-time. Longer exposures can be helpful to
detect laser signals on dark or distant surfaces, but increasing exposure time decreases the maximum
speed. Different target surfaces may require different exposures for optimal results. Gocator sensors
provide three exposure modes for the flexibility needed to scan different types of target surfaces.
Exposure Mode
Description
Single
Uses a single exposure for all objects. Used when the surface is uniform and is the same for
all targets.
Dynamic
Automatically adjusts the exposure after each frame. Used when the target surface varies
between scans.
Multiple
Uses multiple exposures to create a single profile. Used when the target surface has a varying
reflectance within a single profile (e.g., white and black).
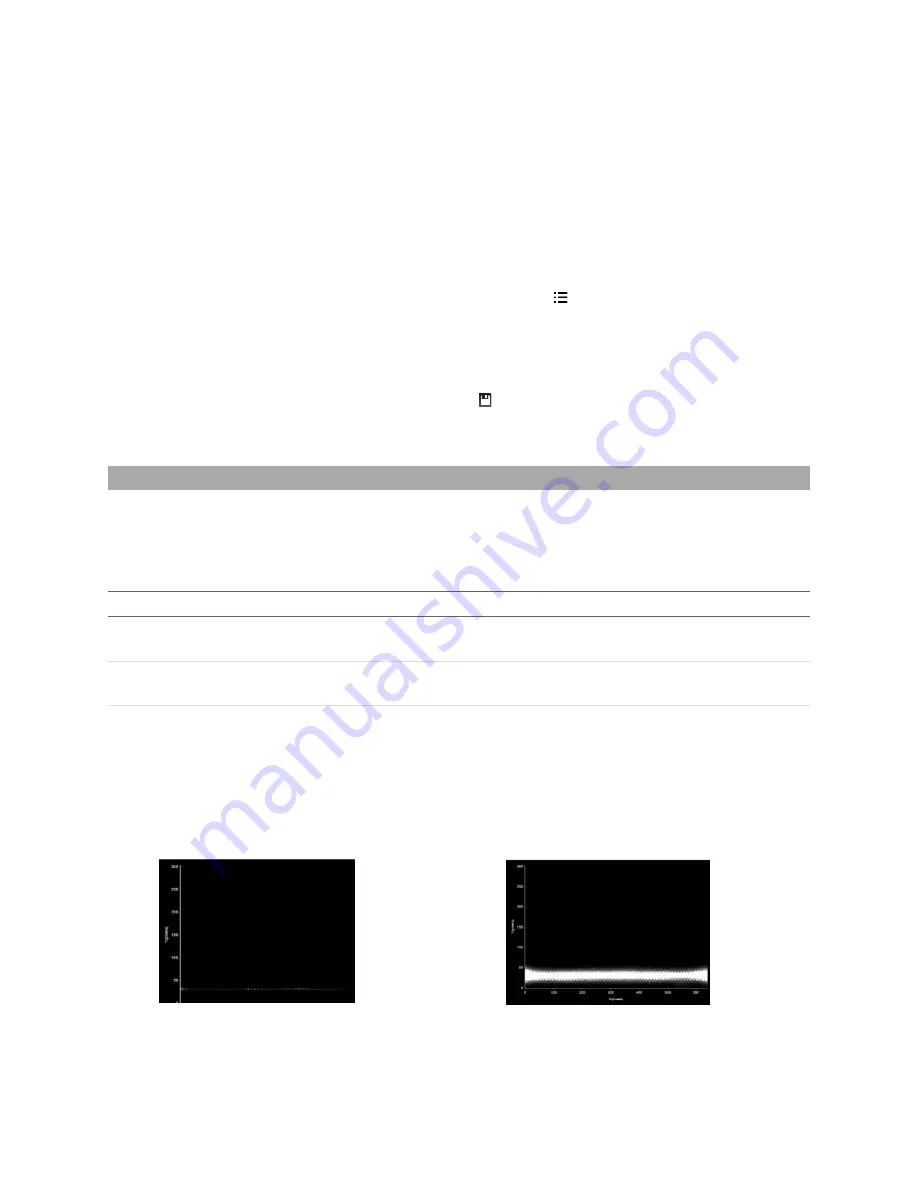
Video mode lets you see how the laser line appears on the camera and identify any stray light or
ambient light problems. When exposure is tuned correctly, the laser should be clearly visible along the
entire length of the viewer. If it is too dim, increase the exposure value; if it is too bright decrease
exposure value.
Under exposure
Laser line is not detected.
Increase the exposure value.
Over exposure
Laser line is too bright .
Decrease the exposure value.
Summary of Contents for Gocator 2300 Series
Page 1: ...USER MANUAL Gocator 2300 2880 Series Firmware version 4 3 x xx Document revision D ...
Page 20: ...Gocator 2300 2880 Series Getting Started System Overview 20 ...
Page 184: ...Gocator 2300 2880 Series Gocator Web Interface Measurement 184 Measurement Panel ...
Page 189: ...Gocator 2300 2880 Series Gocator Web Interface Measurement 189 ...
Page 199: ...Gocator 2300 2880 Series Gocator Web Interface Measurement 199 Measurement Panel ...
Page 208: ...Gocator 2300 2880 Series Gocator Web Interface Measurement 208 else Output_Set Volume 0 ...
Page 389: ...Gocator 2300 2880 Series Specifications Gocator 2300 Series 389 Dimensions Envelope ...
Page 392: ...Gocator 2300 2880 Series Specifications Gocator 2300 Series 392 Dimensions Envelope ...
Page 394: ...Gocator 2300 2880 Series Specifications Gocator 2300 Series 394 Envelope ...
Page 396: ...Gocator 2300 2880 Series Specifications Gocator 2300 Series 396 Dimensions ...
Page 397: ...Gocator 2300 2880 Series Specifications Gocator 2300 Series 397 Envelope ...
Page 399: ...Gocator 2300 2880 Series Specifications Gocator 2300 Series 399 Envelope ...
Page 401: ...Gocator 2300 2880 Series Specifications Gocator 2300 Series 401 Dimensions ...
Page 402: ...Gocator 2300 2880 Series Specifications Gocator 2300 Series 402 Envelope ...
Page 405: ...Gocator 2300 2880 Series Specifications Gocator 2880 Sensor 405 Dimensions ...
Page 406: ...Gocator 2300 2880 Series Specifications Gocator 2880 Sensor 406 Envelope ...


