


4
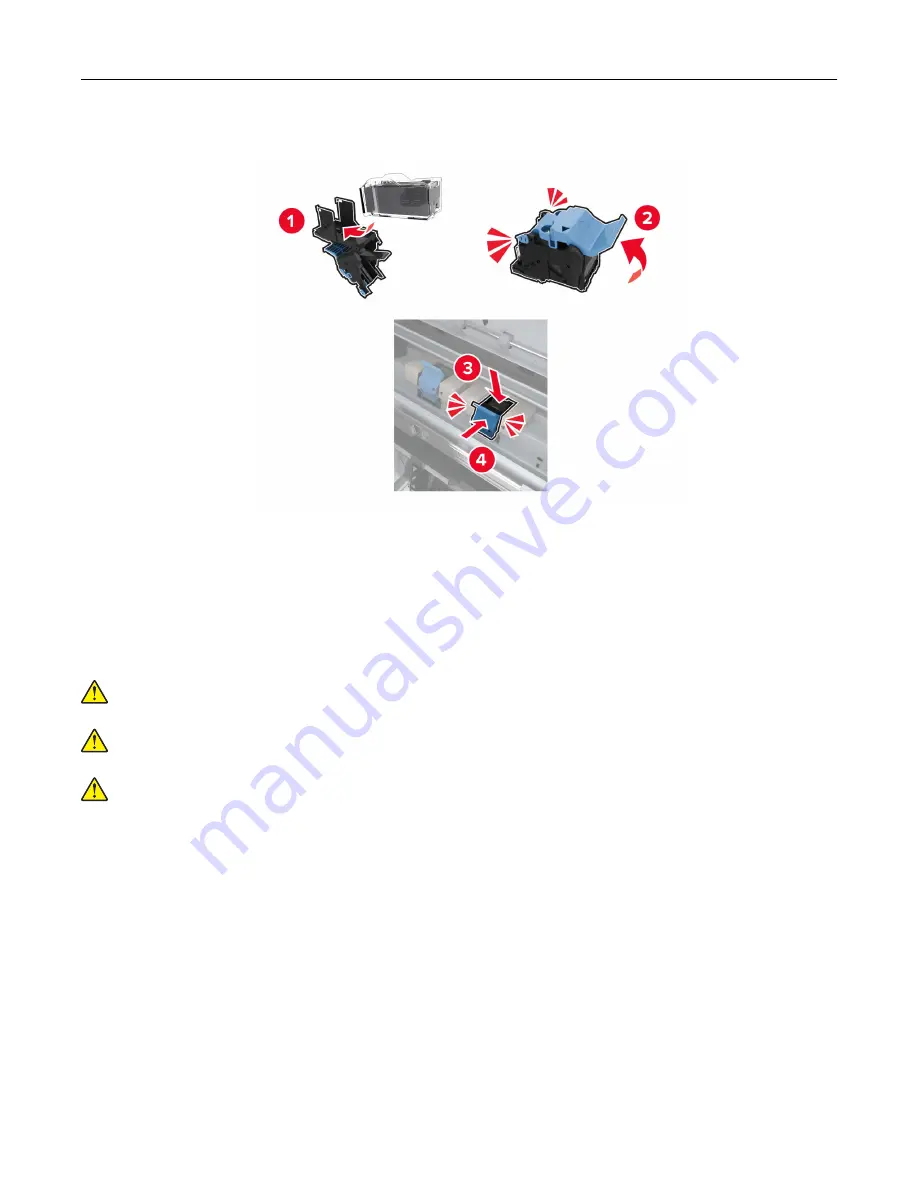
Insert the new staple cartridge until it
clicks
into place.
5
Push the booklet maker back into place, and then close the door.
Moving the printer
Moving the printer to another location
CAUTION—POTENTIAL INJURY:
If the printer weight is greater than 20 kg (44 lb), then it may require
two or more people to lift it safely.
CAUTION—POTENTIAL INJURY:
To avoid the risk of fire or electrical shock, use only the power cord
provided with this product or the manufacturer's authorized replacement.
CAUTION—POTENTIAL INJURY:
When moving the printer, follow these guidelines to avoid personal
injury or printer damage:
•
Make sure that all doors and trays are closed.
•
Turn off the printer, and then unplug the power cord from the electrical outlet.
•
Disconnect all cords and cables from the printer.
•
If the printer has separate floor-standing optional trays or output options attached to it, then disconnect
them before moving the printer.
•
If the printer has a caster base, then carefully roll it to the new location. Use caution when passing over
thresholds and breaks in flooring.
•
If the printer does not have a caster base but is configured with optional trays or output options, then remove
the output options and lift the printer off the trays. Do not try to lift the printer and any options at the same
time.
•
Always use the handholds on the printer to lift it.
•
Any cart used to move the printer must have a surface able to support the full footprint of the printer.
Maintaining the printer
202
Summary of Contents for XC9225
Page 168: ... Scanner glass Scanner glass pad 3 Close the scanner cover Maintaining the printer 168 ...
Page 176: ...5 Insert the new toner cartridge 6 Remove the waste toner bottle Maintaining the printer 176 ...
Page 181: ...8 Insert the waste toner bottle and then close the door Maintaining the printer 181 ...
Page 211: ... Below the fuser area Duplex area Clearing jams 211 ...
Page 216: ...2 Open door J Clearing jams 216 ...
Page 218: ... Areas H1 and H2 Area H6 Clearing jams 218 ...
Page 222: ...2 Remove the staple cartridge holder 3 Remove the loose staples Clearing jams 222 ...
Page 224: ...2 Remove the staple cartridge holder 3 Remove the loose staples Clearing jams 224 ...
Page 226: ...2 Remove the staple cartridge holder 3 Remove the loose staples Clearing jams 226 ...
Page 280: ...6 Remove the controller board shield Upgrading and migrating 280 ...
Page 283: ...4 Remove the controller board shield Upgrading and migrating 283 ...
Page 289: ...7 Connect the tray connector to the printer 8 Open trays 2 and 3 Upgrading and migrating 289 ...
Page 294: ...9 Remove the stabilizing feet from the tray Upgrading and migrating 294 ...
Page 298: ...17 Secure the tray cable with the clamp Upgrading and migrating 298 ...
Page 305: ...7 Remove the paper guides 8 Attach the sensor cover Upgrading and migrating 305 ...
Page 311: ...8 Attach the finisher to the printer Upgrading and migrating 311 ...


