


Fax Server Setup
General Fax Settings
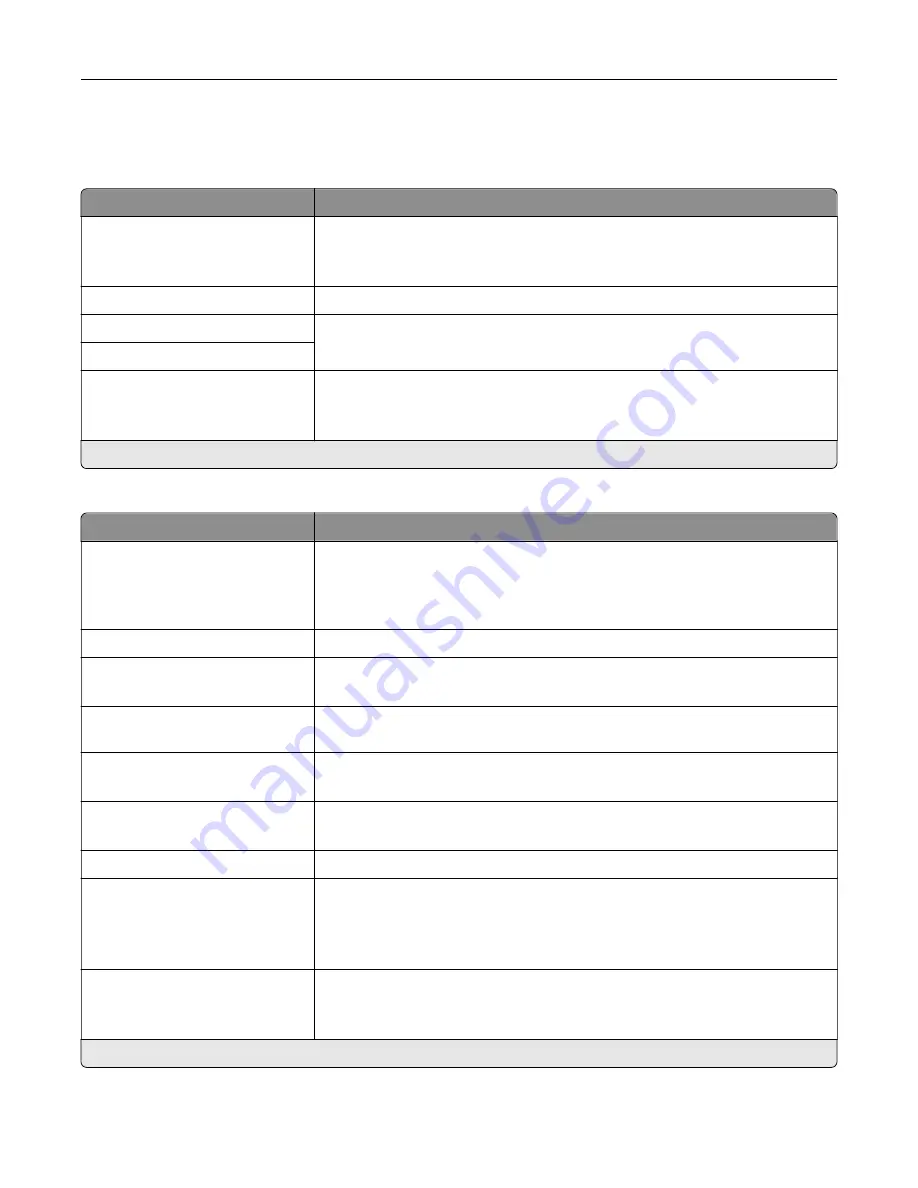
Menu item
Description
To Format
Specify a fax recipient.
Note:
If you want to use the fax number, then type the number sign (#) before
a number.
Reply Address
Specify a reply address for sending fax.
Subject
Specify the fax subject and message.
Message
Enable analog receive
Off*
On
Set the printer to receive analog faxes.
Note:
An asterisk (*) next to a value indicates the factory default setting.
Fax Server E
‑
mail Settings
Menu item
Description
Use E
‑
mail SMTP Server
On*
Off
Use the Simple Mail Transfer Protocol (SMTP) settings for e
‑
mail in receiving
and sending faxes.
Note:
When set to On, all other settings of theFax Server E
‑
mail Settings
menu are not shown.
Primary SMTP Gateway
Type the IP address or host name of the primary SMTP server.
Primary SMTP Gateway Port
1–65535 (25*)
Enter the port number of the primary SMTP server.
Secondary SMTP Gateway
Type the server IP address or host name of your secondary or backup SMTP
server.
Secondary SMTP Gateway Port
1–65535 (25*)
Enter the server port number of your secondary or backup SMTP server.
SMTP Timeout
5–30 (30*)
Set the time before the printer times out if the SMTP server does not respond.
Reply Address
Specify a reply address for sending fax.
Use SSL/TLS
Disabled*
Negotiate
Required
Specify whether to send fax using an encrypted link.
Require Trusted Certificate
Off
On*
Specify a trusted certificate when accessing the SMTP server.
Note:
An asterisk (*) next to a value indicates the factory default setting.
Understanding the printer menus
120
Summary of Contents for XC9225
Page 168: ... Scanner glass Scanner glass pad 3 Close the scanner cover Maintaining the printer 168 ...
Page 176: ...5 Insert the new toner cartridge 6 Remove the waste toner bottle Maintaining the printer 176 ...
Page 181: ...8 Insert the waste toner bottle and then close the door Maintaining the printer 181 ...
Page 211: ... Below the fuser area Duplex area Clearing jams 211 ...
Page 216: ...2 Open door J Clearing jams 216 ...
Page 218: ... Areas H1 and H2 Area H6 Clearing jams 218 ...
Page 222: ...2 Remove the staple cartridge holder 3 Remove the loose staples Clearing jams 222 ...
Page 224: ...2 Remove the staple cartridge holder 3 Remove the loose staples Clearing jams 224 ...
Page 226: ...2 Remove the staple cartridge holder 3 Remove the loose staples Clearing jams 226 ...
Page 280: ...6 Remove the controller board shield Upgrading and migrating 280 ...
Page 283: ...4 Remove the controller board shield Upgrading and migrating 283 ...
Page 289: ...7 Connect the tray connector to the printer 8 Open trays 2 and 3 Upgrading and migrating 289 ...
Page 294: ...9 Remove the stabilizing feet from the tray Upgrading and migrating 294 ...
Page 298: ...17 Secure the tray cable with the clamp Upgrading and migrating 298 ...
Page 305: ...7 Remove the paper guides 8 Attach the sensor cover Upgrading and migrating 305 ...
Page 311: ...8 Attach the finisher to the printer Upgrading and migrating 311 ...


