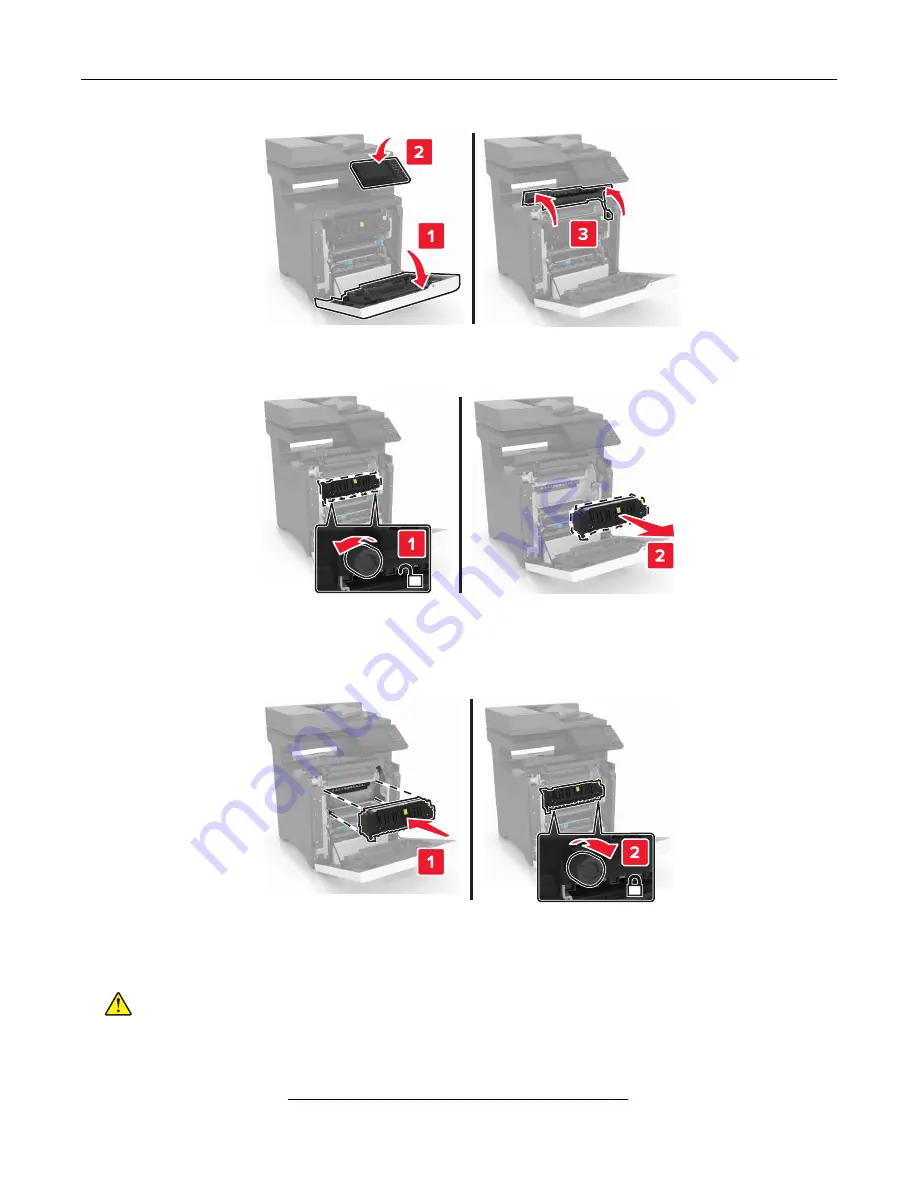
3
Remove the fuser.
4
Unpack the new fuser.
5
Insert the new fuser.
6
Close doors D and A.
7
Connect the power cord to the electrical outlet, and then turn on the printer.
CAUTION—POTENTIAL INJURY:
To avoid the risk of fire or electrical shock, connect the power cord
to an appropriately rated and properly grounded electrical outlet that is near the product and easily
accessible.
8
Reset the fuser maintenance counter.
For more information, see
“Resetting the maintenance counter” on page 85
Maintaining the printer
71
Summary of Contents for XC4100 Series
Page 1: ...XC4100 Series User s Guide January 2016 www lexmark com Machine type s 7528 Model s 598 196 ...
Page 62: ...2 Remove the waste toner bottle 3 Remove the imaging kit Maintaining the printer 62 ...
Page 64: ...8 Insert the black toner cartridge 9 Insert the imaging kit Maintaining the printer 64 ...
Page 66: ...2 Remove the waste toner bottle 3 Remove the imaging kit Maintaining the printer 66 ...
Page 68: ...8 Insert the toner cartridges 9 Insert the new imaging kit Maintaining the printer 68 ...
Page 97: ...4 Close the duplex cover and door A Clearing jams 97 ...
Page 137: ...5 ISP extended cable 4 Install the ISP into its housing Upgrading and migrating 137 ...
Page 138: ...5 Attach the housing to the controller board access cover Upgrading and migrating 138 ...
Page 144: ...5 Open door B 6 Open door C Upgrading and migrating 144 ...
Page 158: ...wireless network Wi Fi Protected Setup 55 Wi Fi Protected Setup wireless network 55 Index 158 ...


