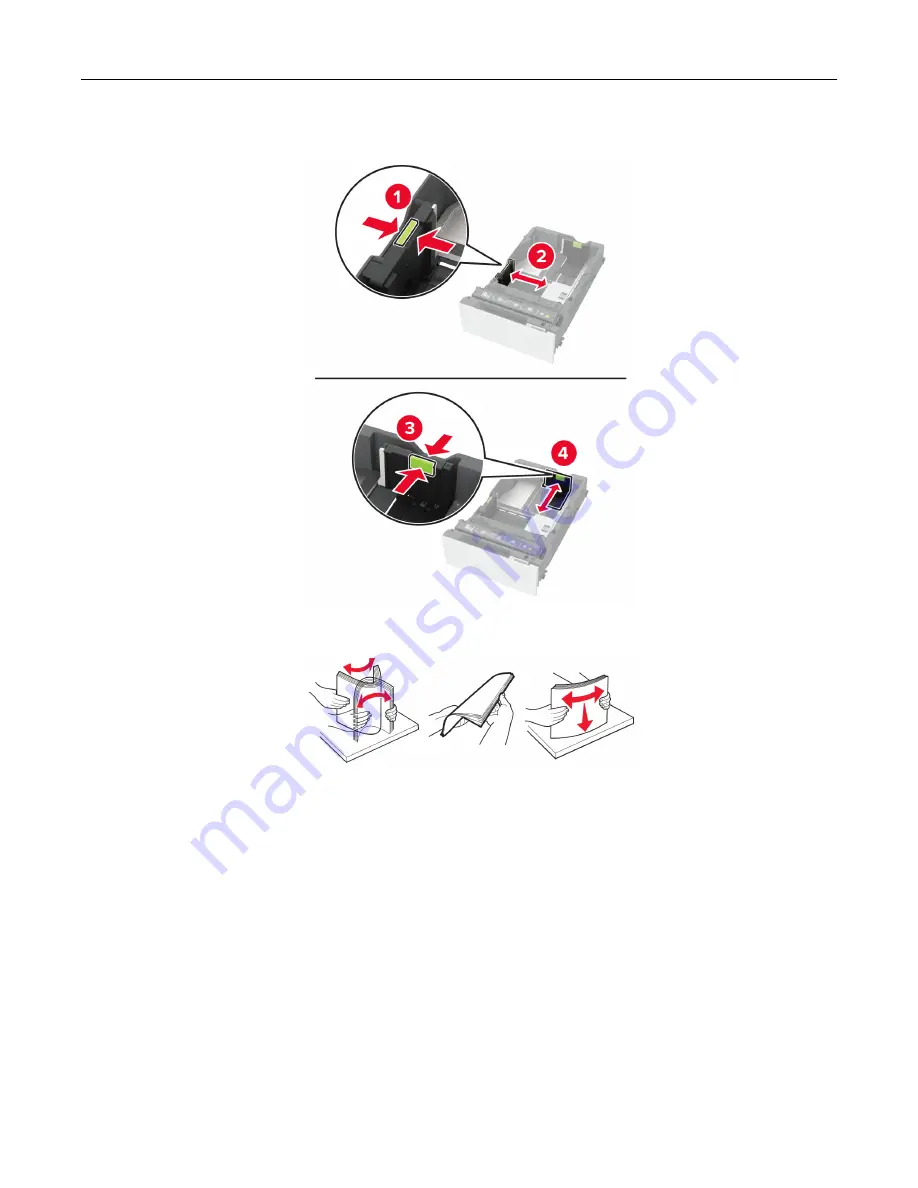
Note:
Use the indicators on the bottom of the tray to position the guides.
3
Flex, fan, and align the paper edges before loading.
4
Load the paper stack with the printable side faceup.
•
For one
‑
sided printing, load letterhead faceup with the header toward the front of the tray.
•
For two
‑
sided printing, load letterhead facedown with the header toward the back of the tray.
•
Do not slide paper into the tray.
Set up, install, and configure
28
Summary of Contents for C4342
Page 46: ...4 Install the ISP into its housing Set up install and configure 46 ...
Page 47: ...5 Attach the housing to the controller board shield Set up install and configure 47 ...
Page 52: ...Set up install and configure 52 ...
Page 55: ...Set up install and configure 55 ...
Page 56: ...3 Install the wireless module into its housing Set up install and configure 56 ...
Page 57: ...4 Attach the wireless module to the controller board shield Set up install and configure 57 ...
Page 123: ...2 Remove the used toner cartridge 3 Unpack the new toner cartridge Maintain the printer 123 ...
Page 124: ...4 Insert the new toner cartridge 5 Close door B Maintain the printer 124 ...
Page 125: ...Replacing the black imaging unit 1 Open door B Maintain the printer 125 ...
Page 127: ...3 Remove the toner cartridges Maintain the printer 127 ...
Page 128: ...4 Disconnect the imaging kit cable Maintain the printer 128 ...
Page 132: ...9 Insert the imaging kit Maintain the printer 132 ...
Page 134: ...Replacing the color imaging kit 1 Open door B Maintain the printer 134 ...
Page 136: ...3 Remove the toner cartridges Maintain the printer 136 ...
Page 137: ...4 Disconnect the imaging kit cable Maintain the printer 137 ...
Page 138: ...5 Remove the used imaging kit Maintain the printer 138 ...
Page 141: ...8 Insert the black imaging unit into the new imaging kit Maintain the printer 141 ...
Page 142: ...9 Insert the new imaging kit Maintain the printer 142 ...
Page 144: ...Replacing the waste toner bottle 1 Open door B Maintain the printer 144 ...


