Menu item
Description
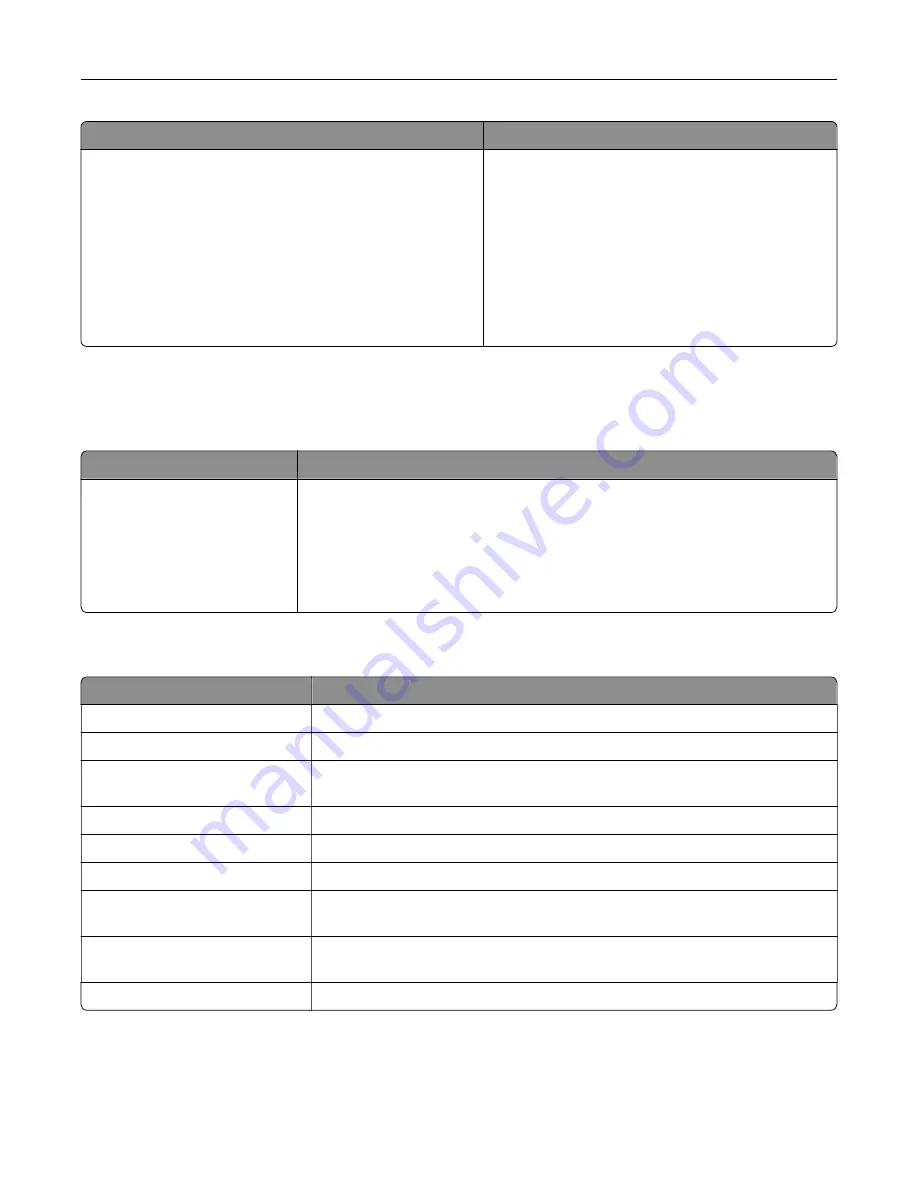
Out of Service Erase
Sanitize all information on nonvolatile memory
Erase all printer and network settings
Erase all apps and app settings
Erase all shortcuts and shortcut settings
Sanitize all information on hard disk
Erase downloads (Erase all macros, fonts, PFOs, etc.)
Erase buffered jobs
Erase Held jobs
Clear all information on non
‑
volatile memory and on
the storage drive.
Note:
Sanitize all information on hard disk appears
only when a storage drive is installed.
Home Screen Customization
Note:
This menu appears only in the Embedded Web Server.
Menu
Description
Status/Supplies
Job Queue
Settings
Address Book
USB Drive
Held Jobs
Specify which icons to show on the home screen.
About this Printer
Menu item
Description
Asset Tag
Specify the identity of the printer. The maximum length is 32 characters.
Printer’s Location
Specify the printer location. The maximum length is 63 characters.
Contact
Specify the contact information for the printer. The maximum length is 63
characters.
Firmware Version
Show the firmware version installed on the printer.
Engine
Show the engine number of the printer.
Serial Number
Show the serial number of the printer.
Export Configuration File to
USB
Export the configuration file to a flash drive.
Export Compressed Logs to
USB
Export the compressed log files to a flash drive.
Send Logs
Send printer log information to Lexmark.
Use printer menus
84
Summary of Contents for C4342
Page 46: ...4 Install the ISP into its housing Set up install and configure 46 ...
Page 47: ...5 Attach the housing to the controller board shield Set up install and configure 47 ...
Page 52: ...Set up install and configure 52 ...
Page 55: ...Set up install and configure 55 ...
Page 56: ...3 Install the wireless module into its housing Set up install and configure 56 ...
Page 57: ...4 Attach the wireless module to the controller board shield Set up install and configure 57 ...
Page 123: ...2 Remove the used toner cartridge 3 Unpack the new toner cartridge Maintain the printer 123 ...
Page 124: ...4 Insert the new toner cartridge 5 Close door B Maintain the printer 124 ...
Page 125: ...Replacing the black imaging unit 1 Open door B Maintain the printer 125 ...
Page 127: ...3 Remove the toner cartridges Maintain the printer 127 ...
Page 128: ...4 Disconnect the imaging kit cable Maintain the printer 128 ...
Page 132: ...9 Insert the imaging kit Maintain the printer 132 ...
Page 134: ...Replacing the color imaging kit 1 Open door B Maintain the printer 134 ...
Page 136: ...3 Remove the toner cartridges Maintain the printer 136 ...
Page 137: ...4 Disconnect the imaging kit cable Maintain the printer 137 ...
Page 138: ...5 Remove the used imaging kit Maintain the printer 138 ...
Page 141: ...8 Insert the black imaging unit into the new imaging kit Maintain the printer 141 ...
Page 142: ...9 Insert the new imaging kit Maintain the printer 142 ...
Page 144: ...Replacing the waste toner bottle 1 Open door B Maintain the printer 144 ...


