Replacing an HBA adapter
Use this information to replace an HBA adapter.
The following notes describe the types of HBA adapters that the server supports and other information that
you must consider when you install an adapter:
• To confirm that the server supports the HBA adapter that you are installing, see
http://www.lenovo.com/us/en/ serverproven/.
• Locate the documentation that comes with the HBA adapter and follow those instructions in addition to
the instructions in this section.
Read the safety information in “Safety” on page v and “Installation guidelines” on page 75.
If you are replacing a server component in the server, you need to turn off the server and peripheral devices
and disconnect all external cables.
To replace an HBA adapter, complete the following steps.
Step 1.
Touch the static-protective package that contains the HBA adapter to any unpainted metal surface
on the server; then, remove the HBA adapter from the package.
Step 2.
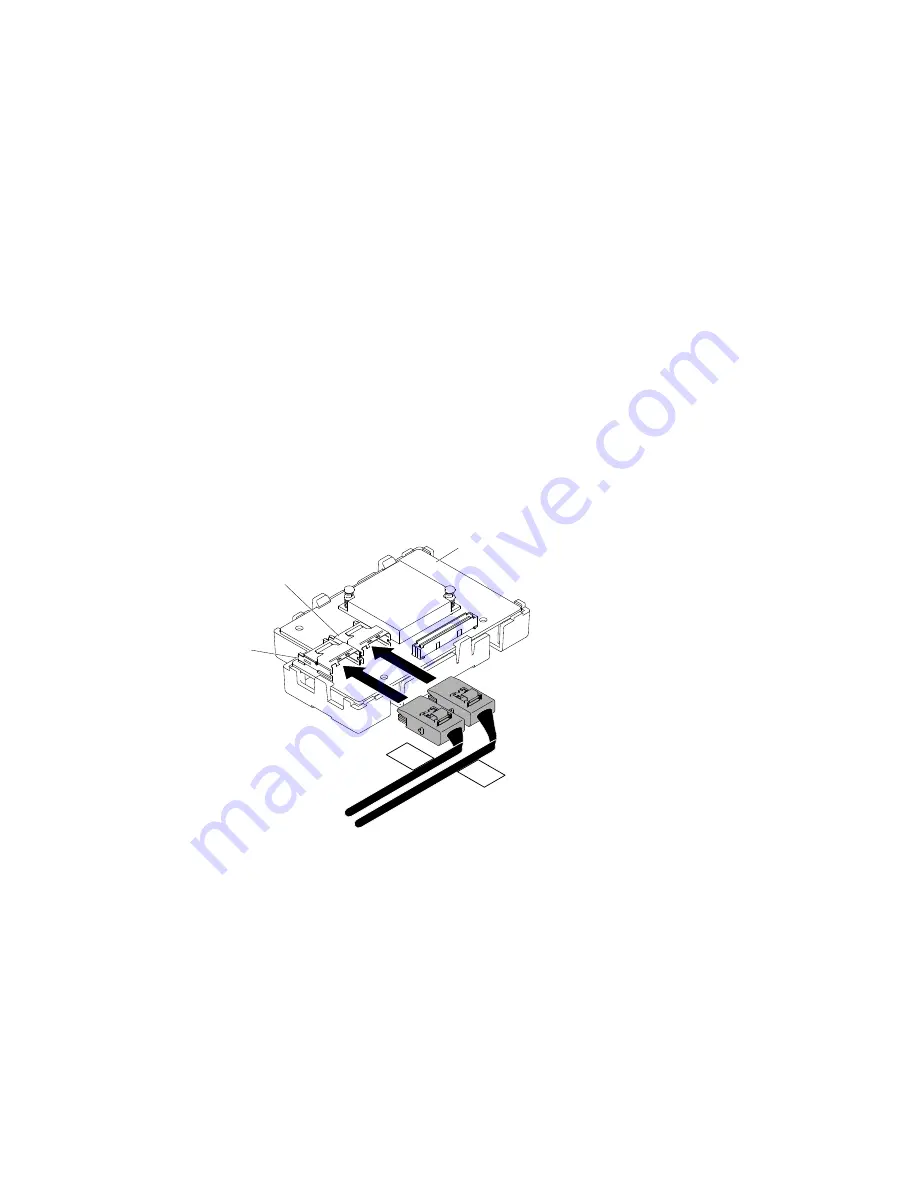
Re-connect the HBA adapter cables into the HBA adapters that you removed earlier. Make sure
you have folded the cables before connecting into the cables.
HBA card
JP1
Jp2
JP1 connector
Jp2 connector
Figure 49. Connecting the HBA cables into the adapter
Step 3.
Place the HBA adapter, component side up, on a flat, static-protective surface and set any jumpers
or switches as described by the adapter manufacturer, if necessary.
Step 4.
Align the gold finger on the HBA adapter, then, insert the HBA adapter into the compute node.
Press the edge of the connector
firmly
into the compute node. Make sure that the HBA adapter is
securely installed in the compute node.
Removing and replacing server components
113


