


9
警告
为了减少发生火灾或触电的风险,请勿将此设备暴露在雨
中或潮湿环境中。
不要将设备放置在容易遭受液体滴溅或者喷洒的地方,不
要将盛有液体的物品(例如花瓶)放在此设备上。
仅适用于海拔2000m以下地区安全使用。
此设备必须连接到带有保护性接地的市电插座上。
为了避免电击,请不要擅自拆开设备。设备内部无用户可
以自行维护的部件。请向具有资格的服务人员咨询。
要完全断开此设备与交流市电的连接,请把电源线插头从
交流电插座中拔出。电源线插头应保持在随时可用状态。
切勿将此设备安装在受限的空间里。
检查当地的电压并选择使用正确的电源接头类型。
请参考下表:
美国
UL817 and CSA C22.2 no 42.
欧洲
CEE 7 page VII, SR section 107-2-D1/
IEC 83 page C4.
英国
BS 1363 of 1984
,
13A
带保险丝的插头
以及带开关和不带开关的电源插座规
格说明。
电 压
电源线及插头标准
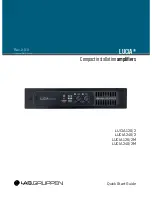
拆箱和查看
每一台
Lab.gruppen
功放在出厂前都经过仔细的检测,应该是以完美
的状态到达用户手中。如果发现有任何的损伤,请立即通知运输公
司。保留包装材料以备承运人检查和将来运输设备时使用。
安装
壁挂安装
–
如需将支架固定在墙壁上(钻孔指南上的
“B”
标记
处),请选择使用合适的安装方式以达到每颗螺钉承重
3
公斤或以
上的能力。确保所有
4
颗螺钉正确地固定在墙壁上。
如要安装在石膏板墙面上,请使用直径
3.5
毫米、长度至少
25
毫米
的木螺钉和
4.5
毫米的石膏板墙塞子,最大承重指标需要达到
3
公斤
或以上(比如
Molly E22412
或更好的型号)。这种安装方式是依照
UL/CA60065
安全标准针对北美地区经过评估的。
在其它墙面上的安装请确保安装方式适合于墙体材料。还需确保
支架是以适当的方式固定在墙面上以保证达到与前面所述类似的
承重指标。
如要将壁挂支架的
“B”
点固定在功放上请使用附带的
3
毫米内梅花头
机械螺钉。
机架安装
–
通过底部的
3
个孔(钻孔指南上的
“A”
标记处)功放可以
固定在机架或类似装置上。
使用一个直径
4
毫米长度最大
20
毫米的机械螺钉(没有随机附带)。
请确保螺钉的长度适合于机架的厚度。所使用的螺钉在安装后不能
穿透到功放内部超过
10-20
毫米。
Lab.Gruppen
机架安装组件
–
这是一个特别的专属安装机架,可以
安装两台
LUCIA
功放,包括所有必要的附件和螺钉,安装说明可以
向
Lab.Gruppen
公司索取。
散热
请确保至少两个功放的通风表面上(顶部、底部、前面和后面)有
足够的开放空间以利于空气的自由流通。当在装有空调的空间里安
装数量众多的功放时,关于热耗散值请参考完整的操作手册。
LUCIA
功放具备智能的风扇控制功能。在低功耗和有良好通风的
应用场合,风扇会停止转动。在适中的功率水平,风扇会以
“
轻
声模式
”
启动。只有在大功率输出时,风扇才会全速转动,这时
的风扇噪音会被大音量的节目声音盖住。
工作电压
LUCIA
功放拥有一个通用电源,可以工作在从
100
到
240
伏、
50
或
60
赫兹的市电电压。针对销售的不同国家在后面板上的电源插口可以
连接带有合适插头的电源线。
接地
信号地的悬浮通过一个连接到外壳的电阻实现,因此接地是自动
的。为了安全起见,永远不要断开交流电源线的接地引脚。在使
用较长的输入线缆时(超过大约
1
米
/39
英寸)请使用平衡的输入
连接方式以避免嗡鸣声和干扰。
电源插头作为断开连接装置使用,并应保持在随时可用
状态。


