background image

4

Important safety instructions

1.   Read these instructions. 
2.   Keep these instructions
3.   Heed all warnings.
4.   Follow all instructions.
5.   Do not use this apparatus near water.
6.   Clean only with a dry cloth.
7.   Do not block any ventilation openings. Install in accordance with the 

manufacturer’s instructions.

8.   Do not install near any heat sources such as radiators, heat registers, 

stoves, or other apparatus (including amplifiers) that produce heat.

9.   Do not defeat the safety purpose of the polarized or grounding-type 

plug. A polarized plug has two blades with one wider than the other. 
A grounding-type plug has two blades and a third grounding prong. 
The wide blade or the third prong is provided for your safety. If the 
provided plug does not fit into your outlet, consult an electrician for 
replacement of the obsolete outlet.

10.  Protect  the  power  cord  from  being  walked  on  or  pinched, 

particularly at plugs, convenience receptacles, and the point where 
they exit from the apparatus. 

11.  Only use attachments/accessories specified by the manufacturer.
12.  Use only with a cart, stand, tripod, bracket, or table specified by 

the manufacturer, or sold with the apparatus. When a cart is used, 
use caution when moving the cart/apparatus combination to avoid 
injury from tip-over. 

13.  Unplug this apparatus during lightning storms or when unused for 

long periods of time.

14.  Refer  all  servicing  to  qualified  service  personnel.  Servicing  is 

required when the apparatus has been damaged in any way, such 
as power-supply cord or plug is damaged, liquid has been spilled 
or objects have fallen into the apparatus, the apparatus has been 
exposed to rain or moisture, does not operate normally, or has been 
dropped.

FCC compliance

Explanation of graphic symbols

Introduction

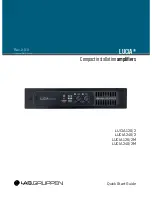
The information contained in this Quick Start Guide is sufficient for proper installation of LUCIA amplifiers, and for configuration of settings in 

many basic applications. Please refer to the full Operation Manual for detailed information on maintenance, cooling requirements, warranty, and 

configuration for complex installations.

This QSG also provides an overview of the DSP features offered in the LUCIA 120/2M and 240/2M, and a brief explanation of use with the 

default DSP preset, which is appropriate for many typical applications. It also includes instructions on downloading the Windows

®

-based PC 

editor software which is required for custom configuration of DSP features. Advanced users familiar with software-based DSP configuration will 

find the PC editor highly intuitive, and may not require further information. All other users should consult the detailed information available in the 

full Operation Manual.

The full Operation Manual is available for download in PDF format from www.labgruppen.com/support.

The lightning bolt triangle is used to 
alert the user to the presence of 
un-insulated “dangerous voltages” 
within the unit’s chassis that may be 
of sufficient magnitude to constitute a 
risk of electric shock to humans.

The exclamation point triangle is used to 
alert the user to presence of important 
operating and service instructions in the 
literature accompanying the product.

This equipment has been tested and found to comply with the 
limits for a Class B Digital device, pursuant to part 15 of the 
FCC rules.

These limits are designed to provide reasonable protection 
against harmful interference in residential installations. This 
equipment generates, uses and can radiate radio frequency 
energy and, if not installed and used in accordance with 
the instructions, may cause harmful interference to radio 
communications. However, there is no guarantee that 
Interference will not occur in a particular installation. If this 
equipment does cause harmful interference to radio or 
television reception, which can be determined by turning the 
equipment off and on, the user is encouraged to try to correct 
the interference by one or more of the following measures:
•  Reorient or relocate the receiving antenna.
•  Increase the separation between the equipment  
 

and receiver.

•  Connect the equipment into an outlet on a circuit different  
 

from that to which the receiver is connected.

•  Consult the dealer or an experienced radio/TV technician 
 

for help.

For customers in Canada

This Class B digital apparatus complies with Canadian
ICES-003.
Cet appareil numérique de la classe B est conforme à la 
norme NMB003 du Canada.

Summary of Contents for LUCIA 120/2

Page 1: ...LUCIA Compactinstallationamplifiers Rev 2 0 0 Item no QSG LUCIA Quick Start Guide LUCIA 120 2 LUCIA 240 2 LUCIA 120 2M LUCIA 240 2M...

Page 2: ...2...

Page 3: ...3 Contents 4 English Quick start guide 8 12 16 Fran ais Guide de prise en main 20 Deutsch Das Wichtigste in K rze 24 Espa ol Gu a de Inicio R pido...

Page 4: ...rovides an overview of the DSP features offered in the LUCIA 120 2M and 240 2M and a brief explanation of use with the default DSP preset which is appropriate for many typical applications It also inc...

Page 5: ...packing materials for the carrier s inspection and for any future shipping Installation Wall mounting For fixing brackets marked B on the drilling guide to the wall please use appropriate means of mou...

Page 6: ...anced inputs e g local video screen output CD player to the RCA phono inputs Note Balanced and unbalanced inputs are in parallel only one pair of inputs should be connected at one time 3 Speaker outpu...

Page 7: ...ns to be enabled by applying changes to the amplifier firmware See the full Operation Manual for more information Individual volume control R R Common volume control R DSP MatrixConfiguration LUCIA120...

Page 8: ...8 1 FCC LUCIA LUCIA 120 2M 240 2M DSP DSP DSP Windows DSP DSP PDF www labgruppen com support FCC 15 B B ICES 003...

Page 9: ...SA C22 2 no 42 CEE 7 page VII SR section 107 2 D1 IEC 83 page C4 BS 1363 of 1984 13A Lab gruppen B 3 4 3 5 25 4 5 3 Molly E22412 UL CA60065 B 3 3 A 4 20 10 20 Lab Gruppen LUCIA Lab Gruppen LUCIA LUCIA...

Page 10: ...IO USB DSP DSP USB IEC LUCIA 120 2M 240 2M 3 4 3 Euroblock 3 Euroblock 1 8 3 5 7 4 9 6 2 1 2 3 4 1 8 3 5 7 4 9 6 2 LED 3 LED LED 3 LED 3 VPL DSP 1 2 0 dB 1 2 3 4 LUCIA 1 2 3 Euroblock 1 2 CD RCA 2 4 8...

Page 11: ...GPI GPO 0 3 3 GPIO 1 4 VCC 3 3 5 6 GPIO GPIO R R R DSP LUCIA 120 2M 240 2M LUCIA 120 2M 240 2M 4 x 4 DSP DSP DSP 1 1 GPI 1 2 2 GPI 2 3 1 6 dB 2 6 dB GPI 1 4 1 6 dB 2 6 dB GPI www labgruppen com suppo...

Page 12: ...240 2M DSP DSP DSP Windows PC DSP PC PC www labgruppen com support PDF FCC Part 15 Class B TV For customers in Canada This Class B digital apparatus complies with Canadian ICES 003 Cet appareil num r...

Page 13: ...SR section 107 2 D1 IEC 83 page C4 240 V UK BS 1363 of 1984 Specification for 13 A fused plugs and switched and unswitched socket outlets Lab gruppen B 3 kg B 3 mm Torx 3 A 4 mm x 20 mm 10 mm 20 mm La...

Page 14: ...ak Limiter DSP 3 1 2 0 dB 4 1 2 3 4 1 IN 1 2 1 2 3 2 IN 1 2 1 2 RCA CD NOTE 3 SPEAKER L R L R 2 4 8 16 41 Arms 4 mm2 12 AWG NOTE 4 GPIO REMOTE GPIO 6 5 USB DSP PC DSP Mini B 6 UTIL USB 7 IEC LUCIA 120...

Page 15: ...VCC 3 3 V 5 6 GPIO GPIO Individual volume control R R Common volume control R DSP LUCIA 120 2M 240 2M LUCIA 120 2M 240 2M 4x4 DSP DSP DSP 1 IN 1 GPI 1 2 IN 2 GPI 2 OUT 3 IN 1 6 dB IN 2 6 dB GPI 1 OUT...

Page 16: ...par le fabricant 12 Utilisez le uniquement avec un chariot socle tr pied support ou table sp cifi par le fabricant ou vendu avec l appareil Si un chariot est utilis faites attention ne pas tre bless p...

Page 17: ...la m thode de fixation est adapt e au mat riau du mur Assurez vous galement que les supports seront fix s au moyen d une visserie appropri e afin de respecter les conditions de charge indiqu es cidess...

Page 18: ...phono Remarque les entr es sym triques et asym triques sont en parall le une seule paire d entr es doit donc tre connect e la fois 3 Sorties pour enceintes Branchez des enceintes ayant une imp dance...

Page 19: ...onnels Les mod les de matrice permettent d activer d autres fonctions GPIO en appliquant des modifications au firmware de l amplificateur Voir le mode d emploi complet pour plus d informations Command...

Page 20: ...nur die vom Hersteller als geeignet angegebenen oder zusammen mit dem Ger t verkauften Gestelle Podeste Halteklammern oder Unterbauten f r dieses Ger t Wenn Sie einen Rollwagen verwenden achten Sie da...

Page 21: ...Montage an anderen Oberfl chen stellen Sie bitte sicher dass Sie ein f r den jeweiligen Baustoff geeignetes Montageverfah ren nutzen Achten Sie au erdem darauf dass die Winkel in geeig neter Weise so...

Page 22: ...ein Eingangspaar eine Signalquelle angeschlossen sein 3 Lautsprecherausg nge Schlie en Sie hier Lautsprecher mit einer Nennimpedanz von 2 4 8 oder 16 Ohm an Die maximale Strombelastung f r den Anschl...

Page 23: ...len k nnen durch nderungen der Verst rker Firmware auch andere GPIO Funktionen aktiviert werden Weitere Informationen finden Sie in der ausf hrlichen Bedienungsanleitung Operation Manual DSP MatrixCon...

Page 24: ...un soporte bastidor tr pode base o mesa especificado por el fabricante o que sea comercializado con el propio aparato Cuando utilice un bastidor con ruedas tenga cuidado al mover la combinaci n basti...

Page 25: ...acuerdo al UL CA60065 Para montaje en otras superficies aseg rese de que el m todo de montaje sea el adecuado para el material de la pared Aseg rese tambi n de fijar las abrazaderas de la forma correc...

Page 26: ...eo reproductor de CD a estas tomas RCA Nota Las entradas balanceadas y no balanceadas van en paralelo solo puede conectar un tipo a la vez 3 Salidas de altavoz Conecte unos altavoces con una impedanci...

Page 27: ...cionales Los modelos de matriz le permiten activar otras funciones GPIO aplicando cambios en el firmware del amplificador Para m s informaci n vea el Manual de instrucciones completo Control de volume...

Page 28: ...28 Notes...

Page 29: ...29 Notes...

Page 30: ...IATM and Auto Load SenseTM are trademarks of Lab gruppen AB All other trademarks remain the property of their respective owners Copyright 2014 Lab gruppen AB All rights reserved labgruppen com E605390...

Reviews: