


Chapter 3 Using the Operator Panel
3-21
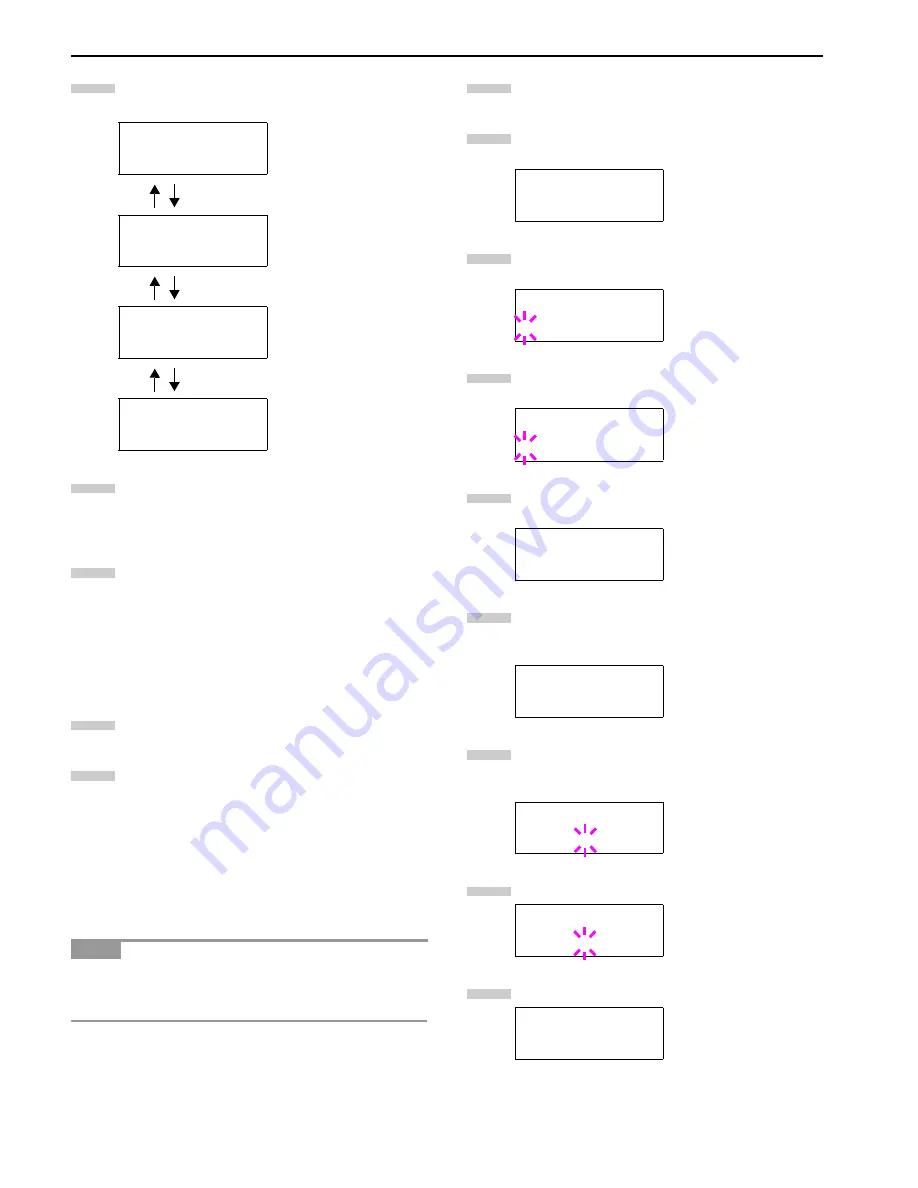
Press the
2
key. Each time the
3
or
4
key is pressed,
the item changes as shown below.
Display the item to be set and press the
ENTER
key.
For DHCP, a question mark (
?
) appears. For IP Ad-
dress, Subnet Mask, and Gateway, the cursor (
_
)
blinks.
For DHCP, select
On
or
Off
using the
3
or
4
key. For
IP Address, Subnet Mask, and Gateway addresses,
press the
3
or
4
key to change the number (000 to
255) where the cursor is blinking. You can use the
1
and
2
key to move the cursor right and left.
To obtain these addresses, consult your network
administrator.
Press the
ENTER
key.
Press the
MENU
key. The message display returns to
Ready
.
Printing a Network Interface Status Page
You can print out a status page for the network interface. The
network interface status page shows the firmware version, the
network addresses, and other information under various network
protocols about the network interface. The default setting is Off
(print). The network interface status page will be outputted after
the printer status page.
Printing out a network interface status page may not be possi-
ble with some optional network interface cards. For details, see
the manual for the network interface.
Press the
MENU
key.
Press the
3
or
4
key repeatedly until
Interface >
appears.
Press the
ENTER
key. A blinking question mark (
?
) ap-
pears.
Press the
3
or
4
key repeatedly until
Network
ap-
pears.
Press the
ENTER
key again. The question mark (
?
)
disappears
Press the
2
key and then press the
3
or
4
key repeat-
edly until the message display indicates
>Network
Status Page
.
The default setting is
Off
. If it is set to
On
, change it as
follows. Press the
ENTER
key. A blinking question
mark (
?
) appears.
Select
On
using the
3
or
4
key.
Press the
ENTER
key again.
>>DHCP
Off
>>IP Address
000.000.000.000
>>Subnet Mask
000.000.000.000
>>Gateway
000.000.000.000
NOTE
8
9
10
11
12
Interface >
Parallel
Interface
?Parallel
Interface
?Network
Interface >
Network
>Network Status
Page Off
>Network Status
Page ? Off
>Network Status
Page ? On
>Network Status
Page On
1
2
3
4
5
6
7
8
9
Summary of Contents for FS-9100DN
Page 12: ...1 1 Chapter 1 Name of Parts A B C D E F 2 3 4 1 0 9 8 7 6 5 H I J K M L G...
Page 90: ...Appendix A Fonts A 2 PCL Scalable and Bitmap Fonts 1...
Page 91: ...Appendix A Fonts A 3 PCL Scalable and Bitmap Fonts 2...
Page 92: ...Appendix A Fonts A 4 KPDL Fonts 1...
Page 93: ...Appendix A Fonts A 5 KPDL Fonts 2...
Page 94: ...Appendix A Fonts A 6 KPDL Fonts 3...
Page 95: ...Appendix A Fonts A 7 KPDL Fonts 4...
Page 96: ...Appendix A Fonts A 8 KPDL Fonts 5...
Page 115: ...Printer Driver Guide Printer Driver Guide Printer Driver Guide Printer Driver Guide for for...


