3-1
Chapter 3
Disassembly/Assembly
Introduction
This chapter contains all the procedures for the disassembly and reassembly of the PC3x. There
are three main sections:
Opening the PC3x
,
Top Enclosure
, and the
PC3x Keyboard Assembly
.
Warning
: If possible, save all user programs and setups before disassembly. For instructions,
refer to
Boot Loader
in Chapter 4, page 4-2
.
Notes, Cautions, Warnings
Please pay special attention to all Notes, Cautions, and Warnings as they not only point out
speci
fi
c instructions, but also alert you to variations between manufactured units.
Cables, Connectors
Cables
All cables with connectors are keyed, and therefore cannot be reversed.
Warning
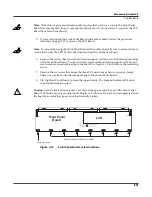
: Some units may have a small PC board installed on the
fl
at ribbon cable connected to
J202 on the Front Panel Board. Neither the socket nor the pins on this board are keyed. See
page 3-14 and page 3-16 for further information.
Cable Routing
In some cases, tape fastens cables to printed circuit boards or the top and bottom enclosures.
When disconnecting cables, always peel back the tape from one side so that the tape remains
properly positioned.
Required Tools and Materials
•
No. 1 Phillips head screwdriver
•
No. 2 Phillips head screwdriver
•
Small
fl
at screwdriver
•
Dowel (3mm diameter)
•
Needle-nose pliers
•
Small blunt-end tool (Q-Tip, toothpick, etc.)
•
USB cable
•
xD Card
•
Foam blocks


