55
OPERATING THE TRACTOR
B
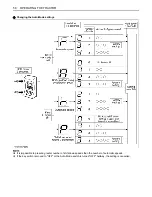
Changing the Field Speed
Using the up-shift/down-shift button on the armrest or on
the power shift / range shift lever, the field speed can be
readily changed. To put the speed in memory, however,
preferably take the following procedure.
C
To change the speed while the tractor is stopped
Place the power shift / range shift lever to "N", press the
up-shift/down-shift button, and change the field speed.
The speed that appears in the selected-speed display will
be the new upper speed level.
C
To increase the speed while running the tractor
Check the speed that appears in the selected-speed
display.
(When the speed display stays on - Not flashing)
1. Press the up-shift button (+) to raise the speed.
2. The speed that appears in the selected-speed display
is the new upper speed level.
(When the speed display is flashing)
1. Press the up-shift button (+) to raise the speed.
2. Travel mode
(trailing and other hauling operations)
Press the top (Travel mode) of the Auto-Mode switch
to the 2nd stage.
3. Field mode
(plowing, subsoiling and other tilling operations, or for
harvesters and other PTO-driven implements)
Press the bottom (Field mode) of the Auto-Mode
switch to the 2nd stage.
4. The speed that appears in the selected-speed display
is now the new upper speed level.
C
To decrease the speed while running the tractor
1. Press the down-shift button (-) to lower the speed.
2. Travel mode
(trailing and other hauling operations)
Press the top (Travel mode) of the Auto-Mode switch
to the 2nd stage.
3. Field mode
(plowing, subsoiling and other tilling operations)
Press the bottom (Field mode) of the Auto-Mode
switch to the 2nd stage.
4. The flashing number stays on. The speed that
appears in the selected-speed display is now the new
upper speed level.
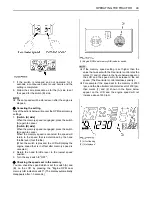
(1) Power shift / Range shift lever
(2) Clutch button
(3) Up-shift button (+)
(4) Down-shift button (-)
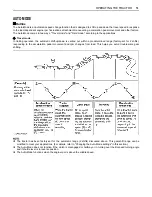
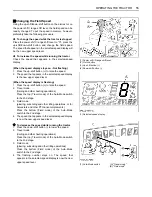
(1) Selected-speed display
(1) Auto-Mode switch
(A) "Travel mode"
(B) "Field mode"
Summary of Contents for M100GX
Page 17: ... 7 SAFE OPERATION 7 DANGER WARNING AND CAUTION LABELS ...
Page 18: ...SAFE OPERATION 8 ...
Page 19: ... 9 SAFE OPERATION ...
Page 20: ...SAFE OPERATION 10 ...
Page 21: ... 11 SAFE OPERATION ...


